
 Use cases
 Messaging
 Taxi Companies
 Private Transport
 Transportation Entrepreneurs
 Last Mile
 SuperApp
 Software
 Taxi dispatch
 Corporate transportation
 Auction
 Products
 Booking Software
 Dispatch Platform
 Driver App
 Passenger App
 Web Widget
 Functions
 Schedule & Booking
 Driver Management
 Custom
 Corporate Portal
 Security & Support
 Resources
 Learn
Learn



Bulk import of ride bookings
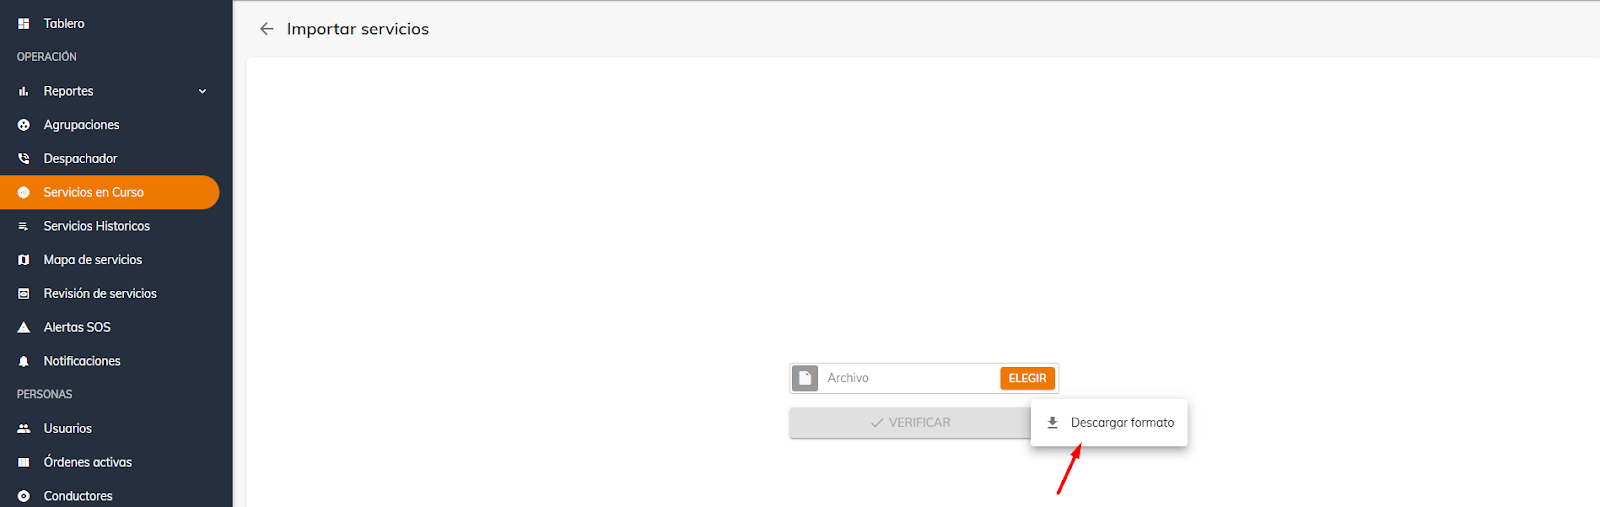
To import services, the first thing to do is go to the "Ongoing Services" section. Then click the "Import" button in the top-right corner. A window similar to the one in the image below will appear. If you don't have a template selected yet, click the arrow next to "Verify" and choose the "Download template" option.
When you open the downloaded file, you'll see a format similar to the Excel document shown in the image below. In this file, you can make any changes you need before importing it into the web panel. These changes are the details of the services you'll import, such as the passenger's email, date, time, pickup and drop-off addresses, among others. Some of the headers (column names) in that Excel document include notes, which you can read by hovering over each one to help you fill in the corresponding data. For example, the "Destination Latitude" column is optional if you enter the destination address. As a best practice, it's important to be specific enough (including the region or district) so that two addresses with the same name can be told apart.

Another example is the "Service" column; the note explains that if you use this column, the stops of a single service will be set. In other words, if you don't enter any value, separate services will be created, but if you assign numbers, they will be treated as stops.

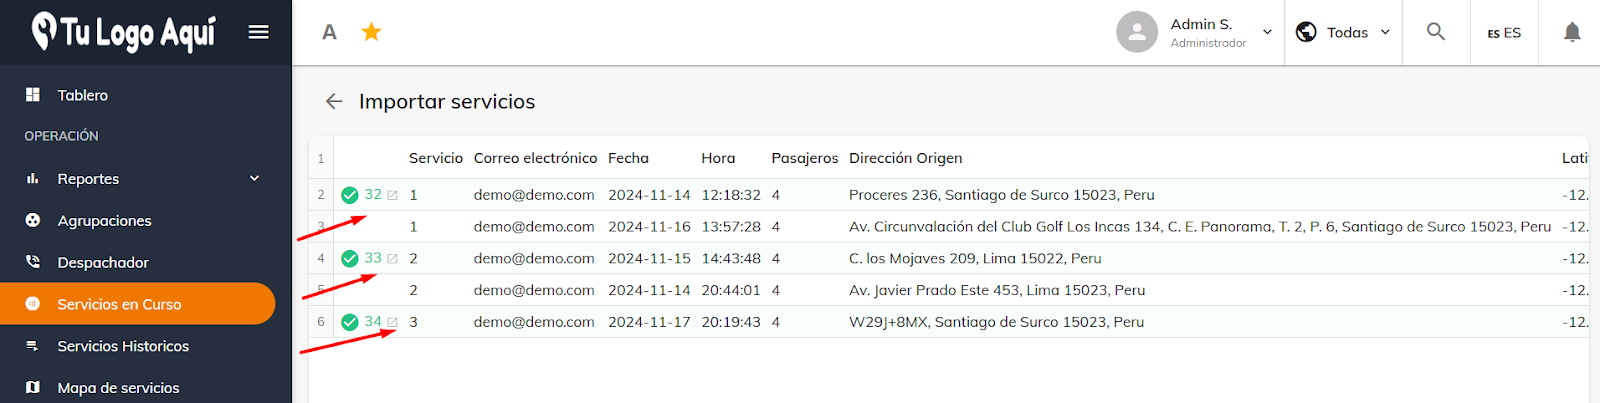
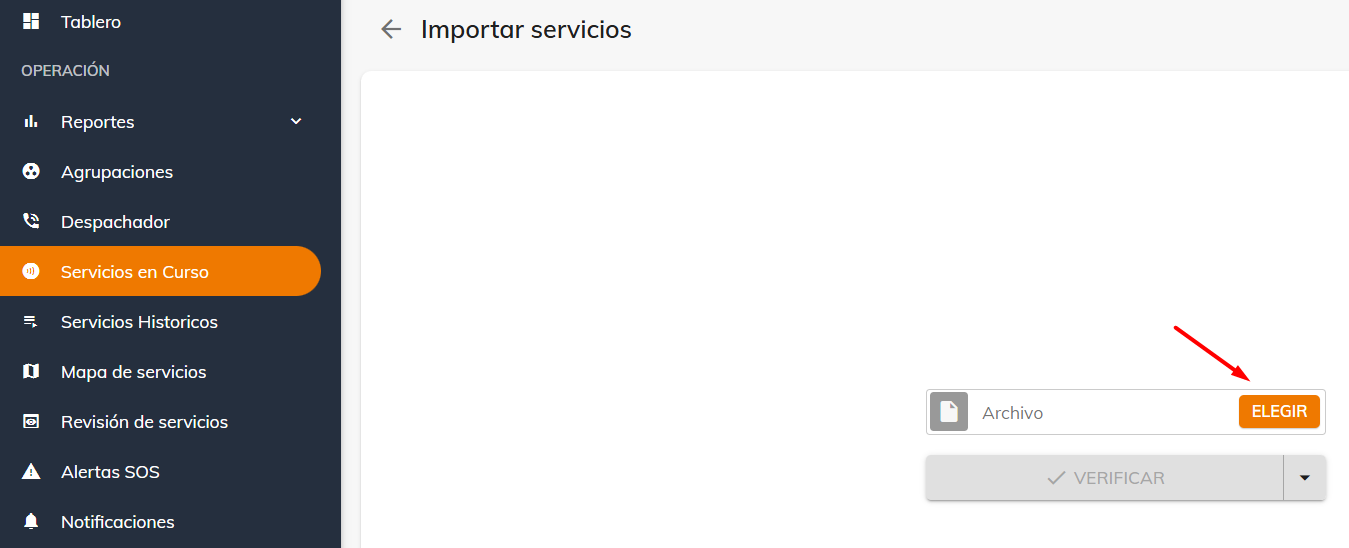
To import the Excel document, go to "Ongoing Services" and click the "Choose" button. Then select the Excel file with the changes you made.
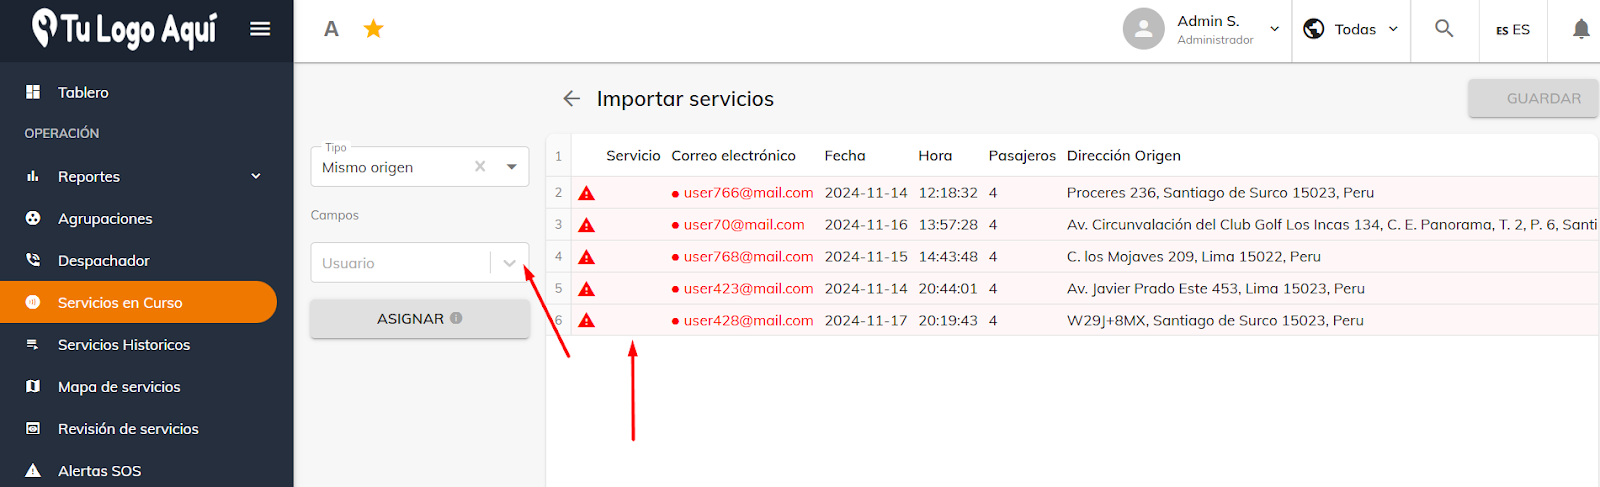
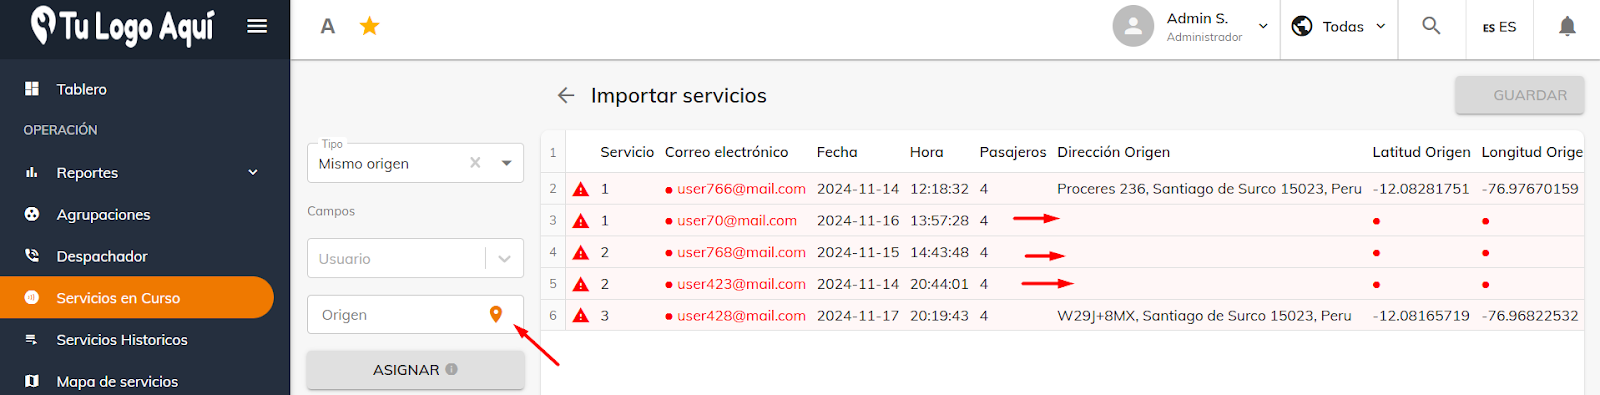
Some errors may appear, which you can also fix right from the web panel. For example, replace the emails with ones that are already registered, since the email isn't valid as shown in the image below. To fix the error, you can select a user and their email; this will then be applied to every service that has the error, letting you complete the import process.
Likewise, if you leave some services without a pickup point, a field will appear so you can select one. The pickup point you select will be automatically applied to all empty cells.

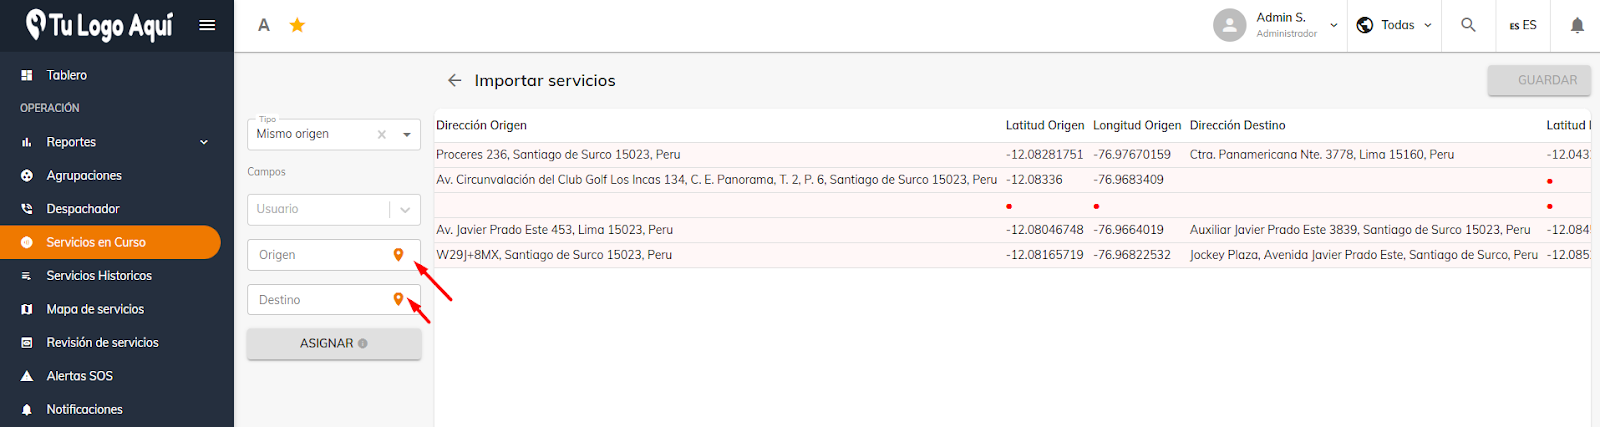
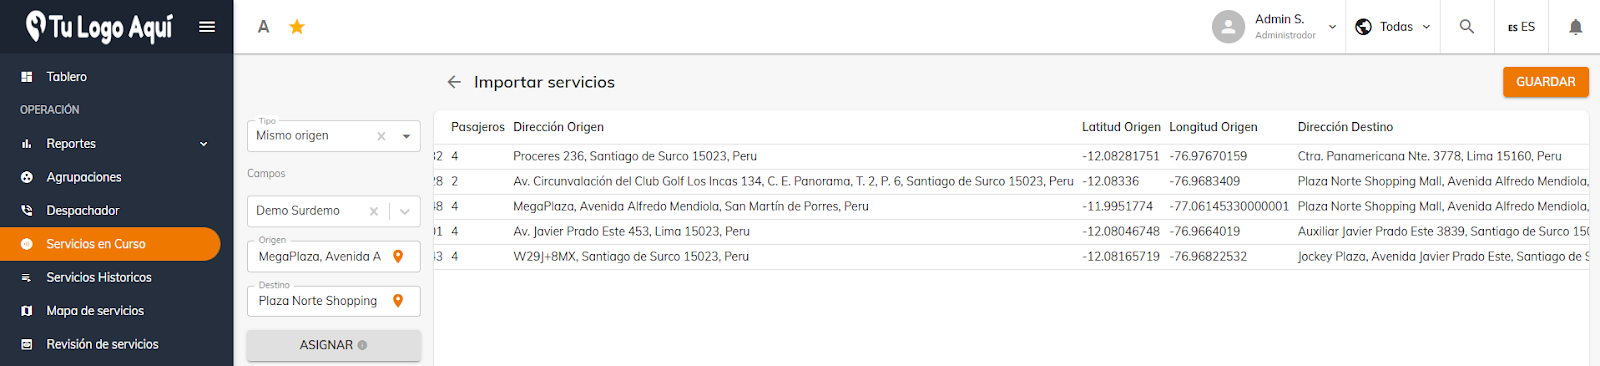
Similarly, if you leave it without a drop-off point, a field will appear so you can select the destination. It will be automatically applied to all empty cells.

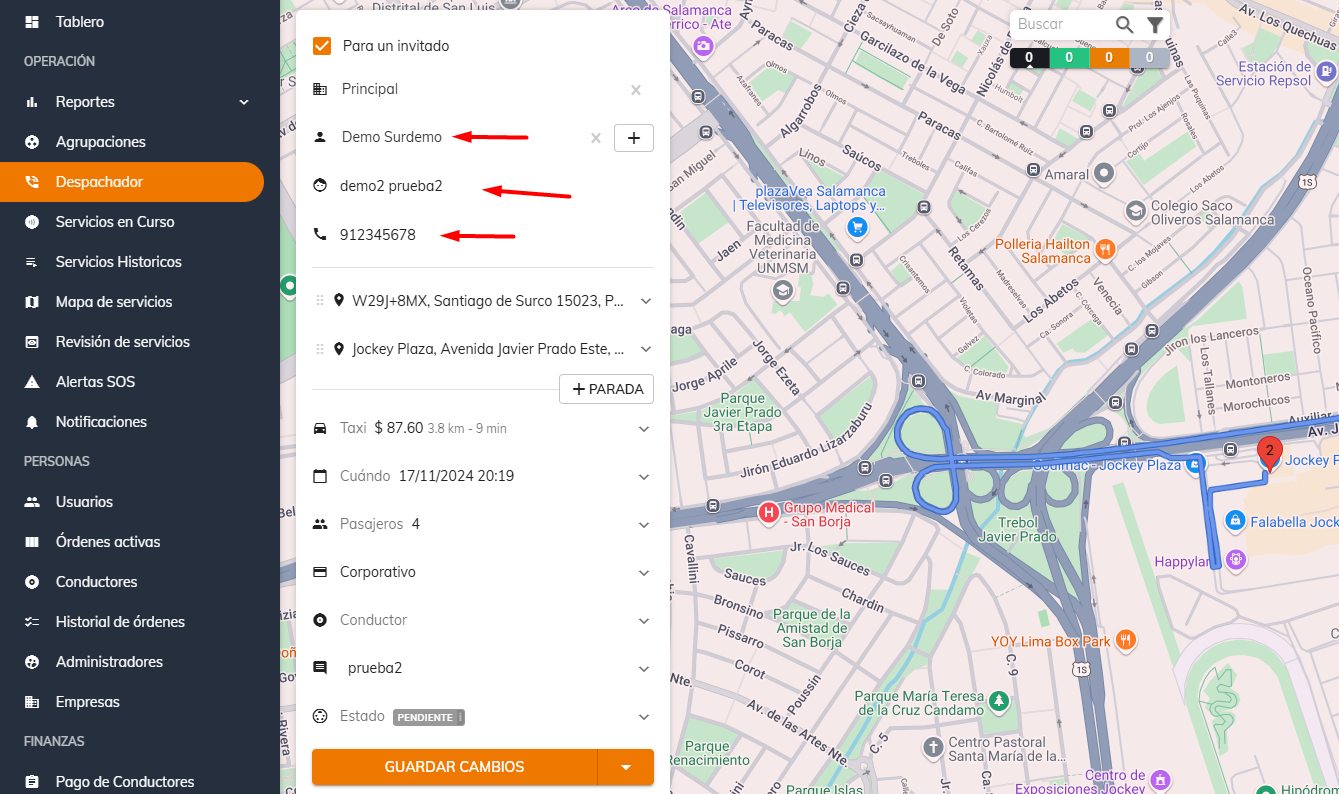
If you want the ride to be for a guest or a third party, you need to fill in the first name, last name, and phone number fields. You can also add a note if you'd like.


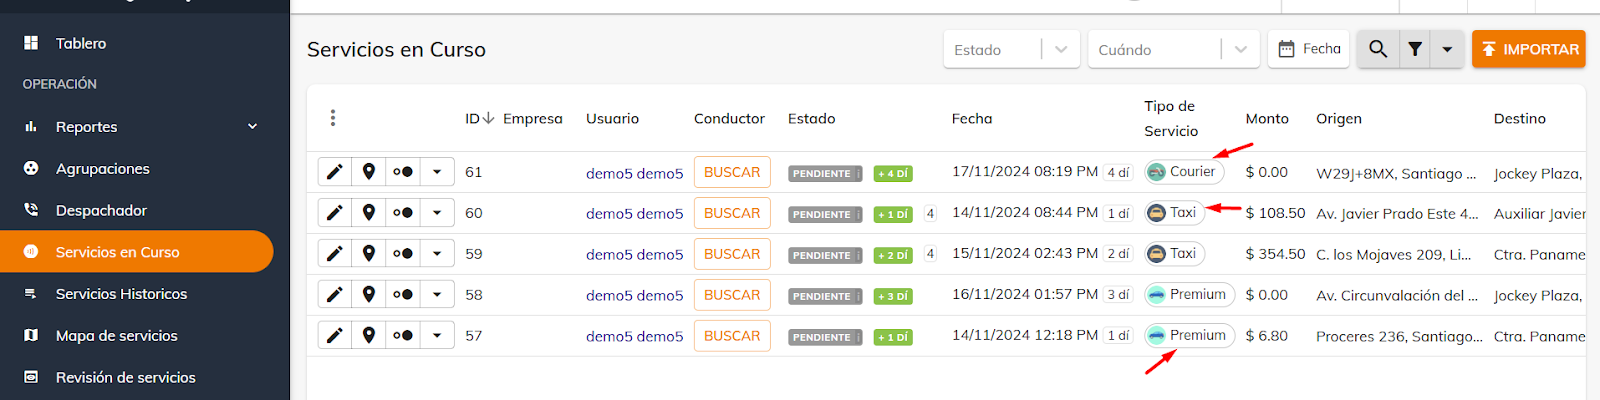
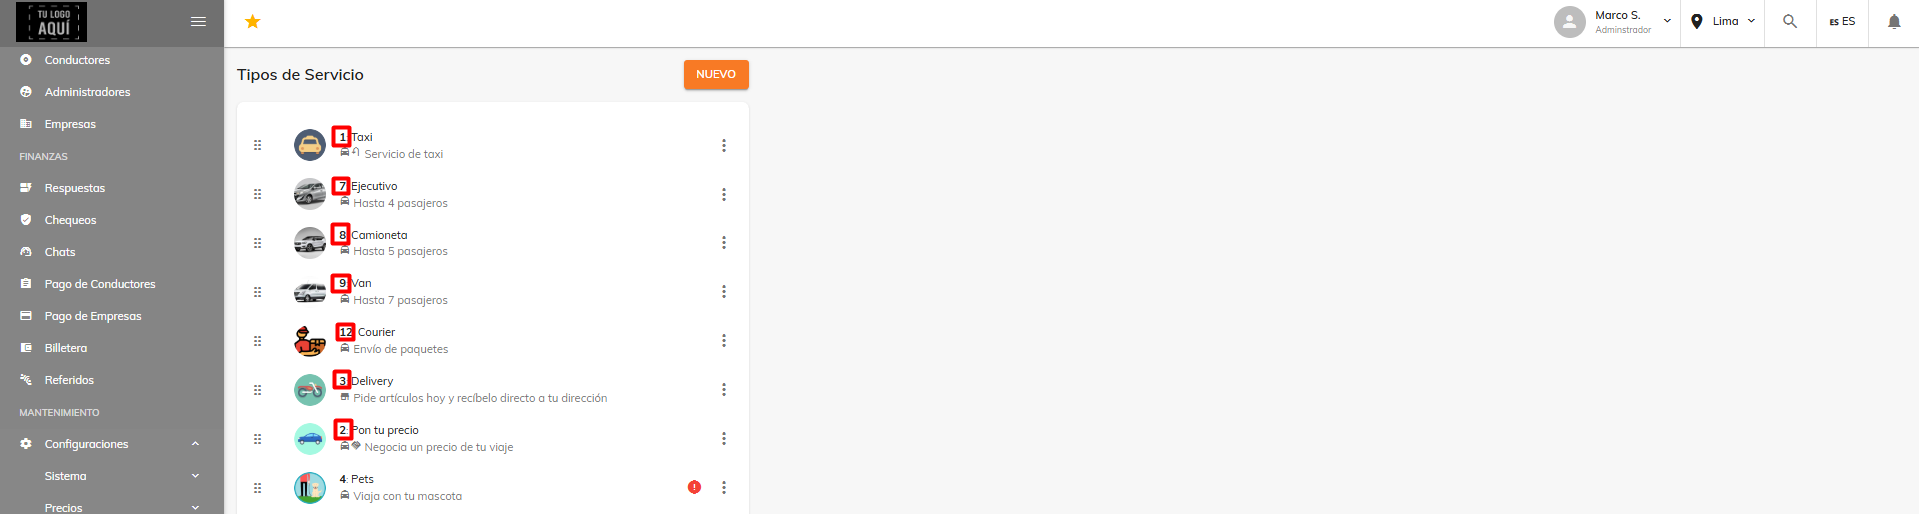
You can also select the service type by ID; in this case, 1 -> Taxi, 2 -> Premium, 3 -> Courier, among others.

You can check the IDs of the service types in that section.
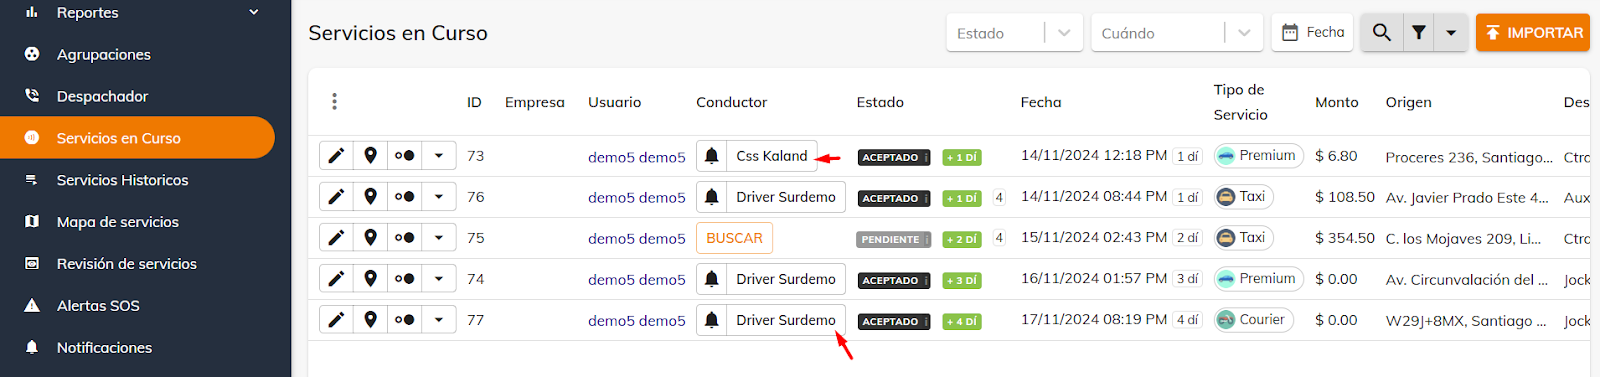
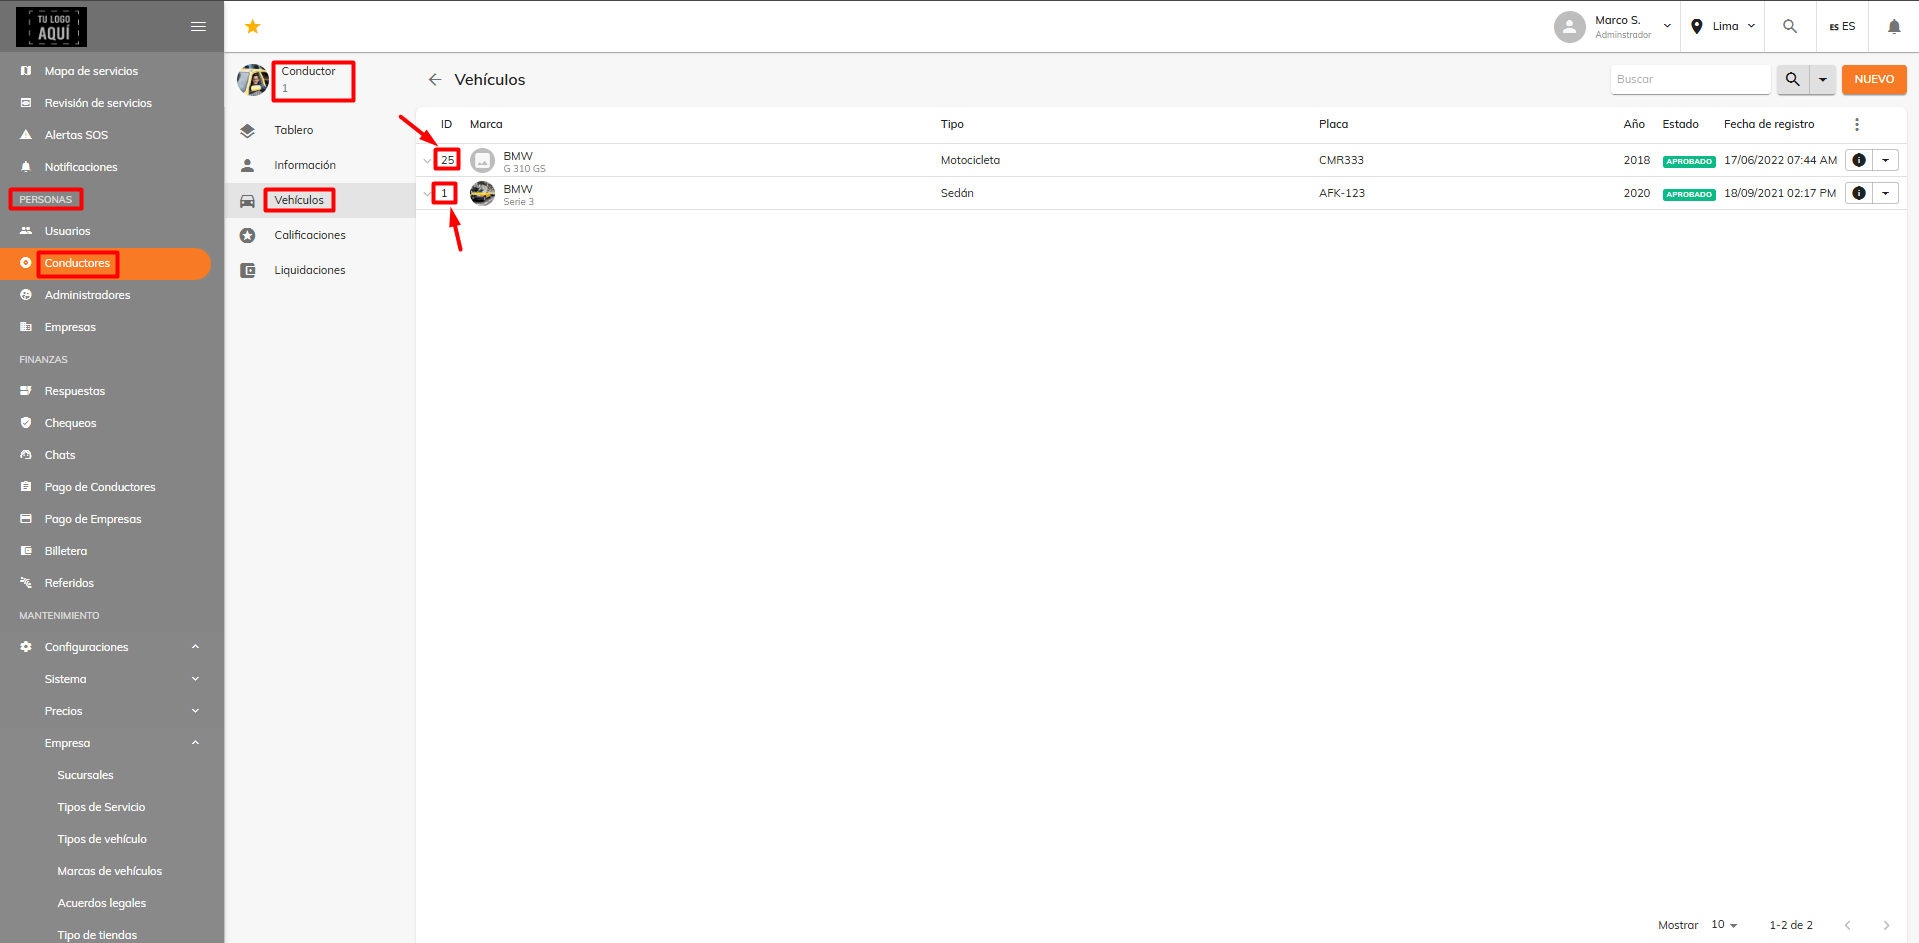
Also, if you want to assign a driver along with the service type, you can do so using the vehicle ID.

You can check the vehicle IDs in that section.
You can also group them. To do so, enter the same number to group the services in the Group (ID) column.
Was this article helpful?
Companies (Corporate Services)
- Creating Companies and Corporate Users
- Signing In as a Company User: Admin / Passenger
- Corporate users: Changing your password
- Setting Up Trip Validation for Company Users
- Bulk user import for companies
- Bulk import of ride bookings
- Forms: Dynamic field for company rides
- Groupings
- Bulk-deactivating users for a company