
 Use cases
 Messaging
 Taxi Companies
 Private Transport
 Transportation Entrepreneurs
 Last Mile
 SuperApp
 Software
 Taxi dispatch
 Corporate transportation
 Auction
 Products
 Booking Software
 Dispatch Platform
 Driver App
 Passenger App
 Web Widget
 Functions
 Schedule & Booking
 Driver Management
 Custom
 Corporate Portal
 Security & Support
 Resources
 Learn
Learn



Creating Companies and Corporate Users
If you work with corporate clients, you can register them in the web panel. Once you've entered the company's details and location, you can create users or import them from Excel to link them to the company and group their trips together. First, go to the Companies module.
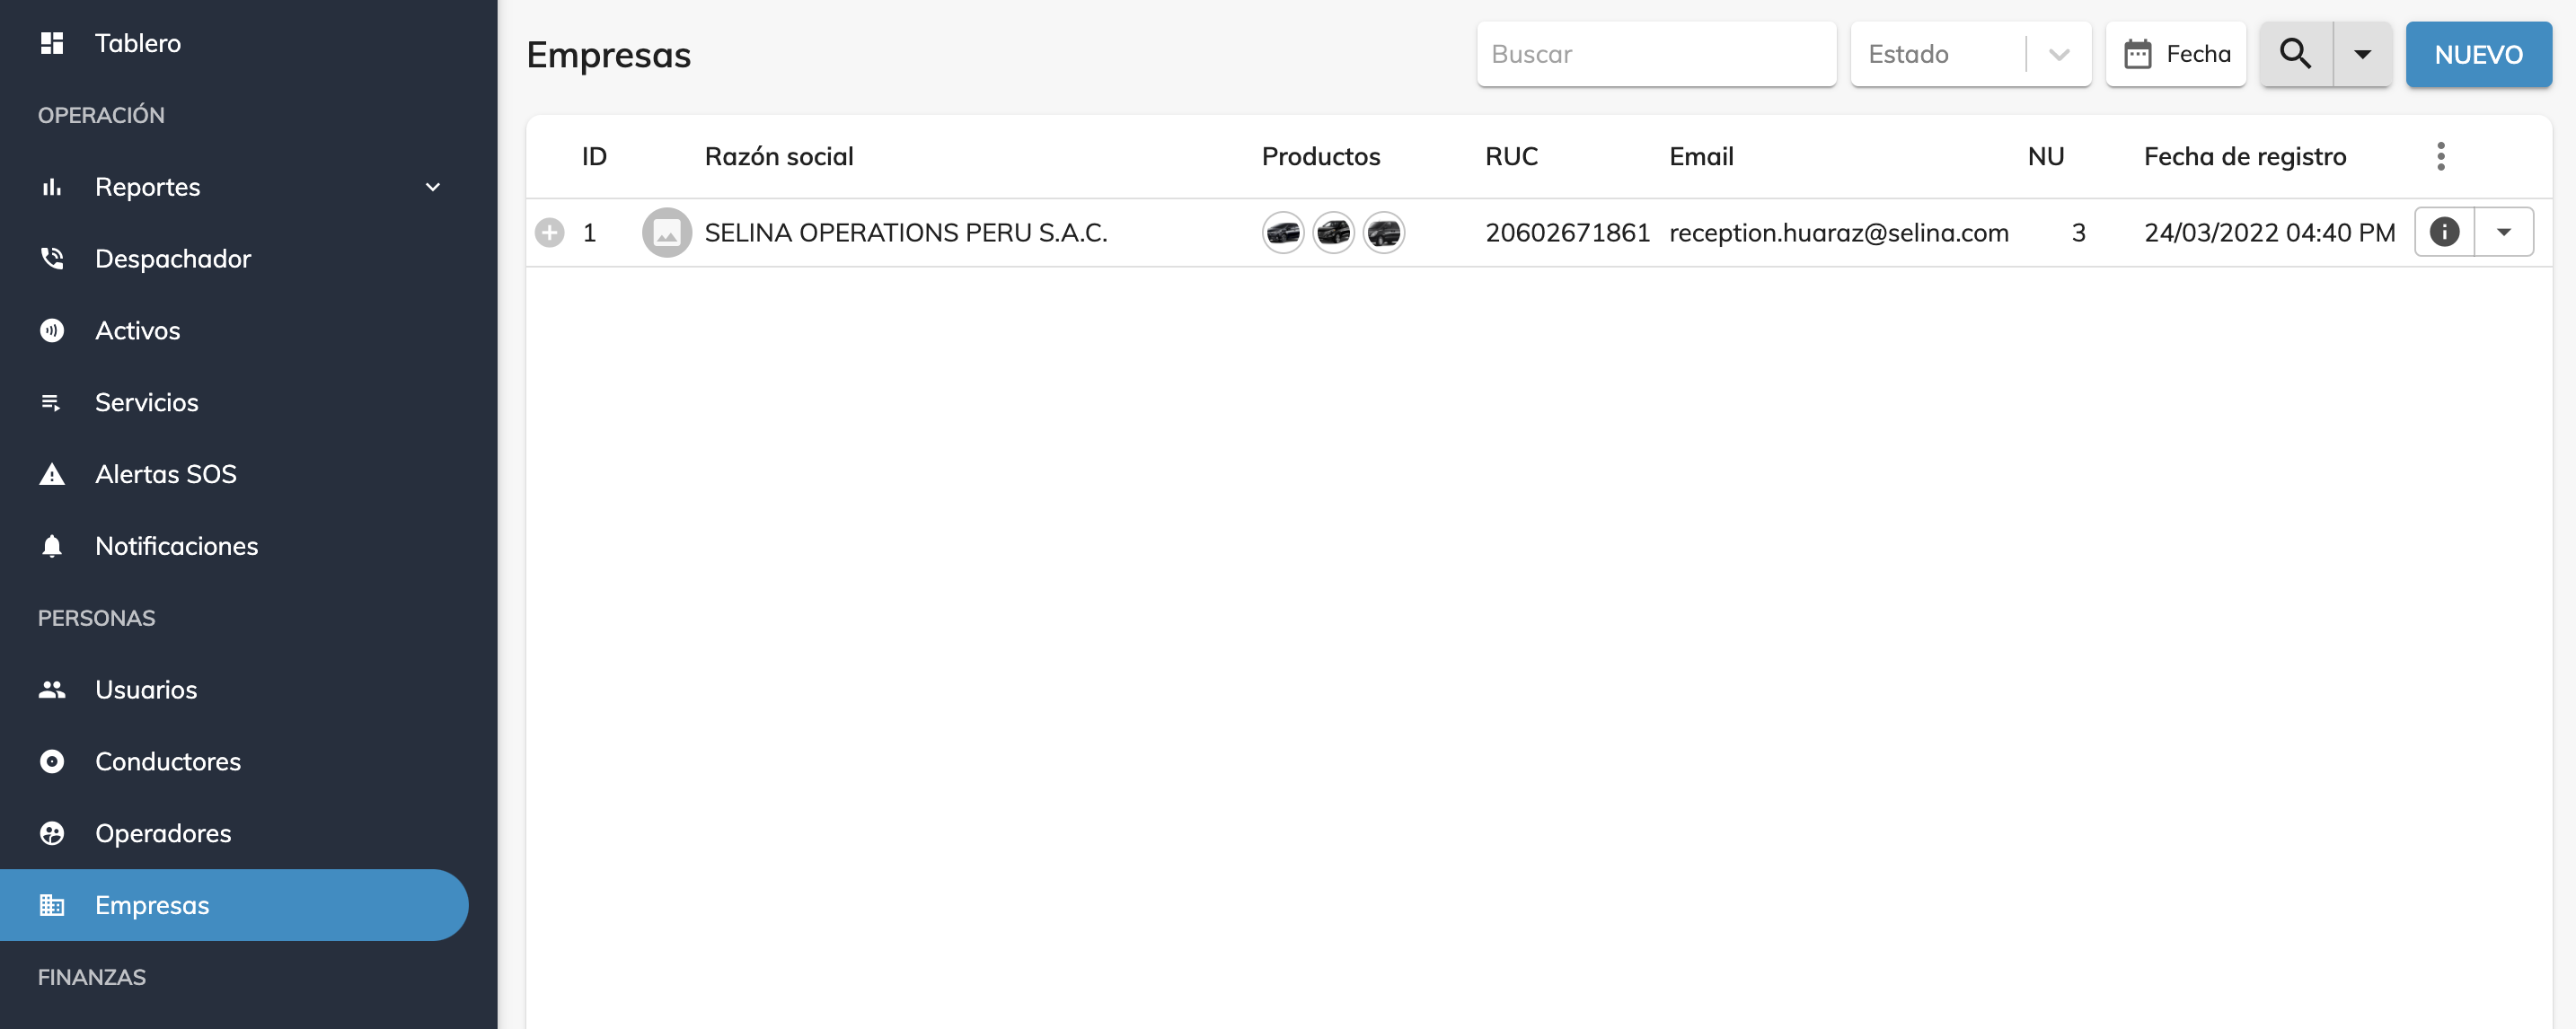
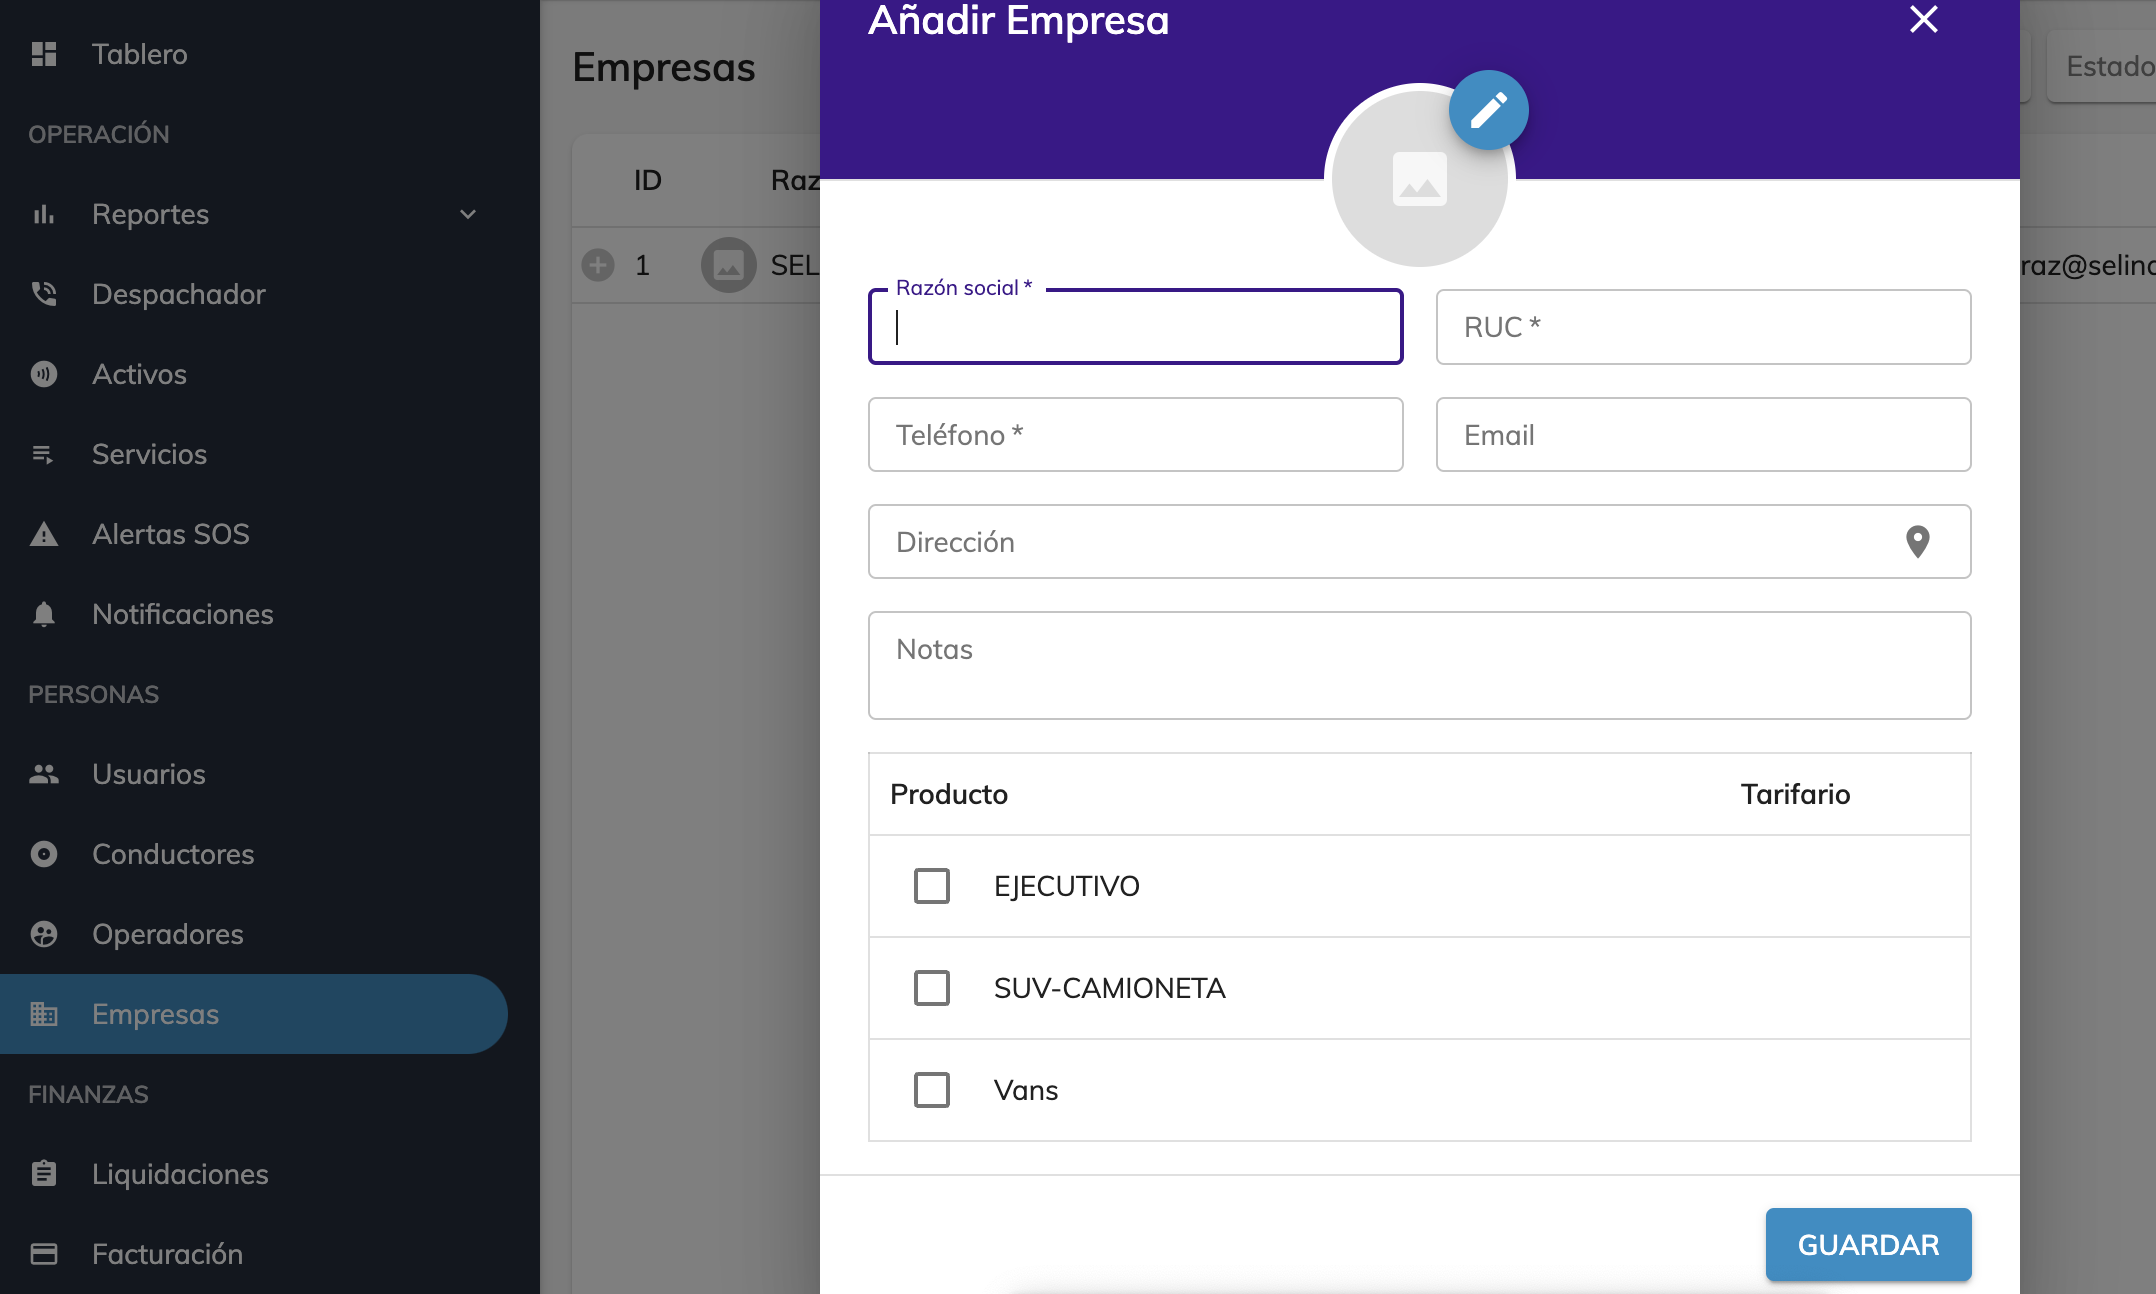
Click "New" and a window will open where you can enter the required details. The * indicates a required field. You can also assign the products or service types, each with its own rate plan.
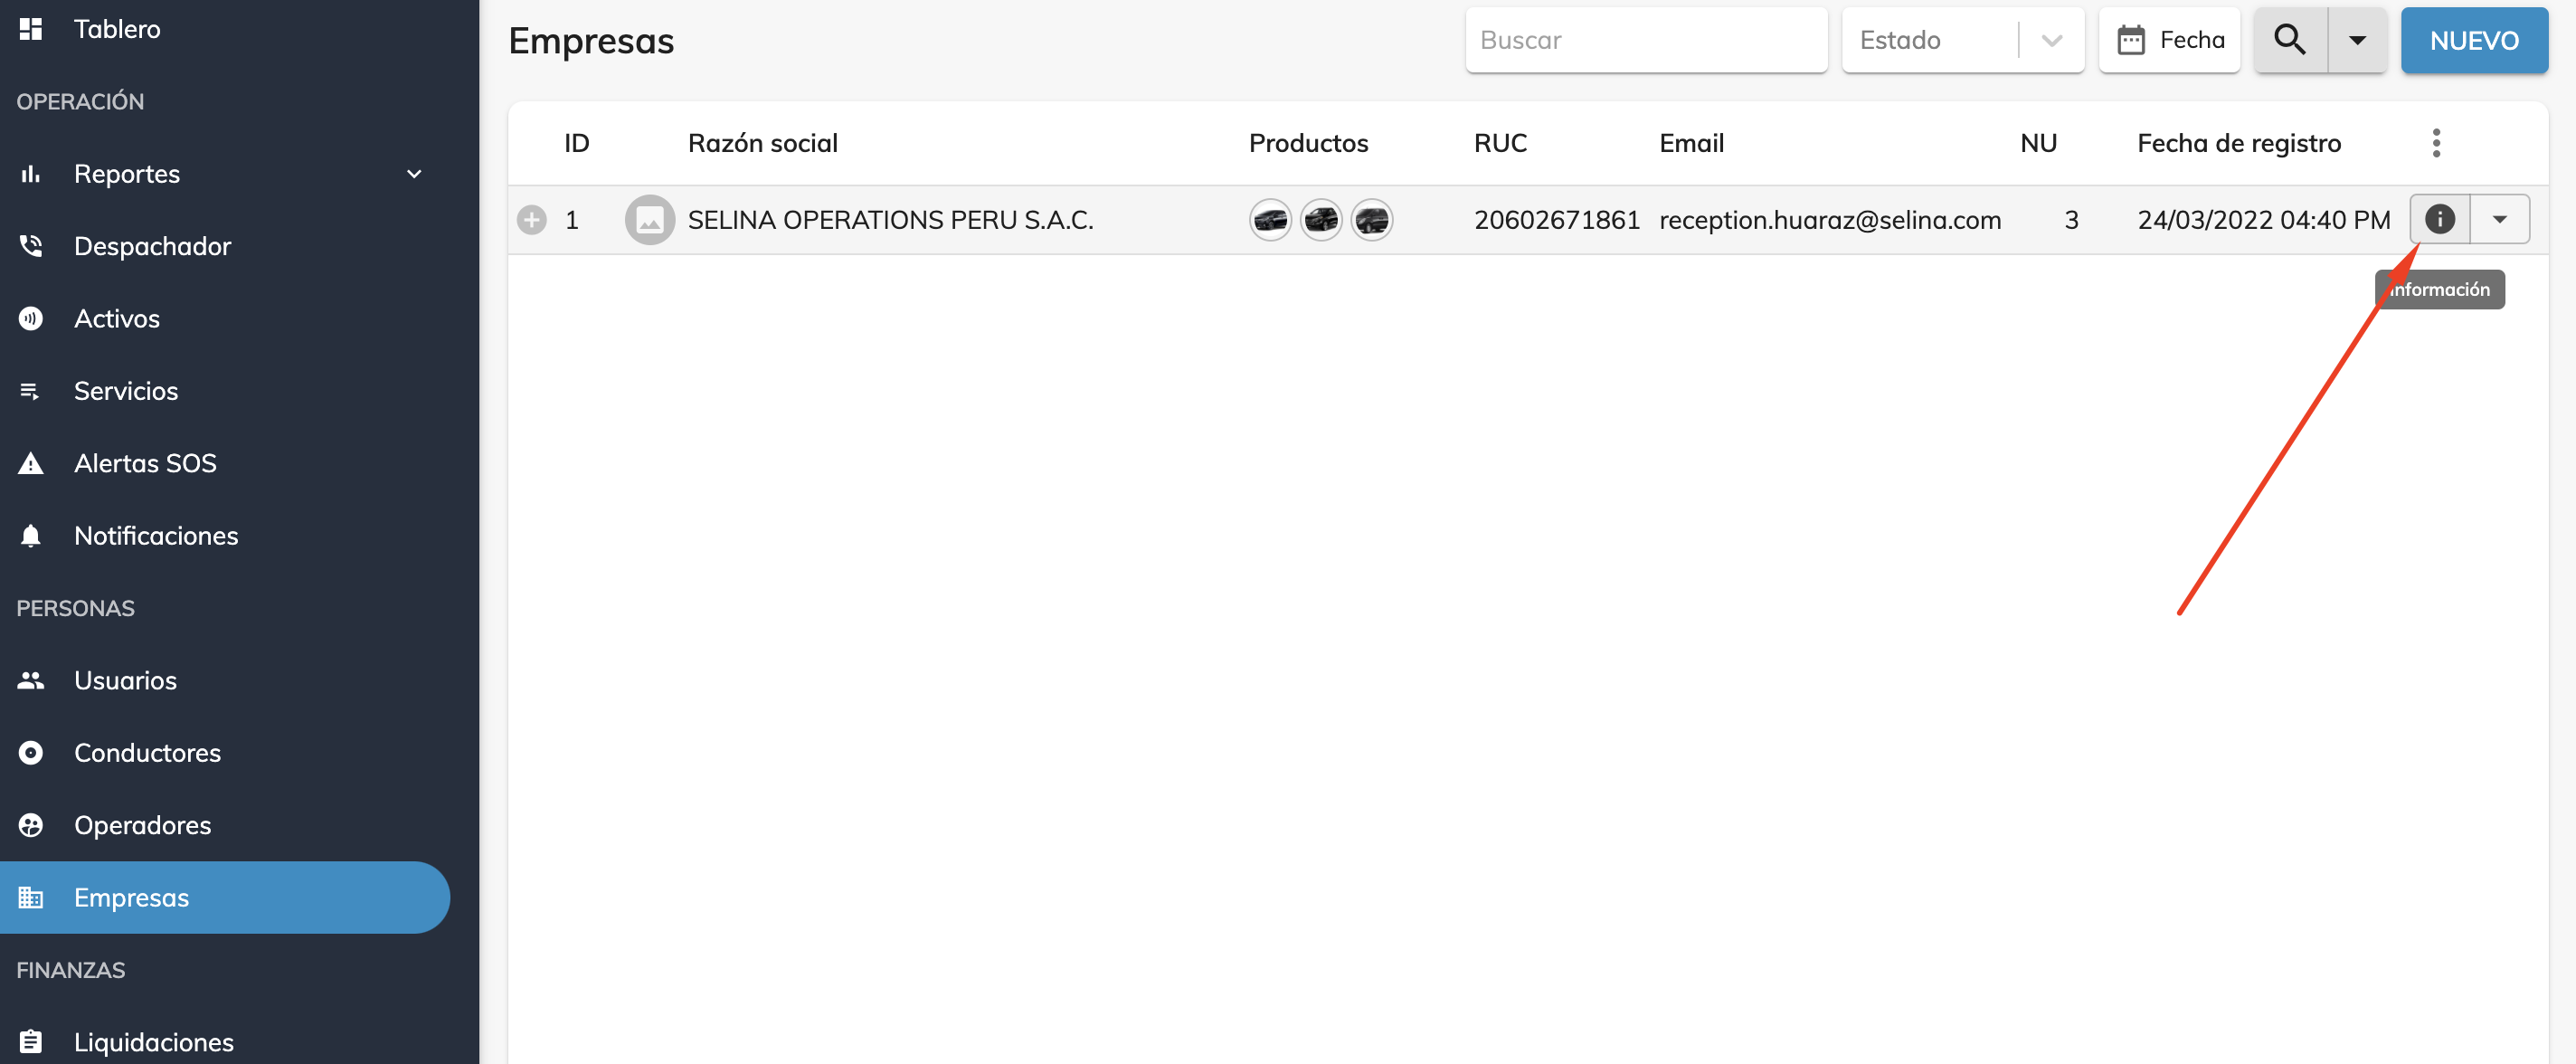
Once the company is created, you can register its users or administrators. In the company record, click the (i) button, which stands for information.
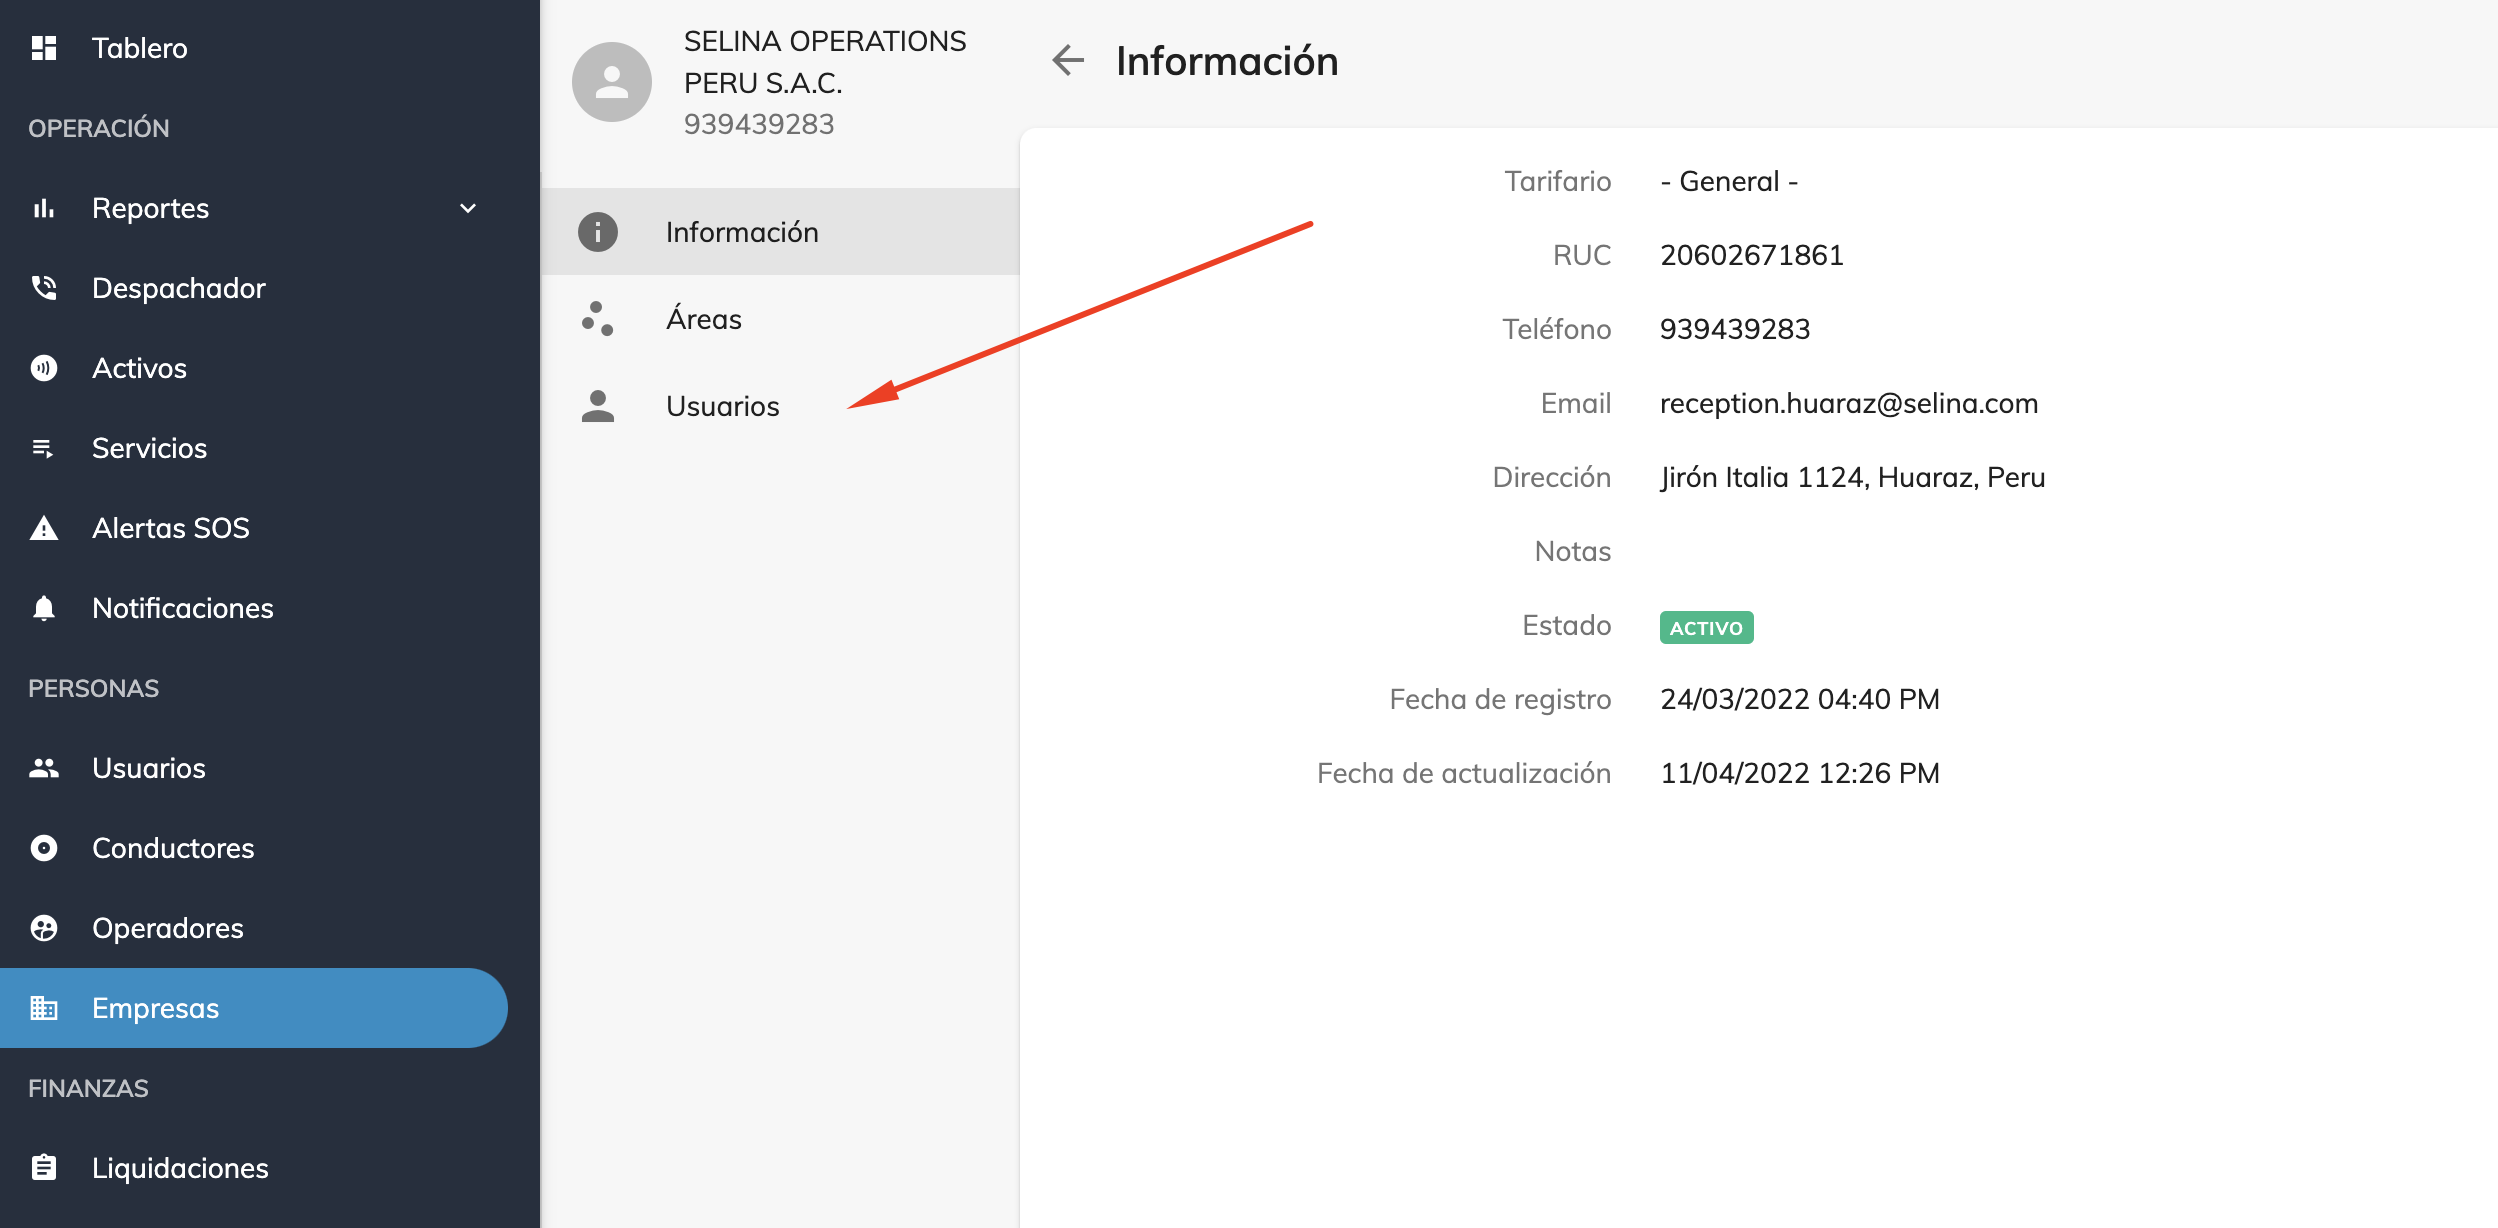
When you open it, you'll see the company's information and other options. To register users, go to the Users section.
Here you'll see all the users that belong to the company you created, and you can add new ones. All these users can request trips and have different profile types.
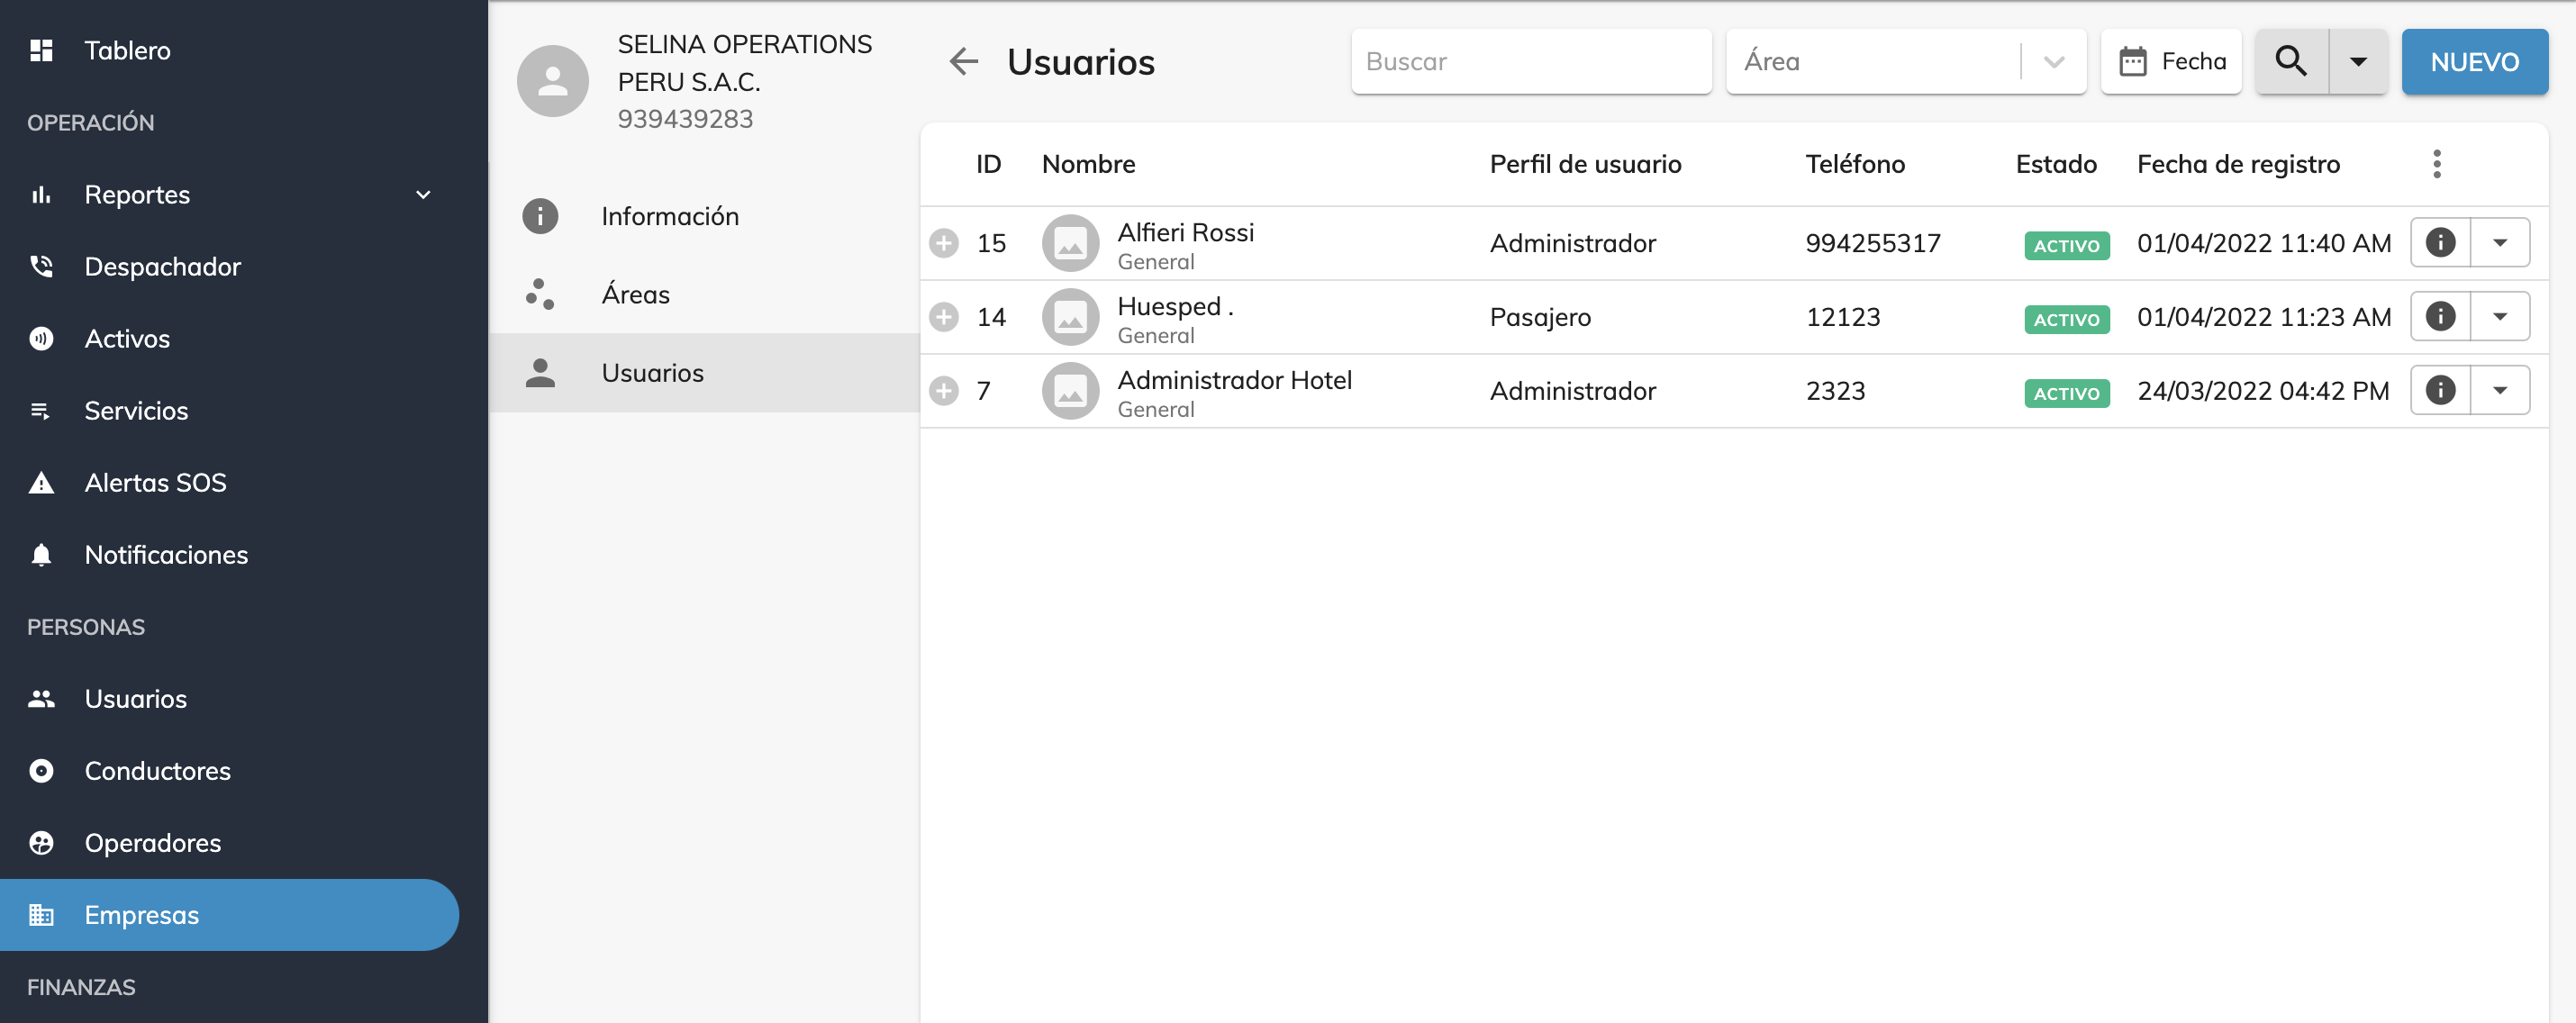
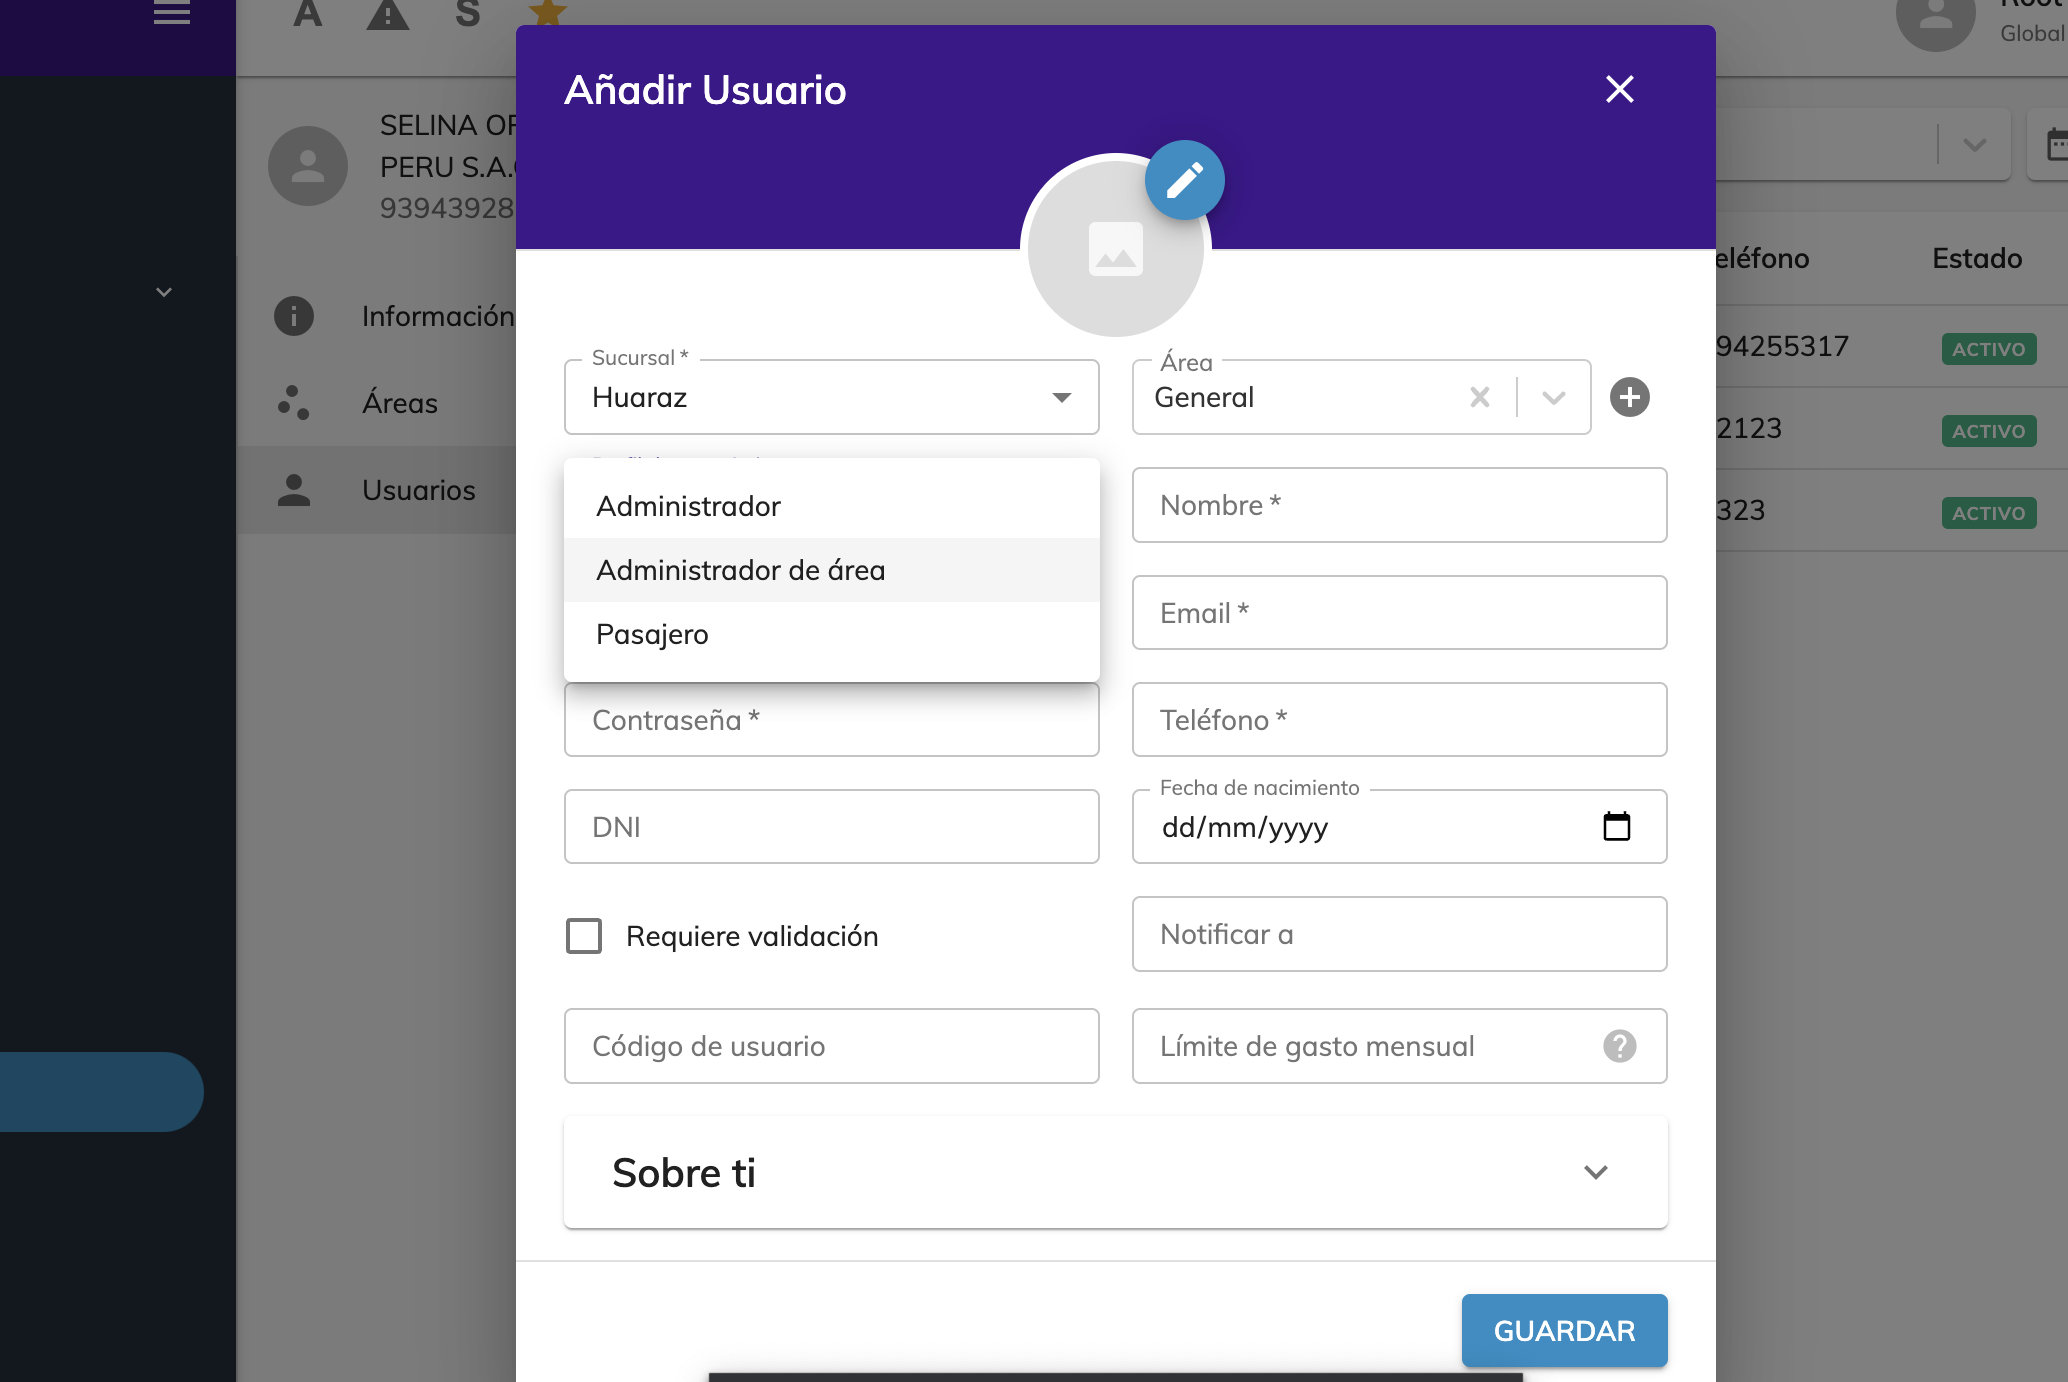
When you click the "New" button, you'll need to fill out a form to create the user. The Administrator profile lets them add new users and request trips for other users at the same company.
Was this article helpful?
Companies (Corporate Services)
- Creating Companies and Corporate Users
- Signing In as a Company User: Admin / Passenger
- Corporate users: Changing your password
- Setting Up Trip Validation for Company Users
- Bulk user import for companies
- Bulk import of ride bookings
- Forms: Dynamic field for company rides
- Groupings
- Bulk-deactivating users for a company