
 Use cases
 Messaging
 Taxi Companies
 Private Transport
 Transportation Entrepreneurs
 Last Mile
 SuperApp
 Software
 Taxi dispatch
 Corporate transportation
 Auction
 Products
 Booking Software
 Dispatch Platform
 Driver App
 Passenger App
 Web Widget
 Functions
 Schedule & Booking
 Driver Management
 Custom
 Corporate Portal
 Security & Support
 Resources
 Learn
Learn



Forms: Dynamic field for company rides
To get started, you need a company set up where you'll add the form you want to create. To do this, go to the "Companies" section and click "New".
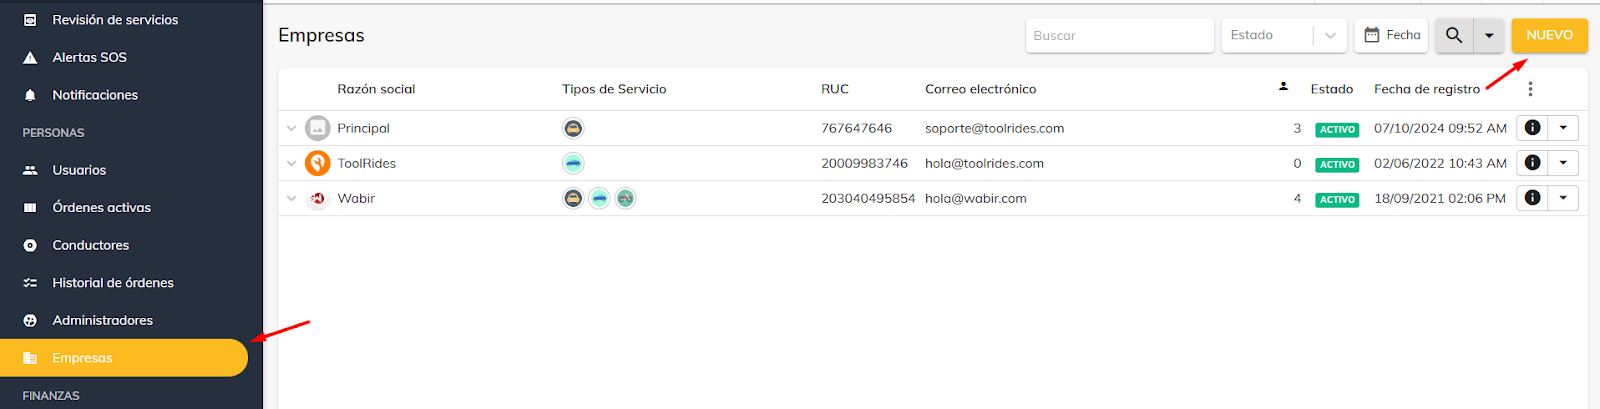
Once the company is created, make sure it has registered passenger users. Then go to the "Forms" section. Under "Company Service", select "New".
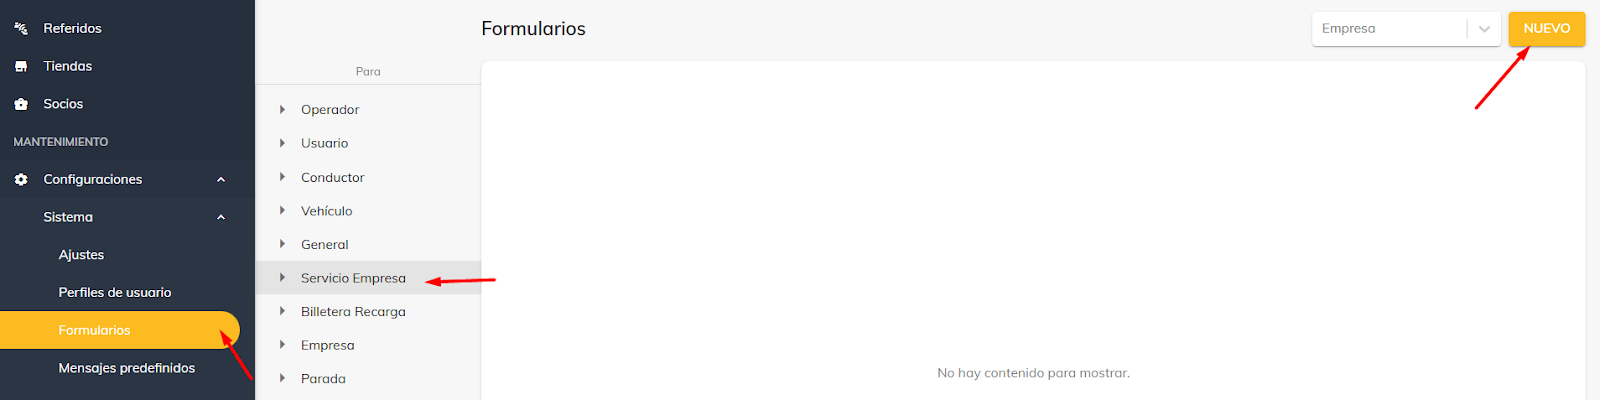
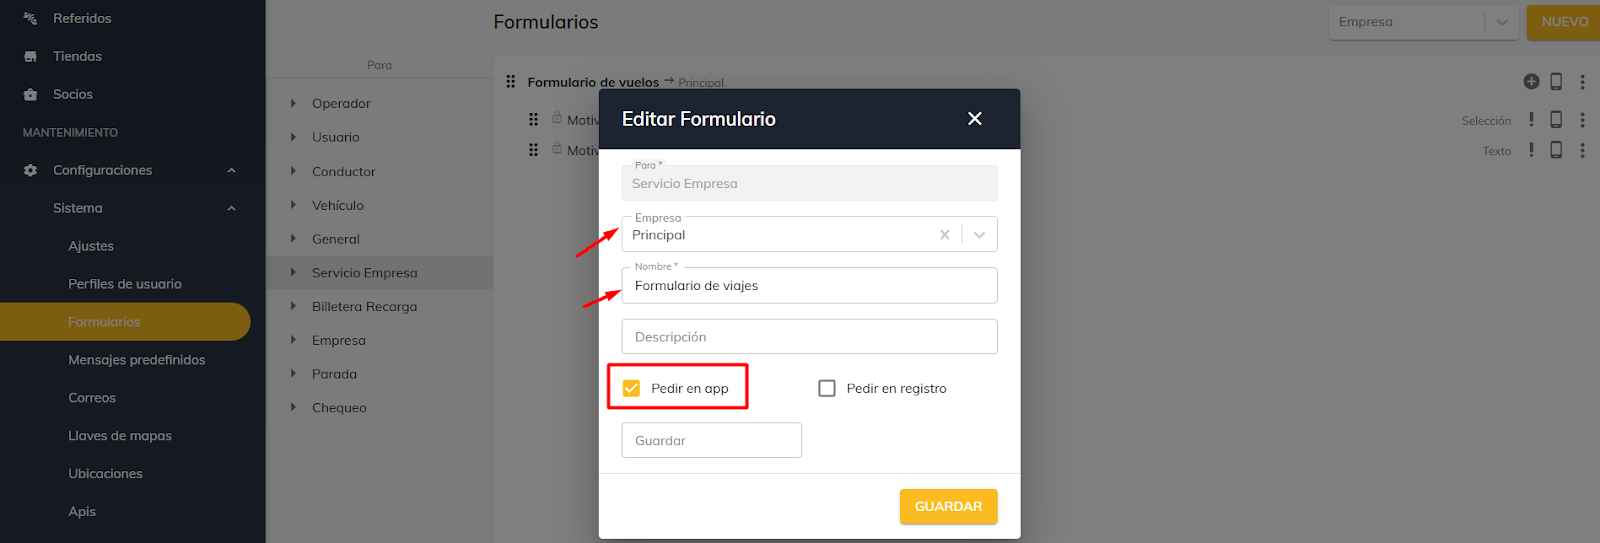
Select the company the form will be linked to, give it a name, add an optional description, and set whether the information will be requested in the app. Finally, save the form.
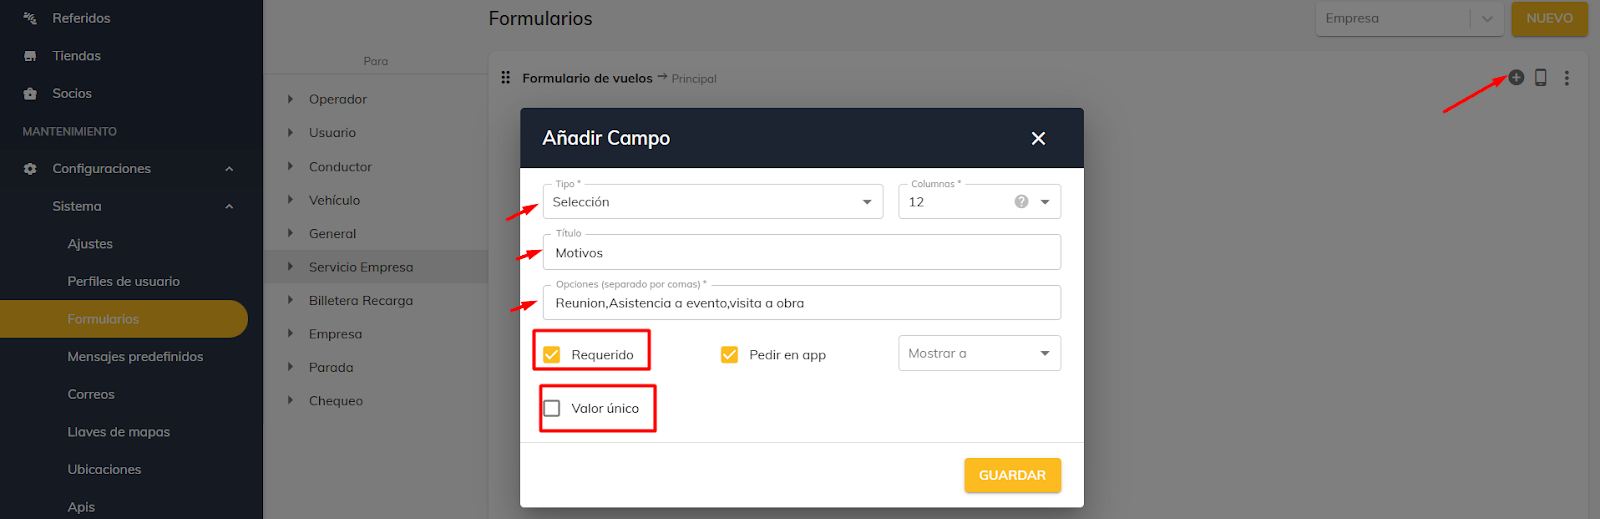
Now that the form is created, you need to add fields to it. There are several field types; as an example, we'll use the "Selection" type. To do this, inside the form, click "Add field", choose "Selection", and give it a title—for example, "Reasons". Then enter the options separated by commas, and set whether it's required and whether it should have a unique value (to prevent duplicate entries).
You can also add a text field. To do this, repeat the previous process, select "Text", give it a title, set the minimum and maximum number of characters, enable the "Numeric" option if it should only allow numbers, and set whether it's required and whether it should have a unique value. Then save the field.
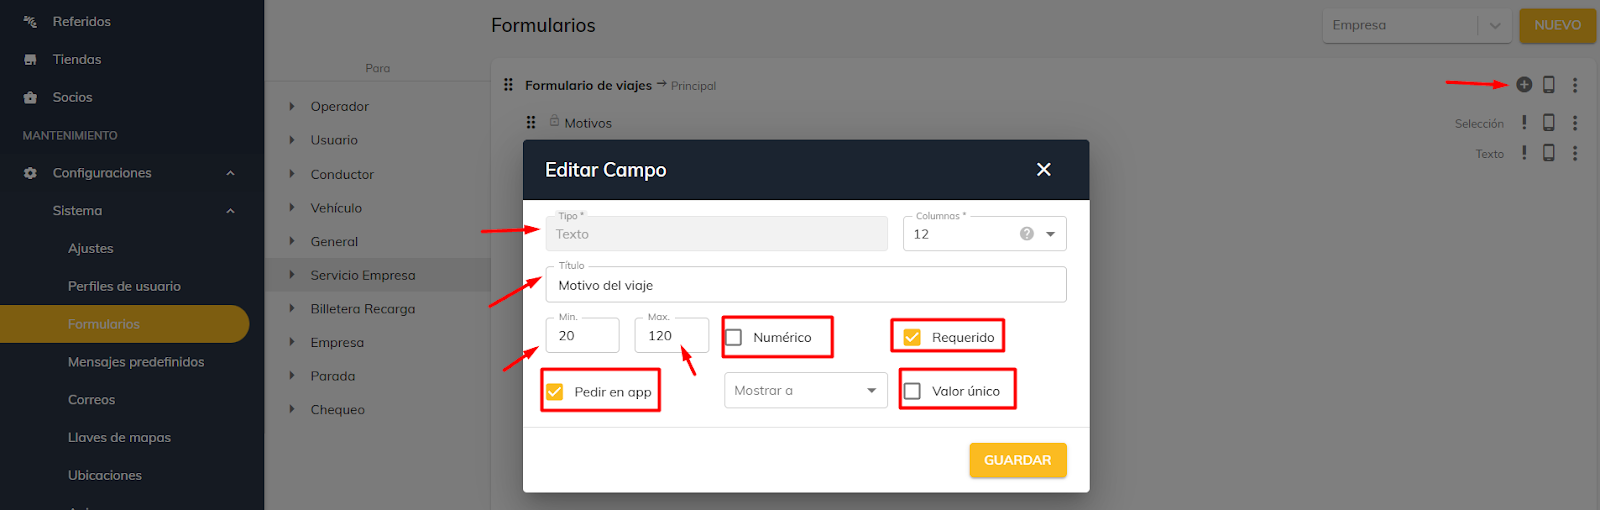
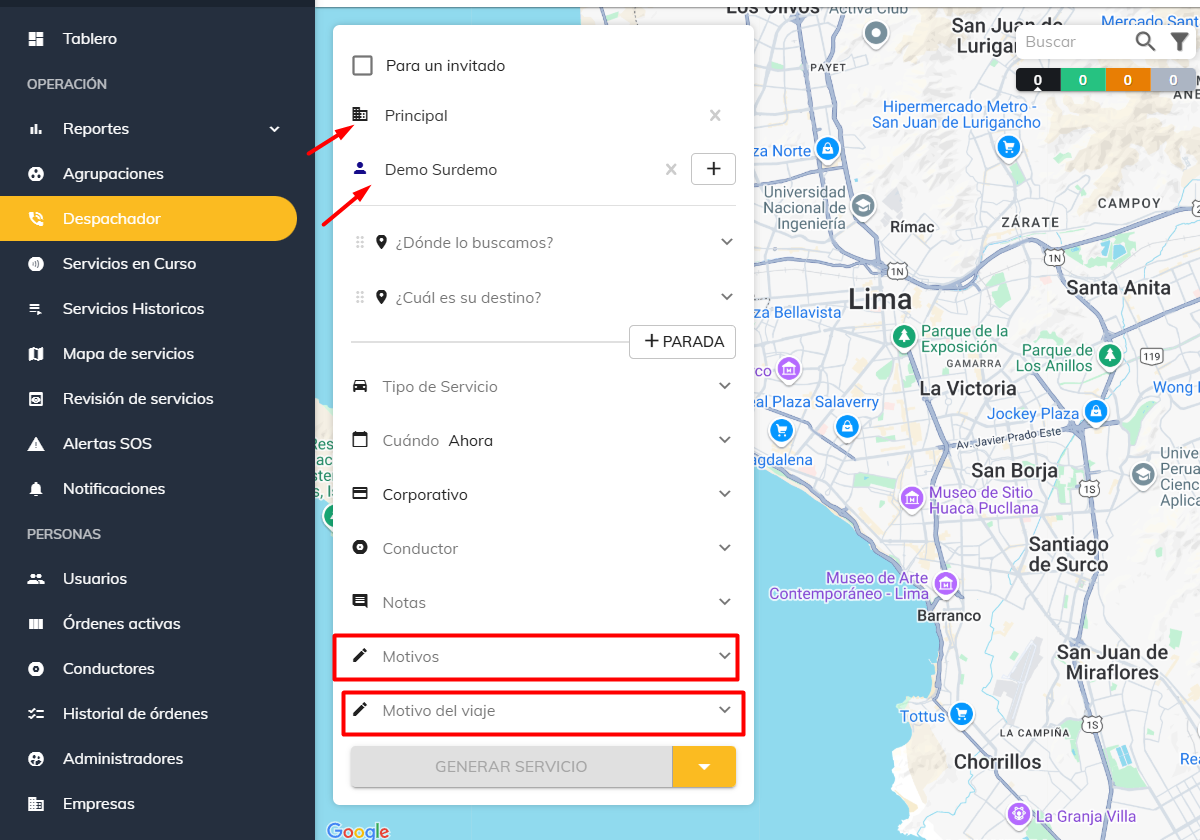
Once the form is complete with the fields you need, when you create a ride in the Dispatcher, the form will appear based on your configuration, letting you collect the required information from passengers.
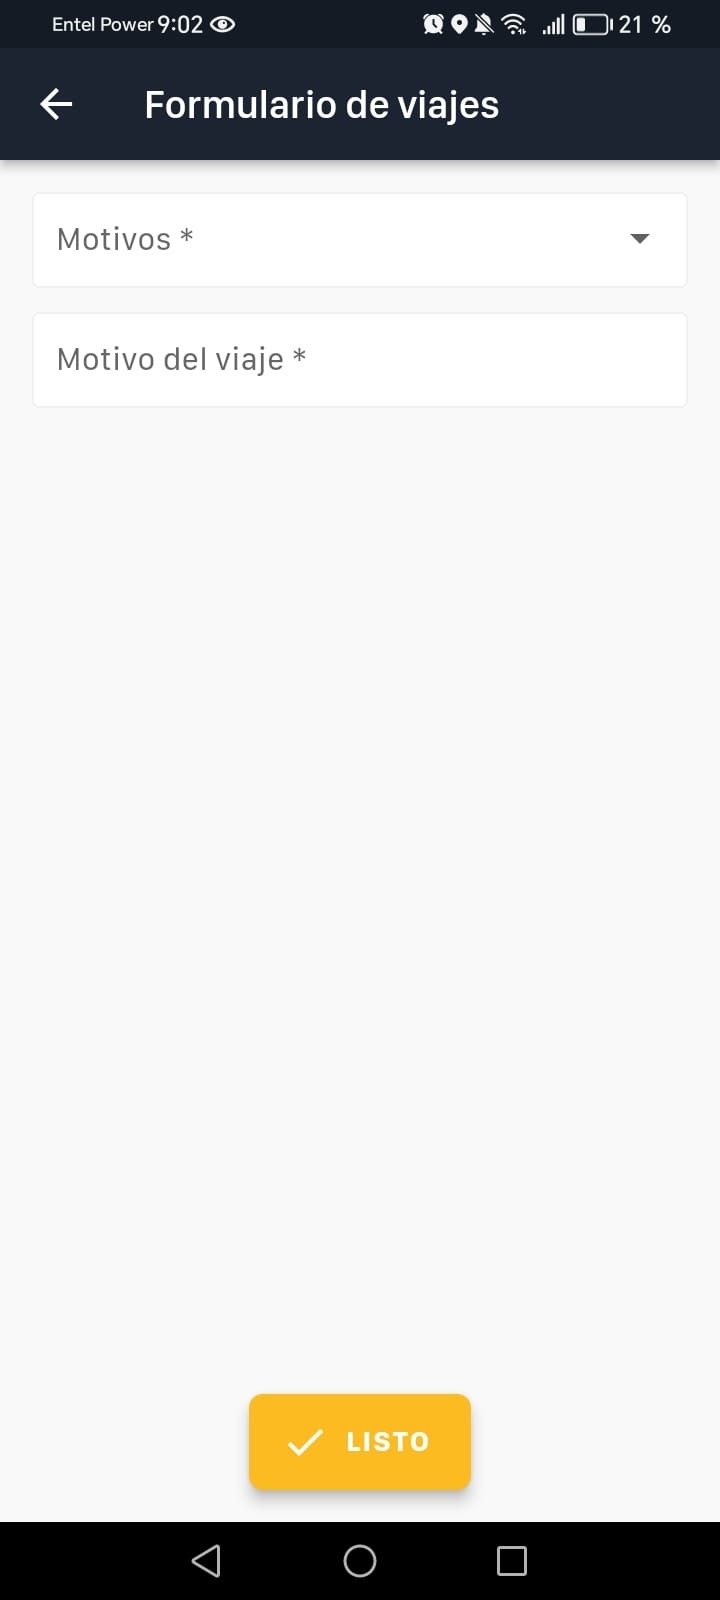
On the mobile device, when creating a ride, the form will be shown with the configured fields.
Was this article helpful?
Companies (Corporate Services)
- Creating Companies and Corporate Users
- Signing In as a Company User: Admin / Passenger
- Corporate users: Changing your password
- Setting Up Trip Validation for Company Users
- Bulk user import for companies
- Bulk import of ride bookings
- Forms: Dynamic field for company rides
- Groupings
- Bulk-deactivating users for a company