
 Use cases
 Messaging
 Taxi Companies
 Private Transport
 Transportation Entrepreneurs
 Last Mile
 SuperApp
 Software
 Taxi dispatch
 Corporate transportation
 Auction
 Products
 Booking Software
 Dispatch Platform
 Driver App
 Passenger App
 Web Widget
 Functions
 Schedule & Booking
 Driver Management
 Custom
 Corporate Portal
 Security & Support
 Resources
 Learn
Learn



Groupings
To use groupings, the first thing to do is go to this section and select the 'New' option. You'll then see several fields, such as: the grouping type (same origin or same destination), the service type to use, and the option to assign a driver.
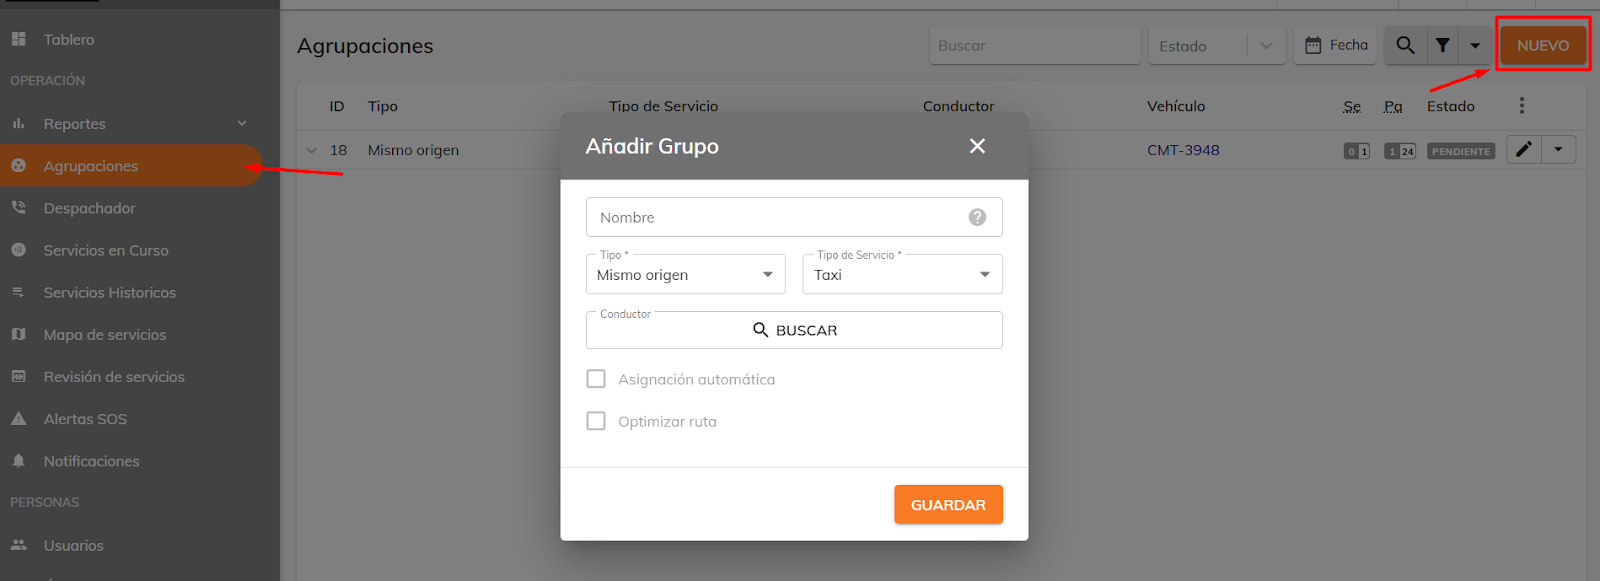
If a driver is assigned, you'll be able to generate an automatic assignment. If it's accepted, the option to optimize the route will also appear. Note that all of these fields, including the name, are optional; the required fields are the service type and the grouping type.
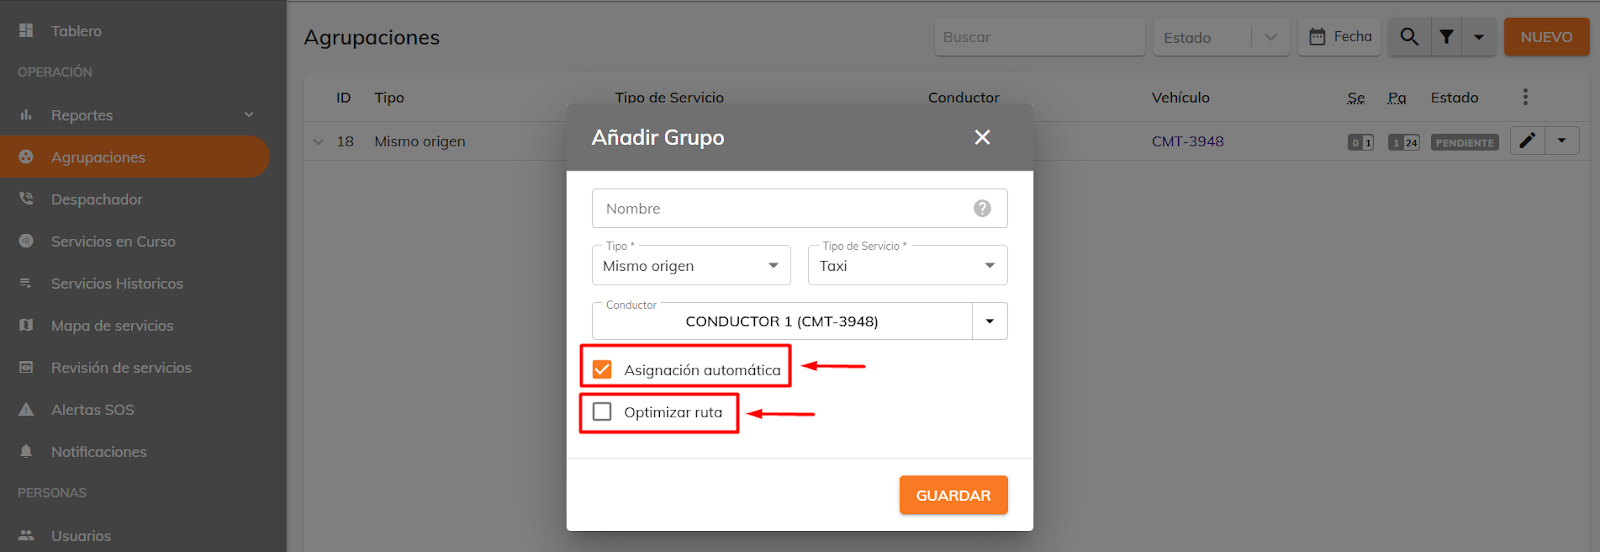
Once a grouping is created without a driver, the option to assign services automatically will become available, as long as there's a nearby driver who still has capacity; otherwise, you'll see the message: "There are no services near this group" or "The vehicle has reached its maximum capacity," and if no driver is assigned, an error message will appear.
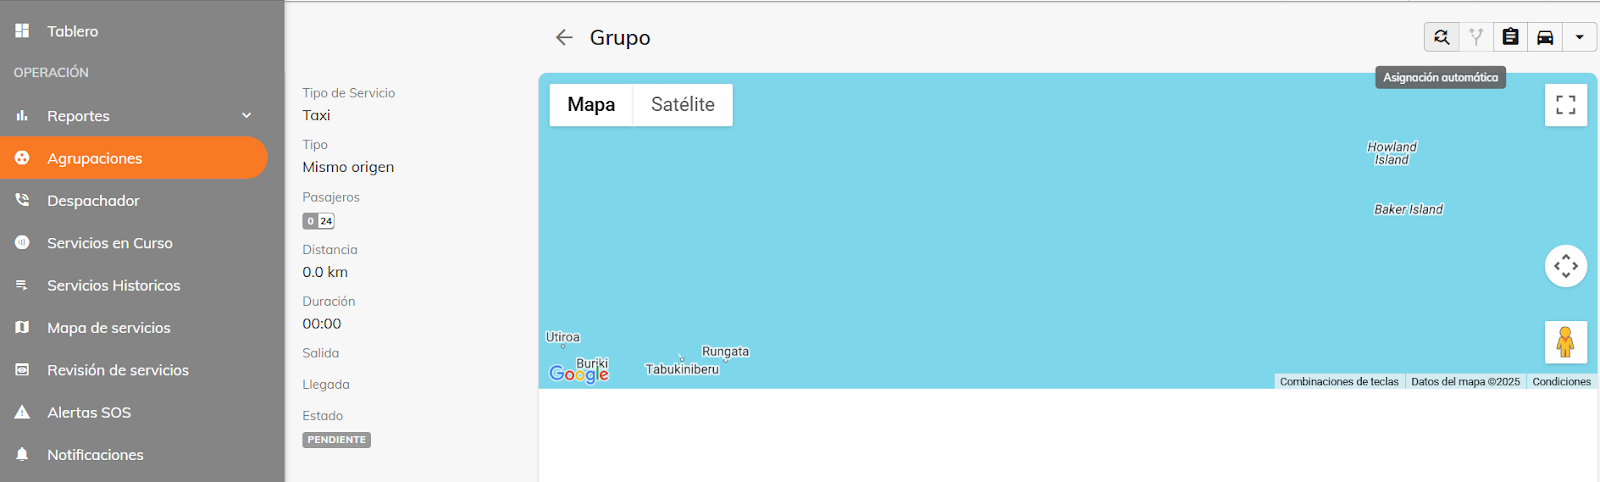
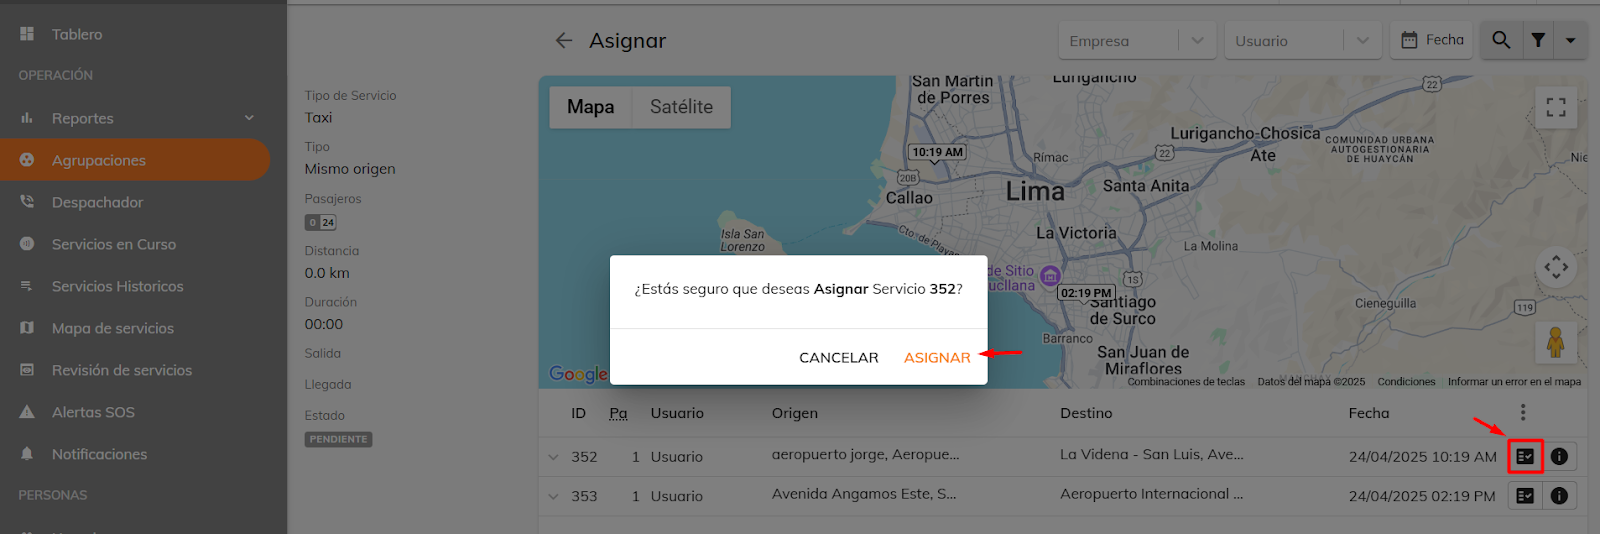
If this message appears, you can still assign services manually using the "Assign" option, which will show all the services that don't yet have a driver assigned and are of the same service type.
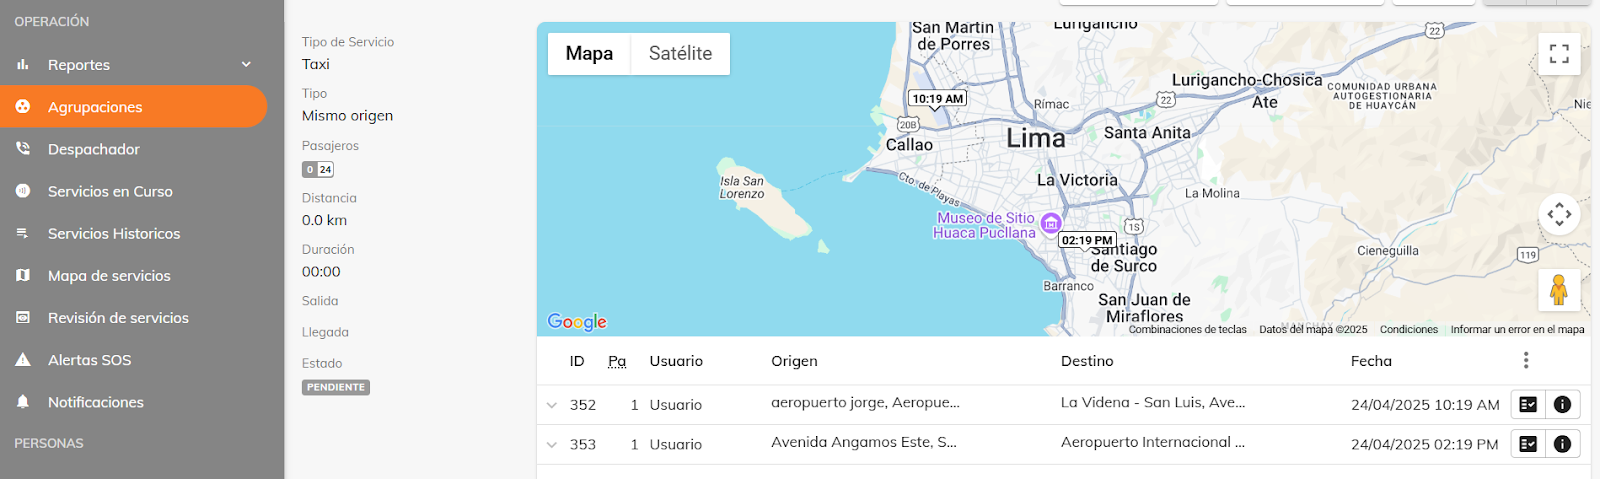
When you're in the "Assign" option, you can use this icon to add to the grouping the services that don't have a driver, as well as look up trip information.
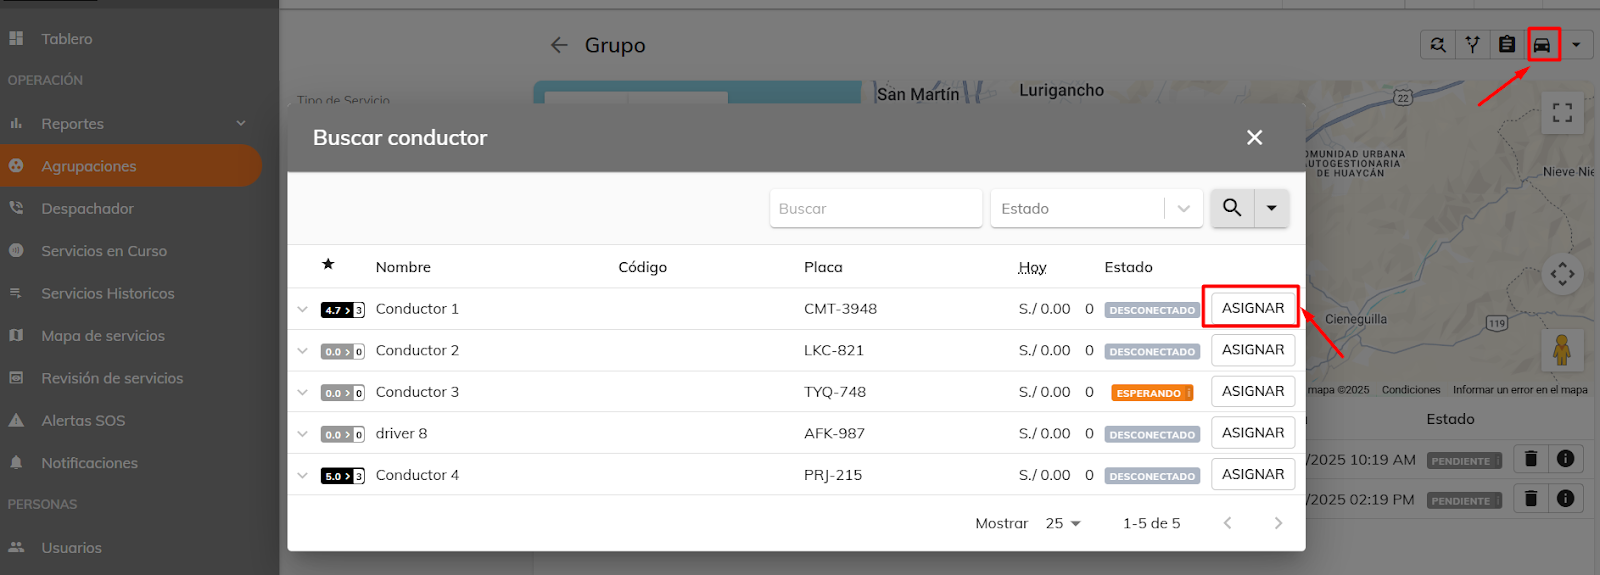
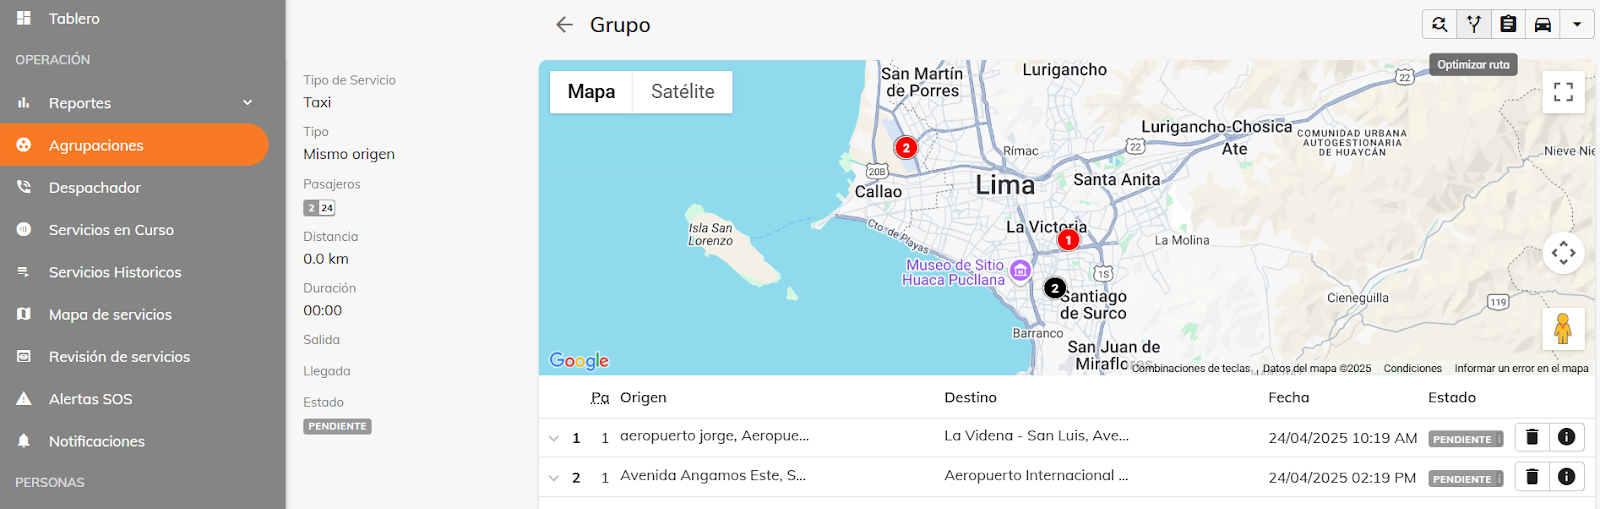
Once assigned, the route can be viewed from the groupings panel. If multiple routes are available, you can use the "Optimize route" option, which calculates the best one according to Google Maps, as long as a driver is assigned. To assign a driver, use the corresponding icon available in the interface.
The red circles are destination points, and the black dots are origin points.
The suggested route is visible to the driver, who can decide whether to follow it or use another one they find more convenient. You can also remove the assigned driver and replace them with another if needed.
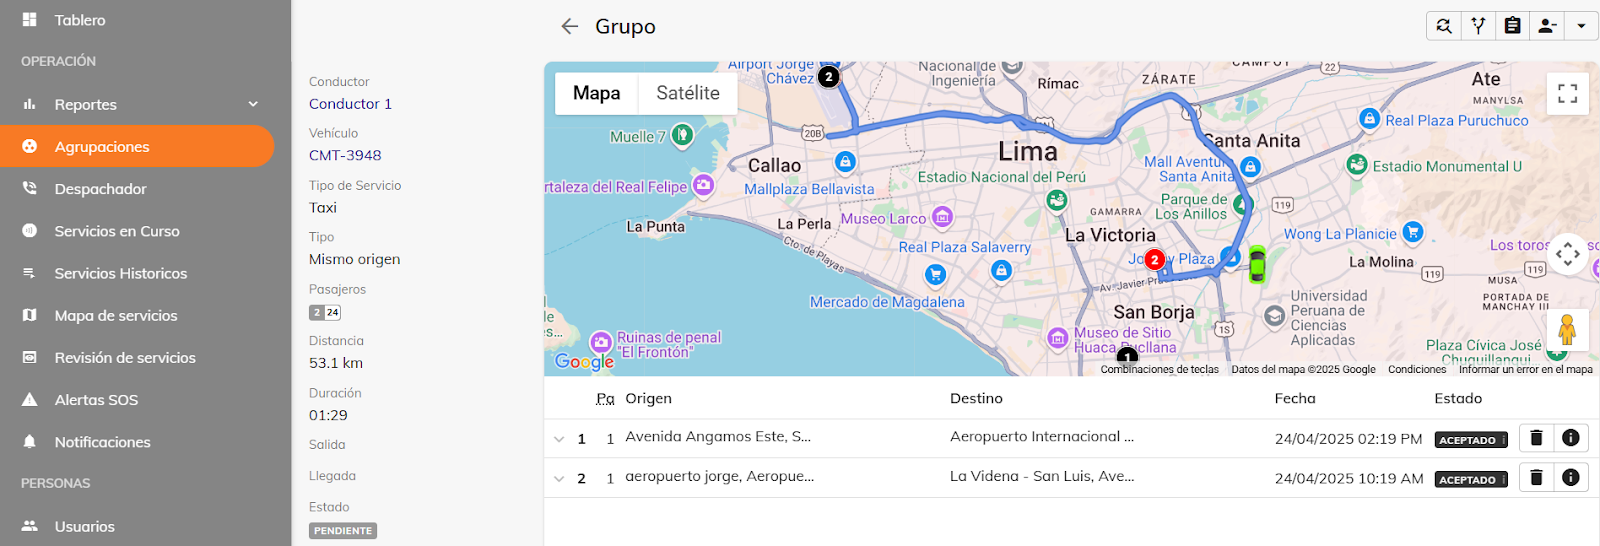
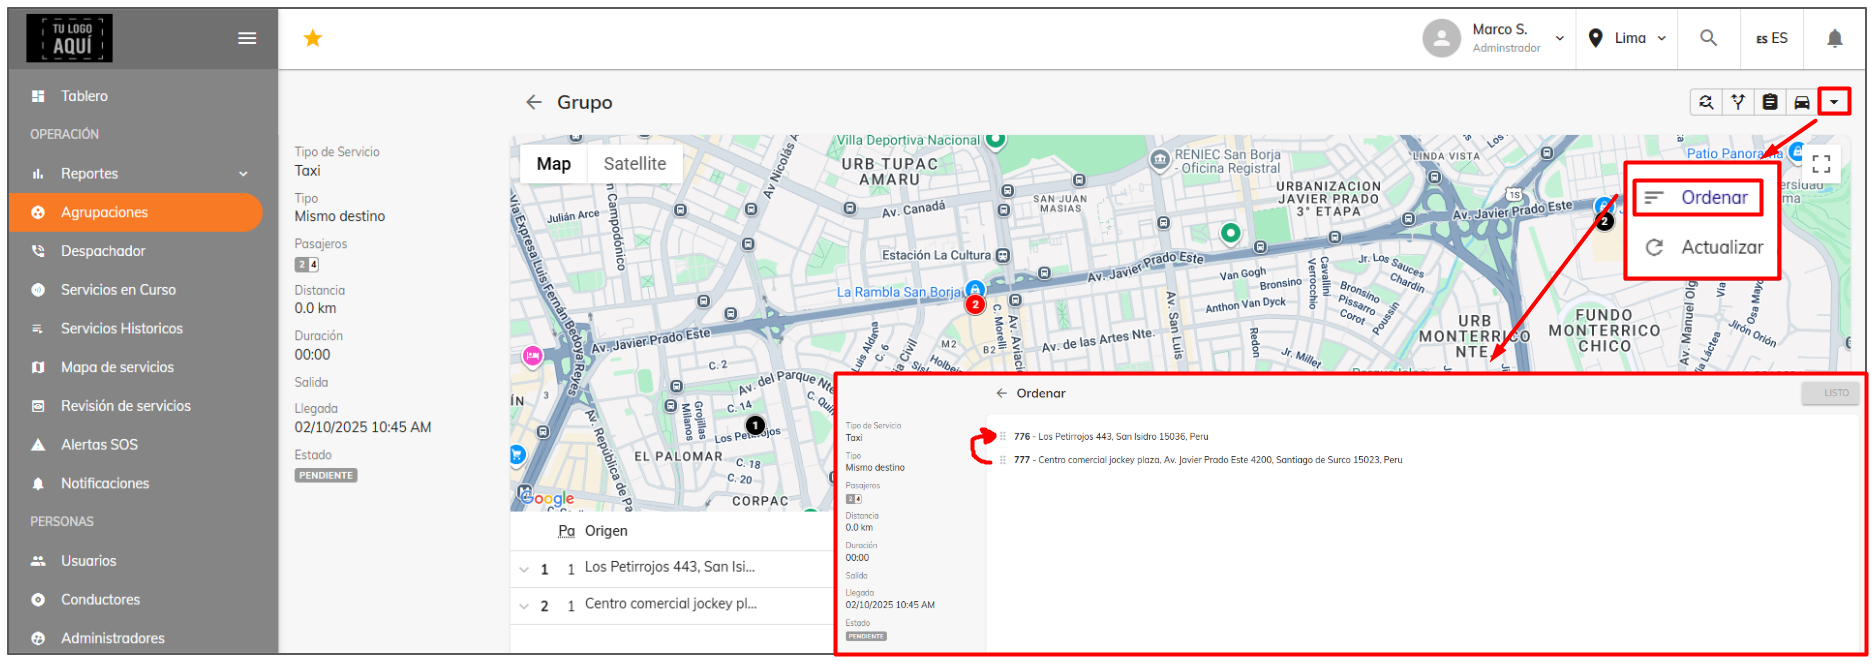
You can also manually reorder this optimal route for any reason where you want to prioritize a particular service.
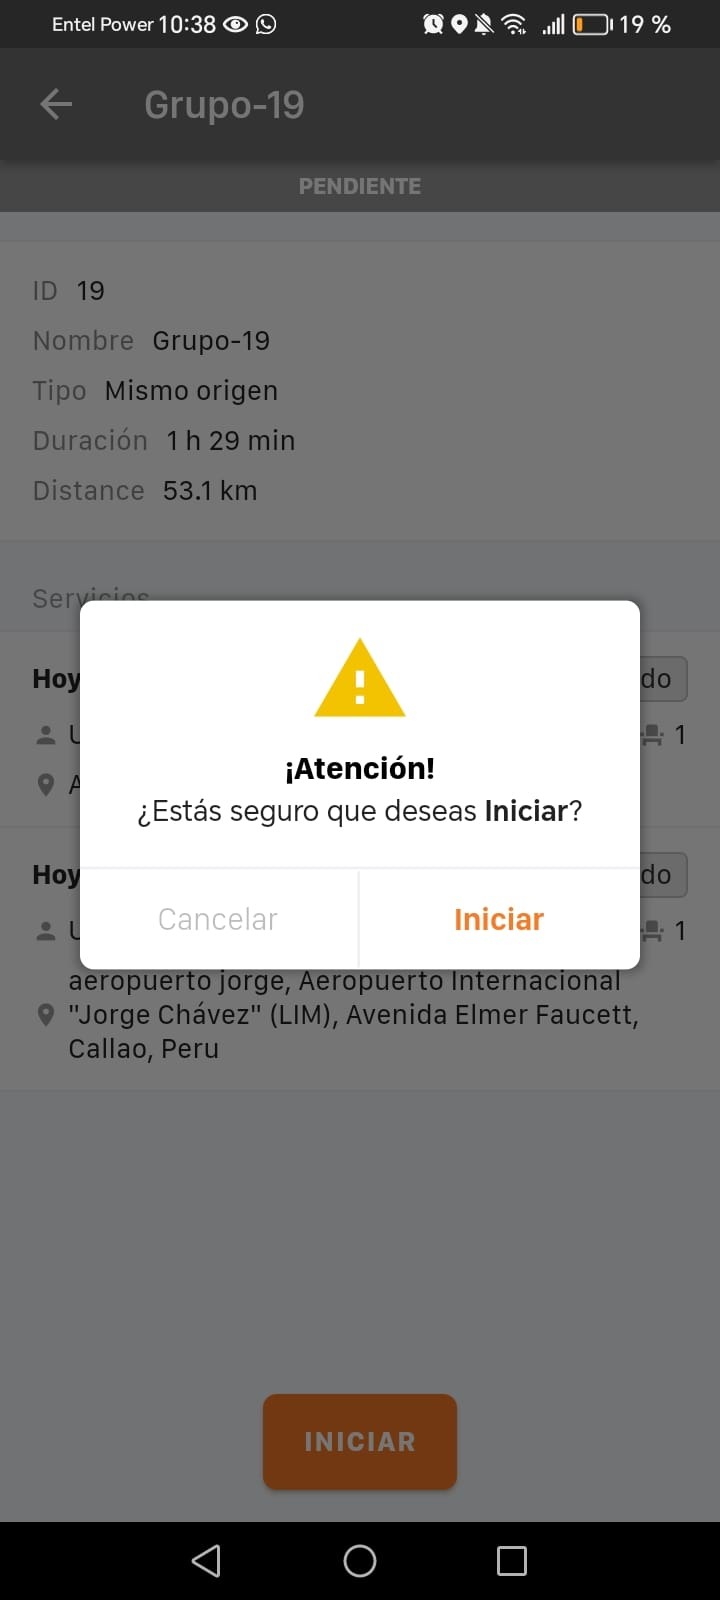
Here's how it looks in the app: go to "Active Services," where all services are shown, whether grouped or not. Then, when you try to start a grouped service, a warning message will appear.
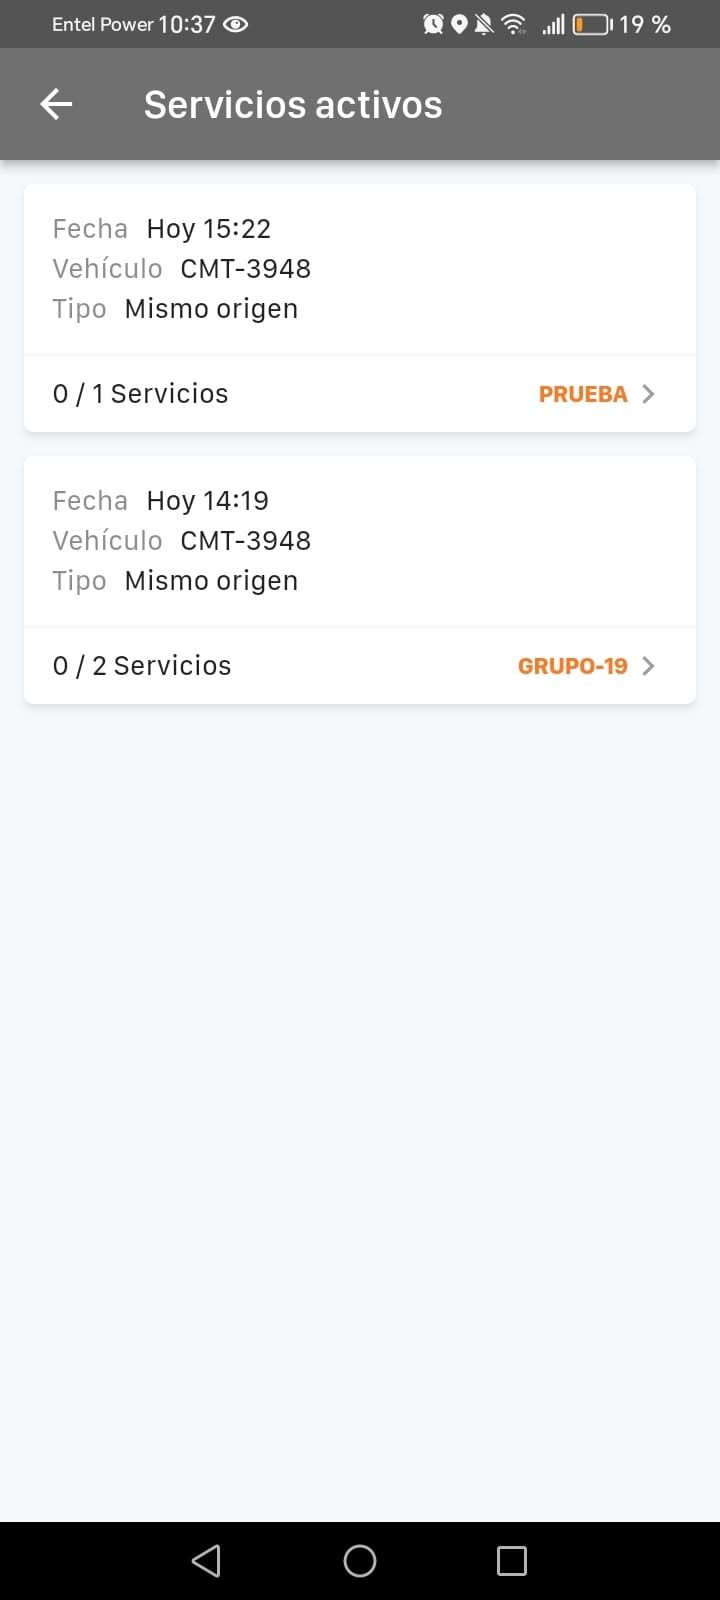
Then, once started, you can follow whatever order you consider best for completing all the services.
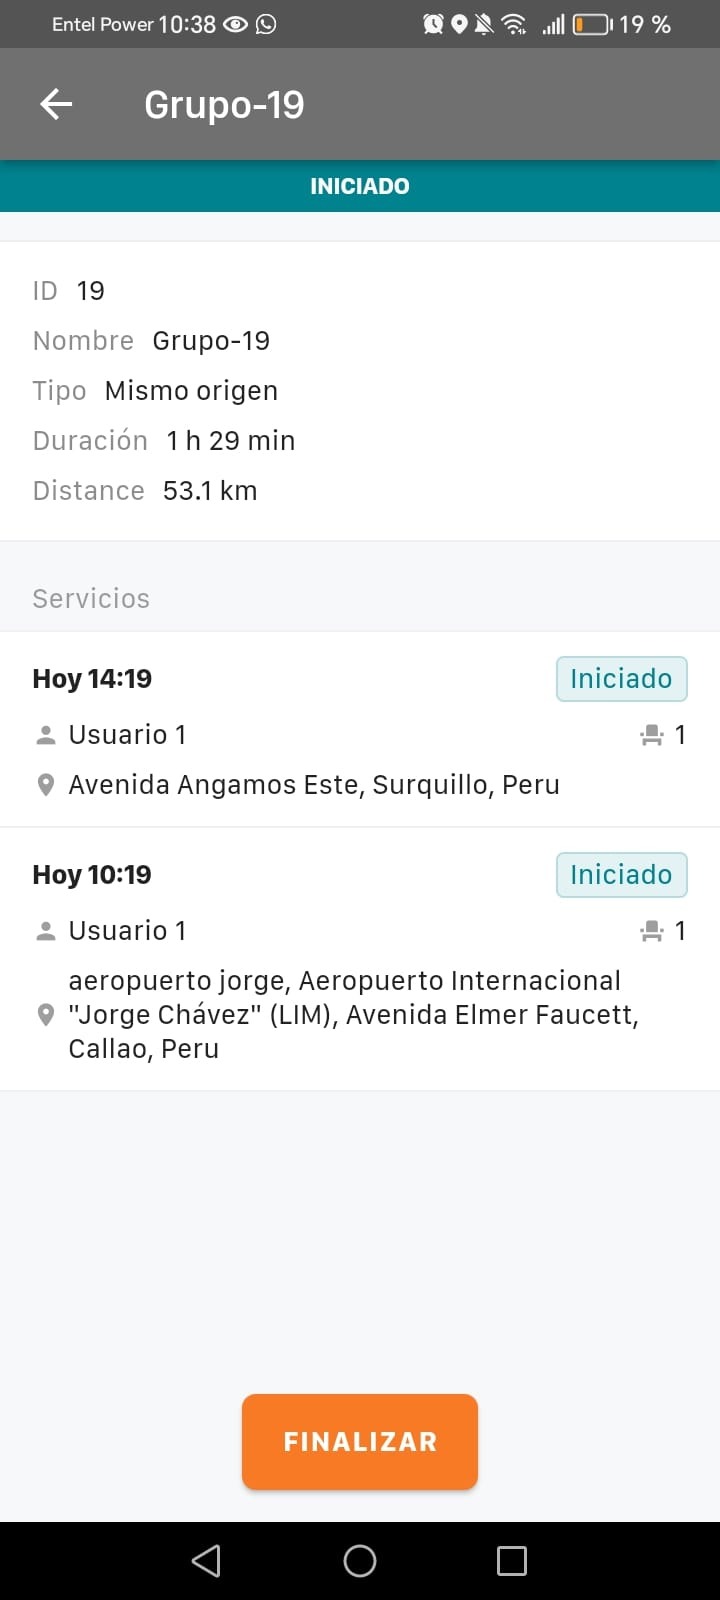
To finish the service, you need to complete all the stops.
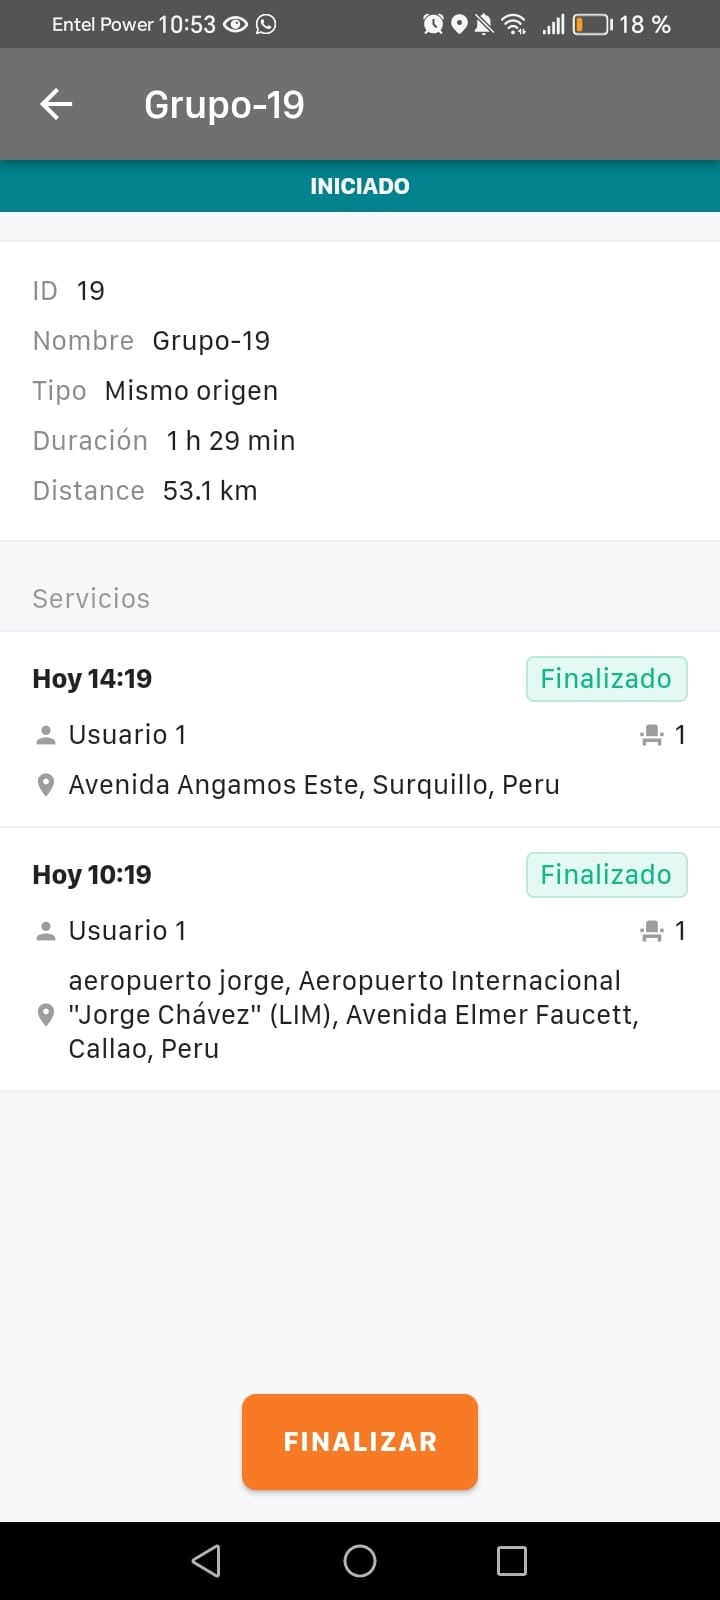
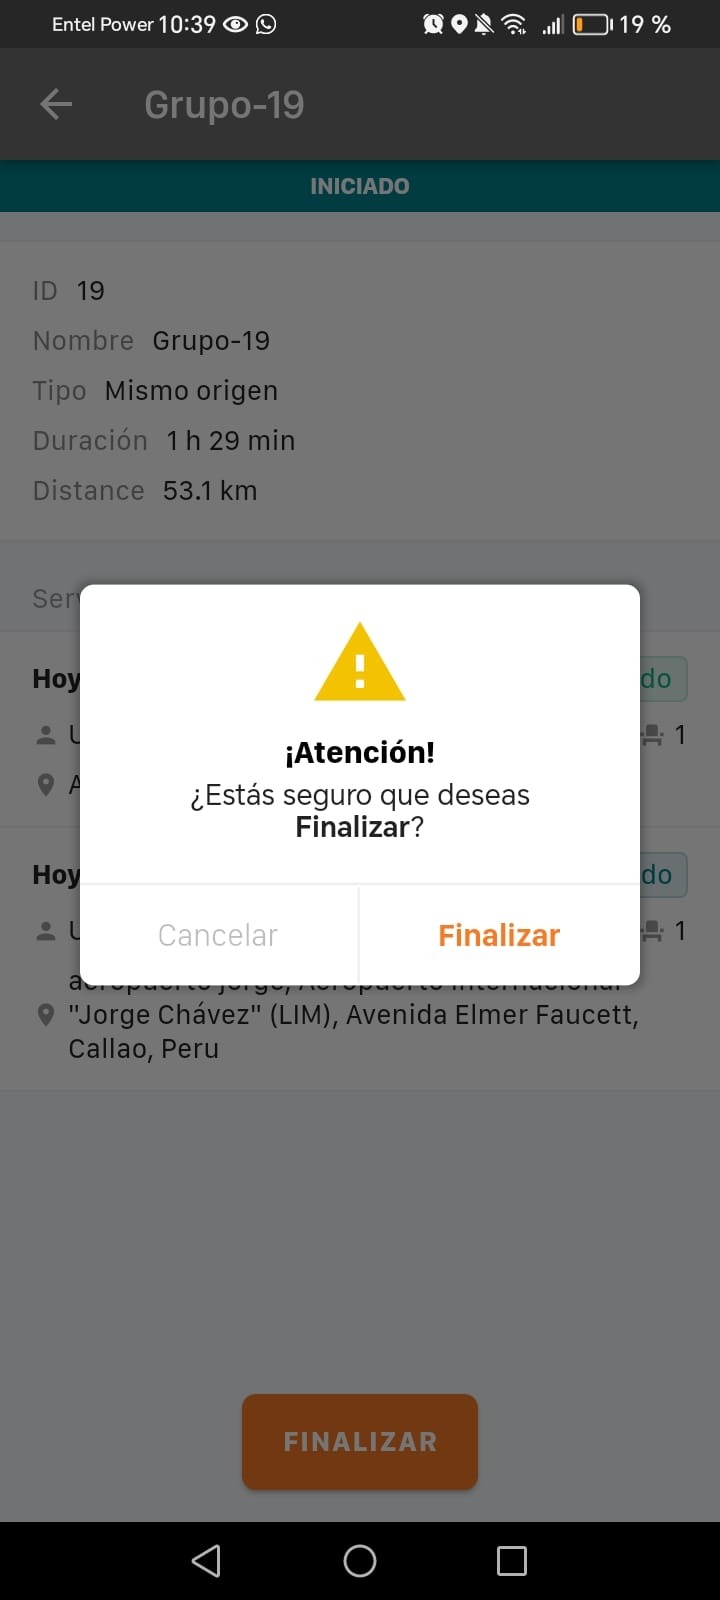
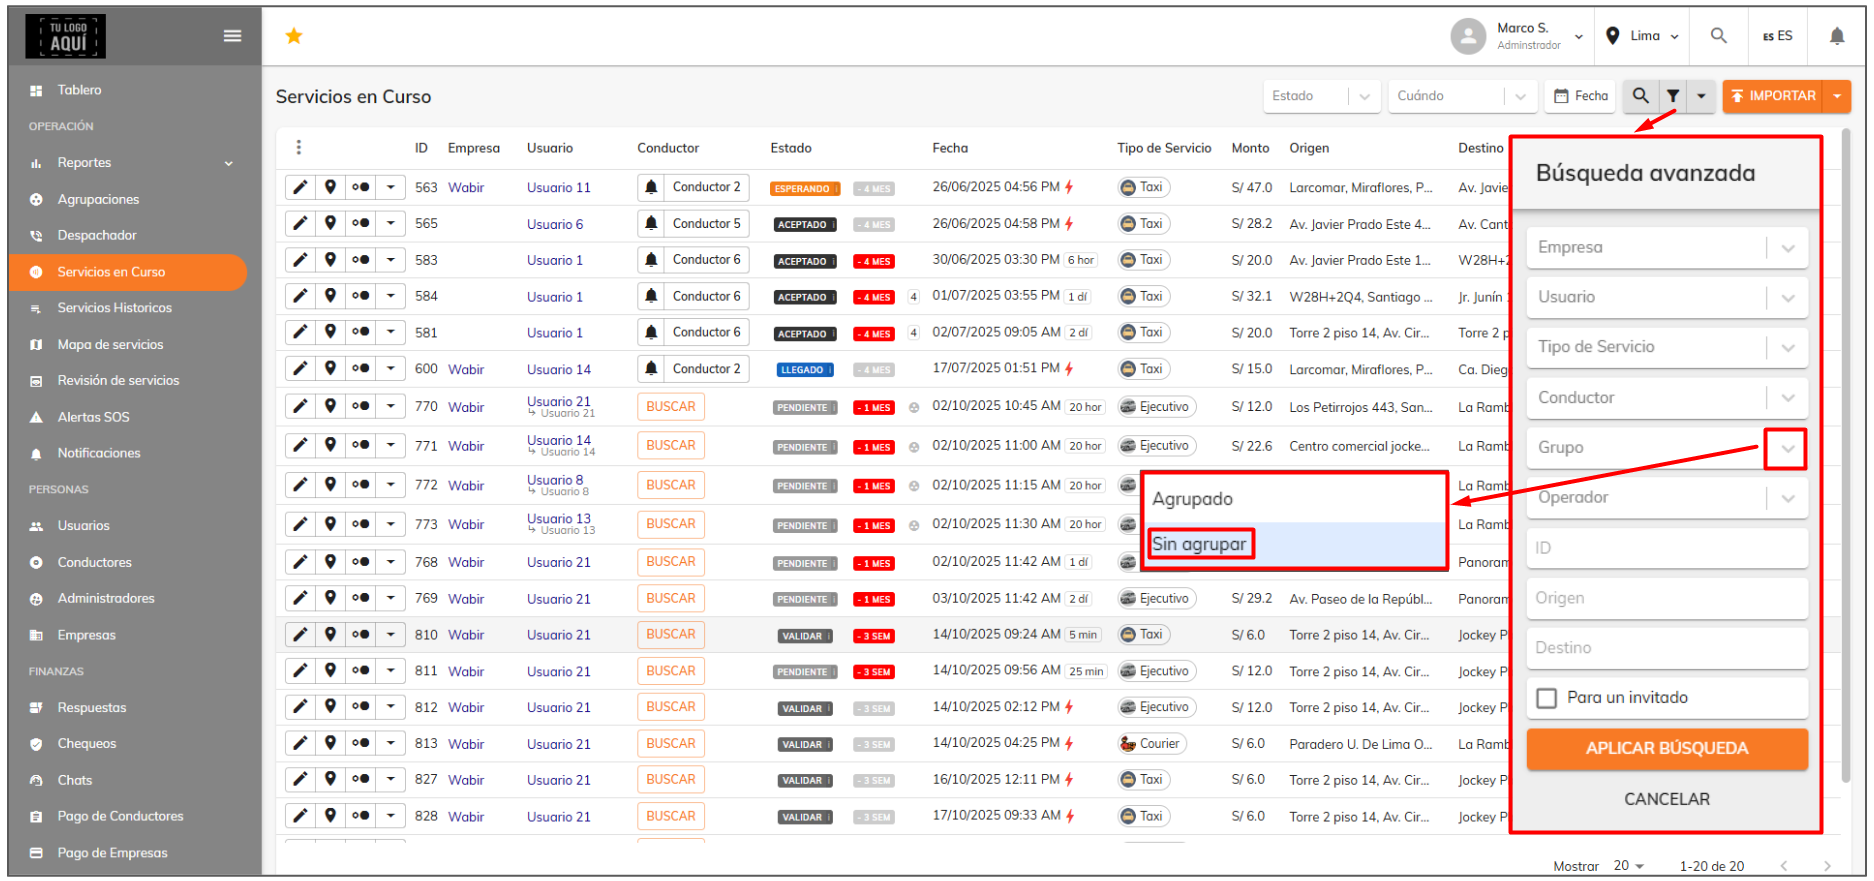
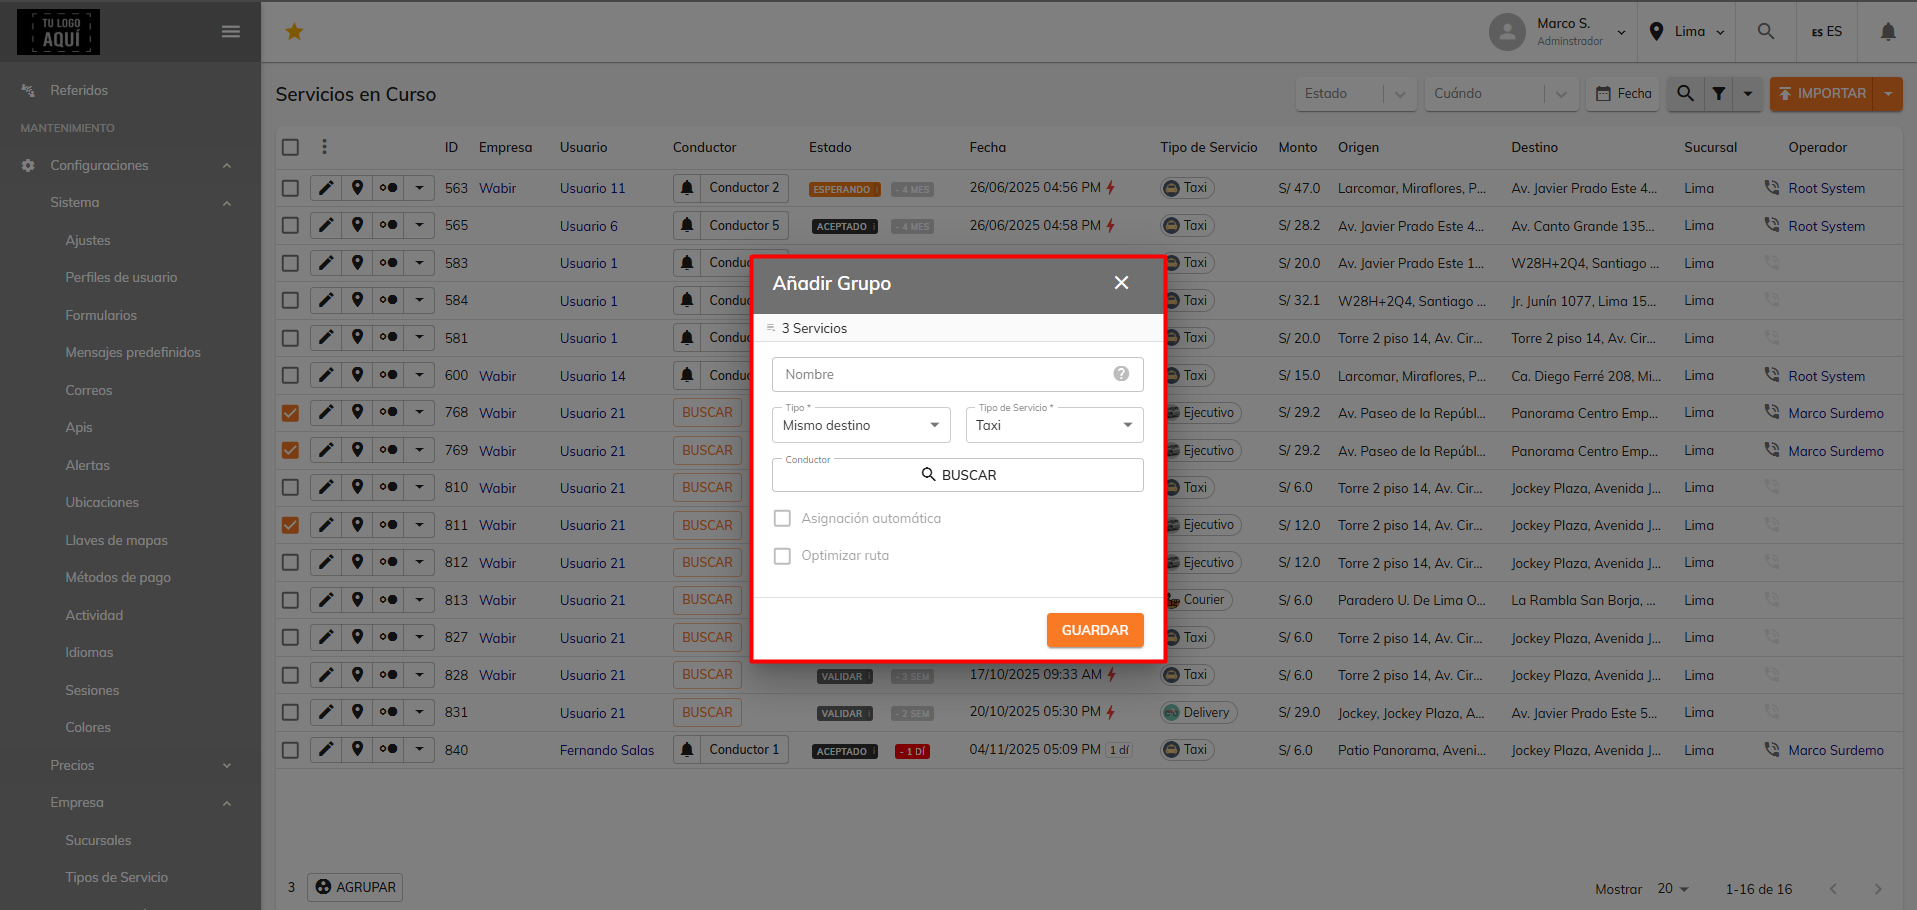
You can also create a grouping from services in progress. To do so, in that submodule, apply the advanced search and filter by ungrouped services.
This way, services will appear that you can select and group using the button at the bottom left.
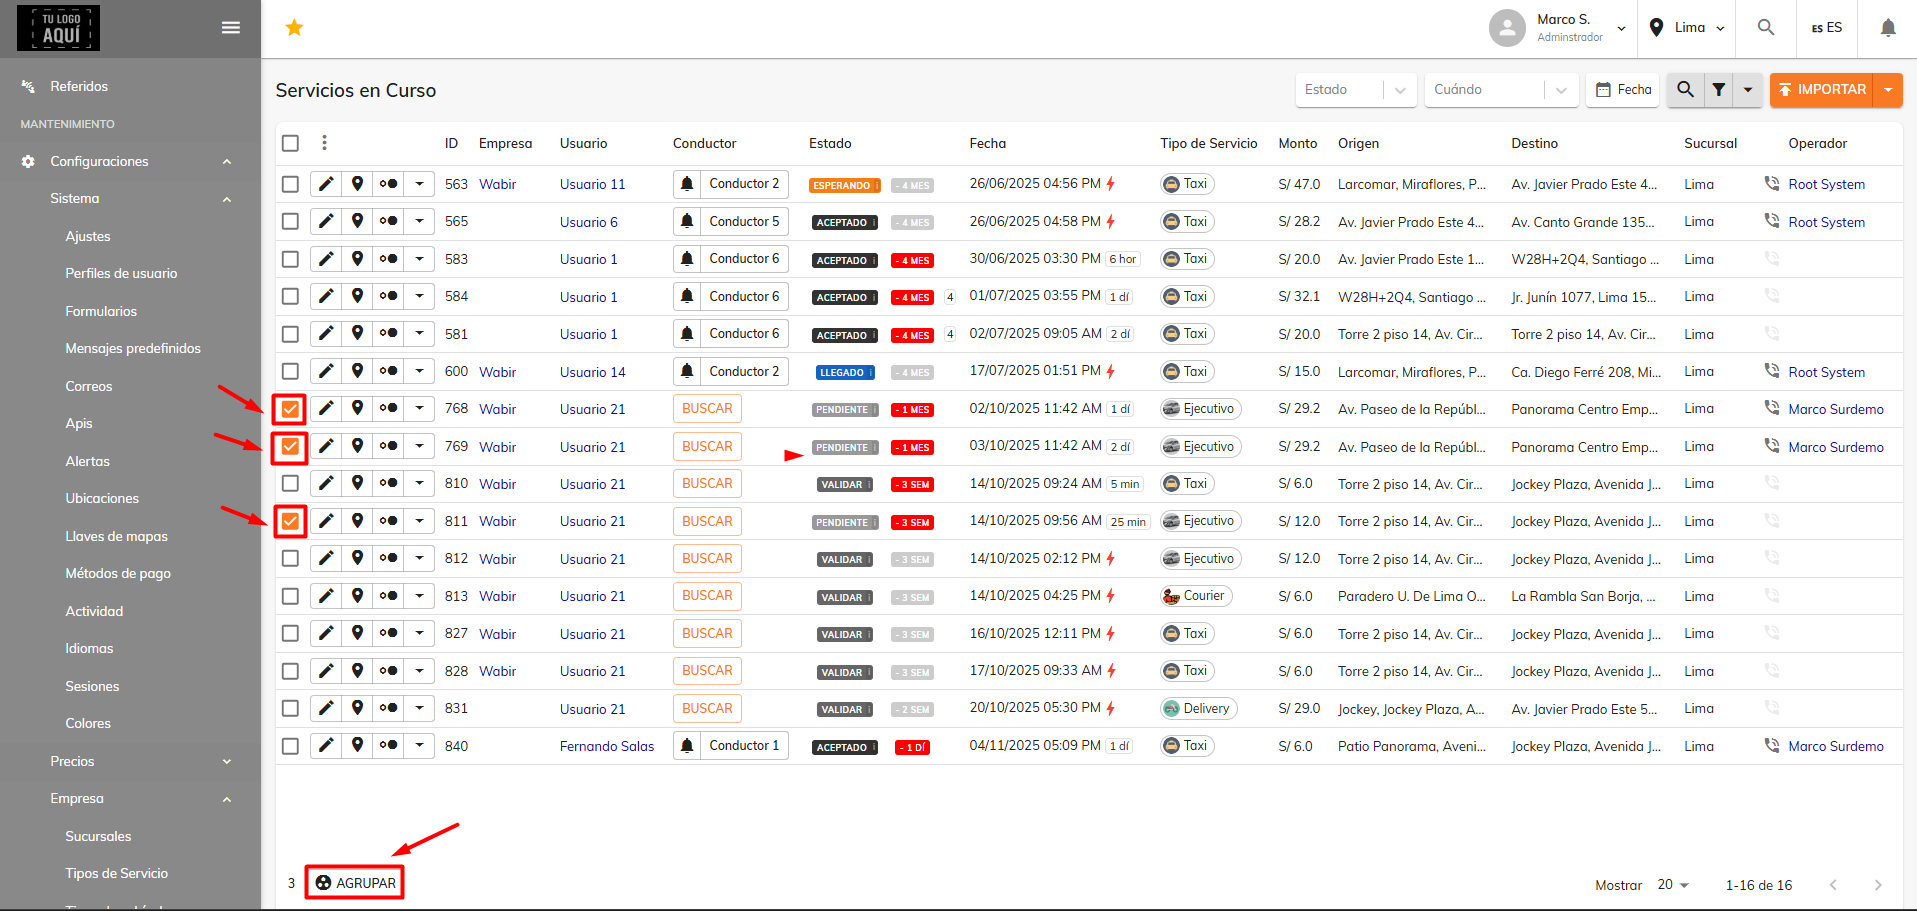
After clicking the "GROUP" button, we create a grouping with the fields mentioned earlier.
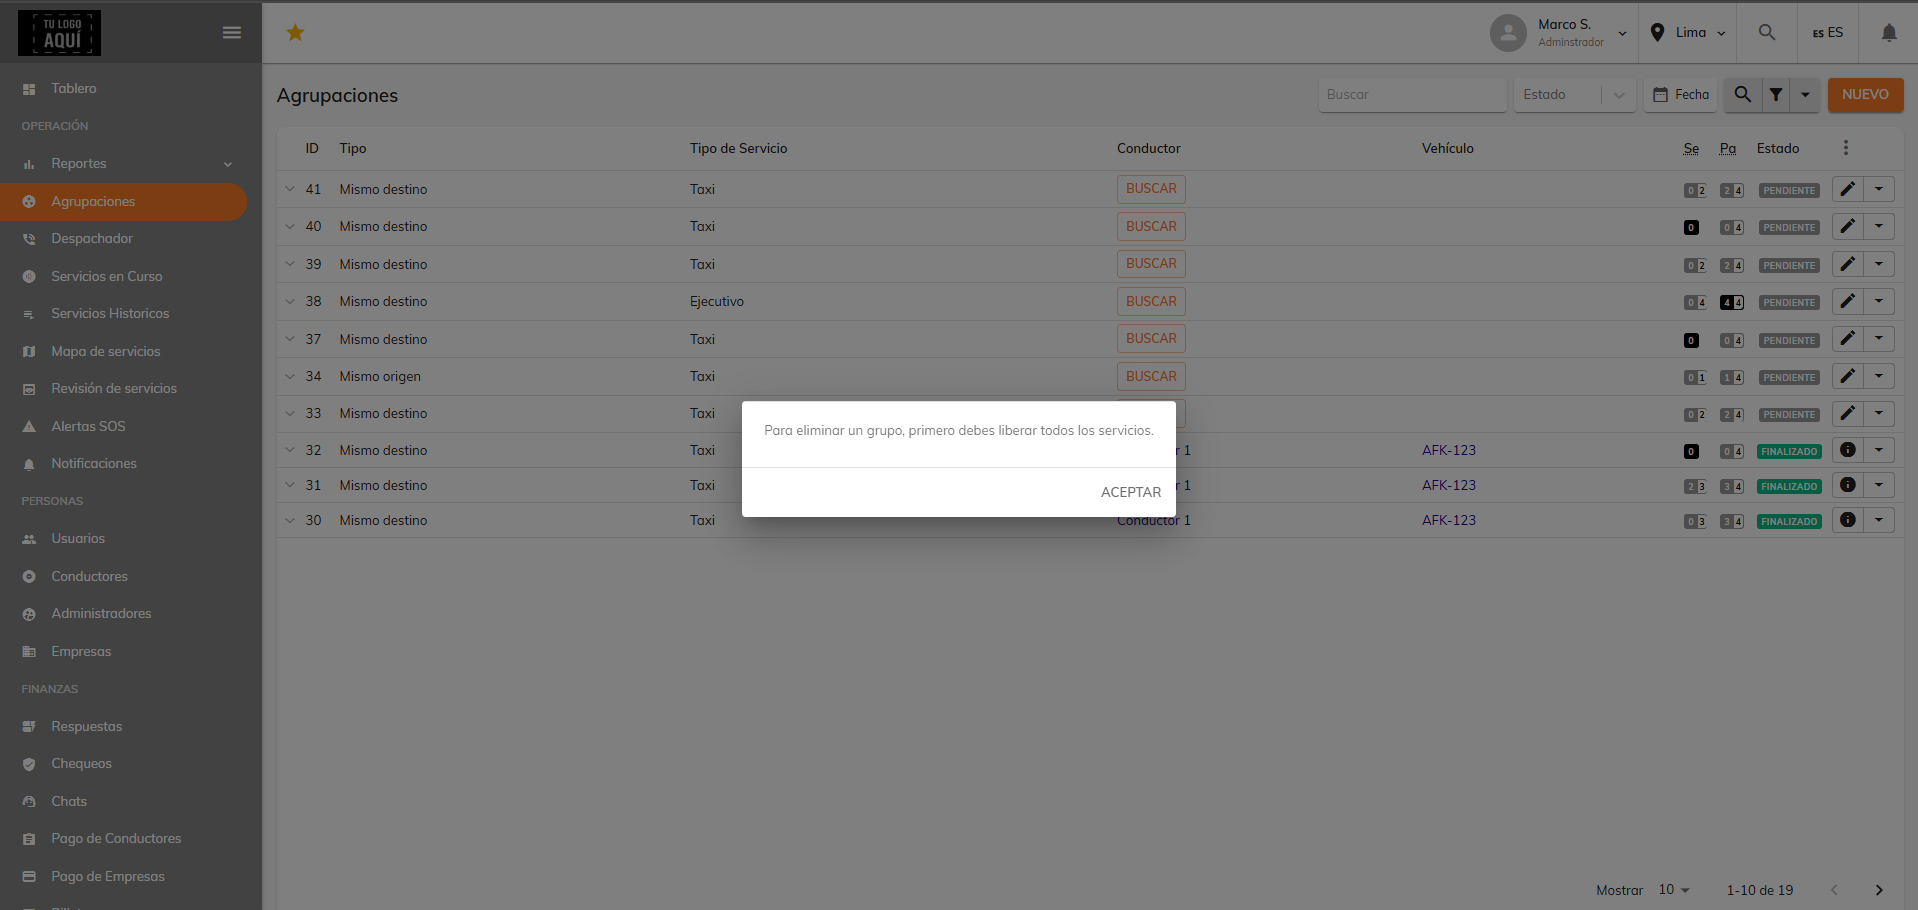
To delete a grouping, you must first remove all the services in that grouping. Otherwise, you won't be able to delete it and you'll get the following message.
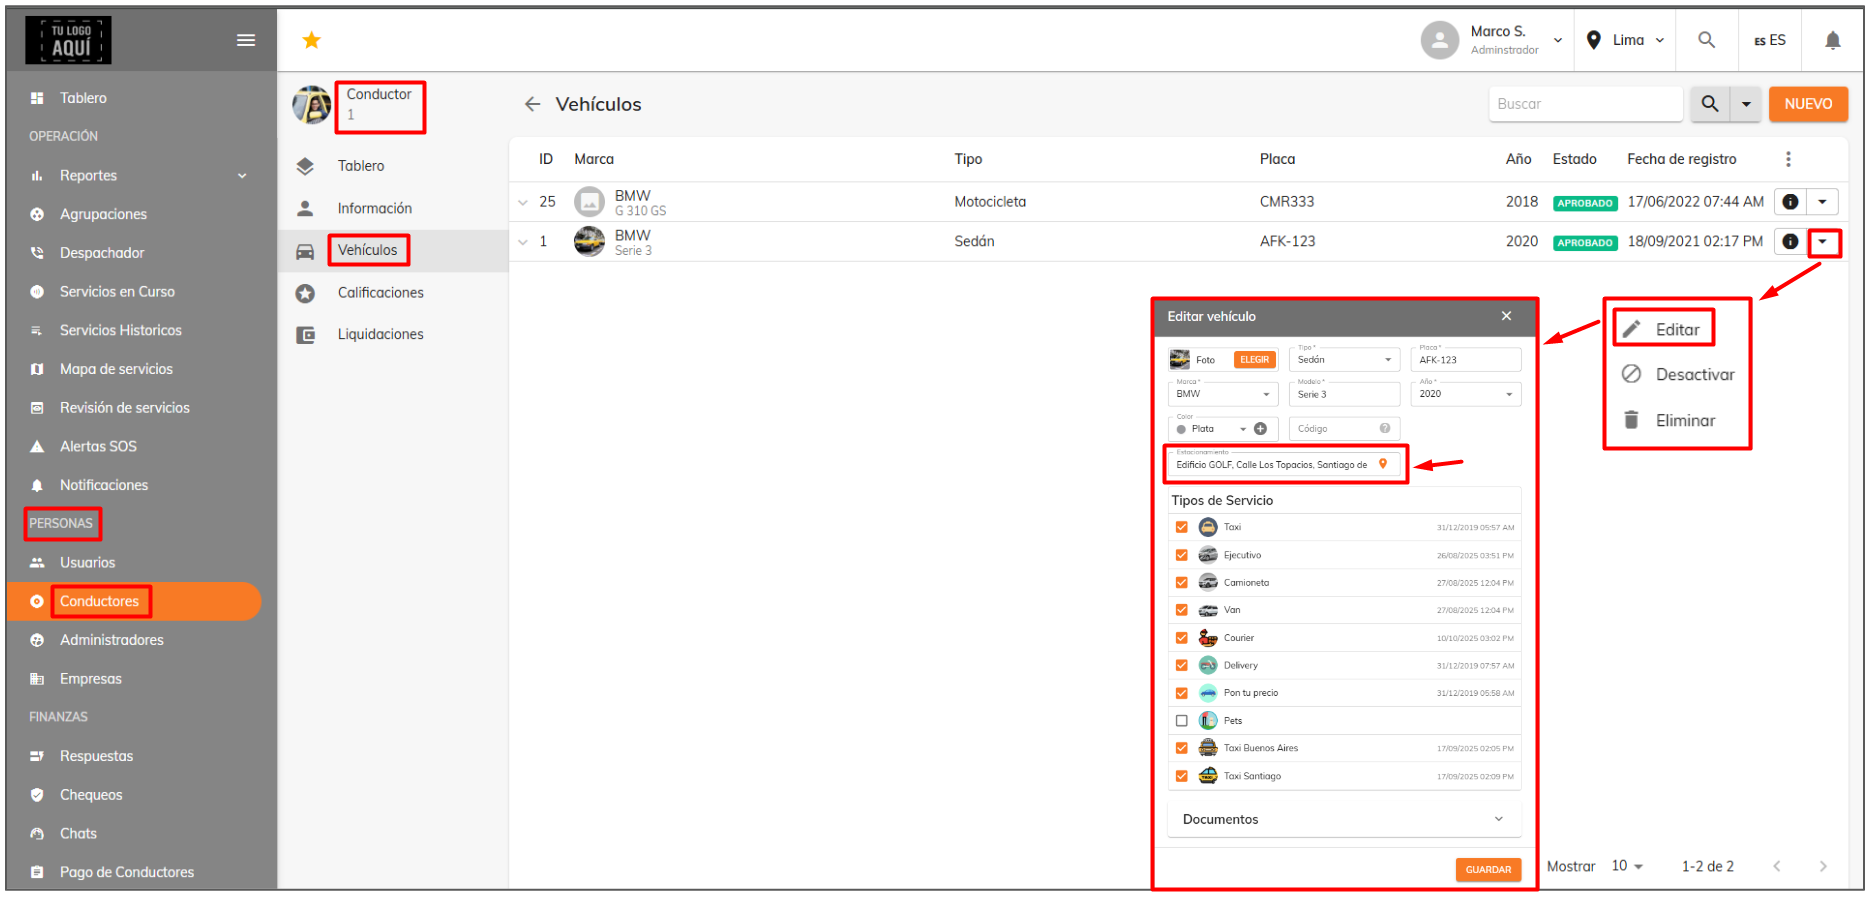
You also need to add the parking address for the vehicles of the drivers who will handle service groupings. To do so, go to the driver's vehicles section under People > Drivers.
If you don't have the groupings submodule enabled, check that your profile type has it enabled under Maintenance > Settings > System > User profiles.
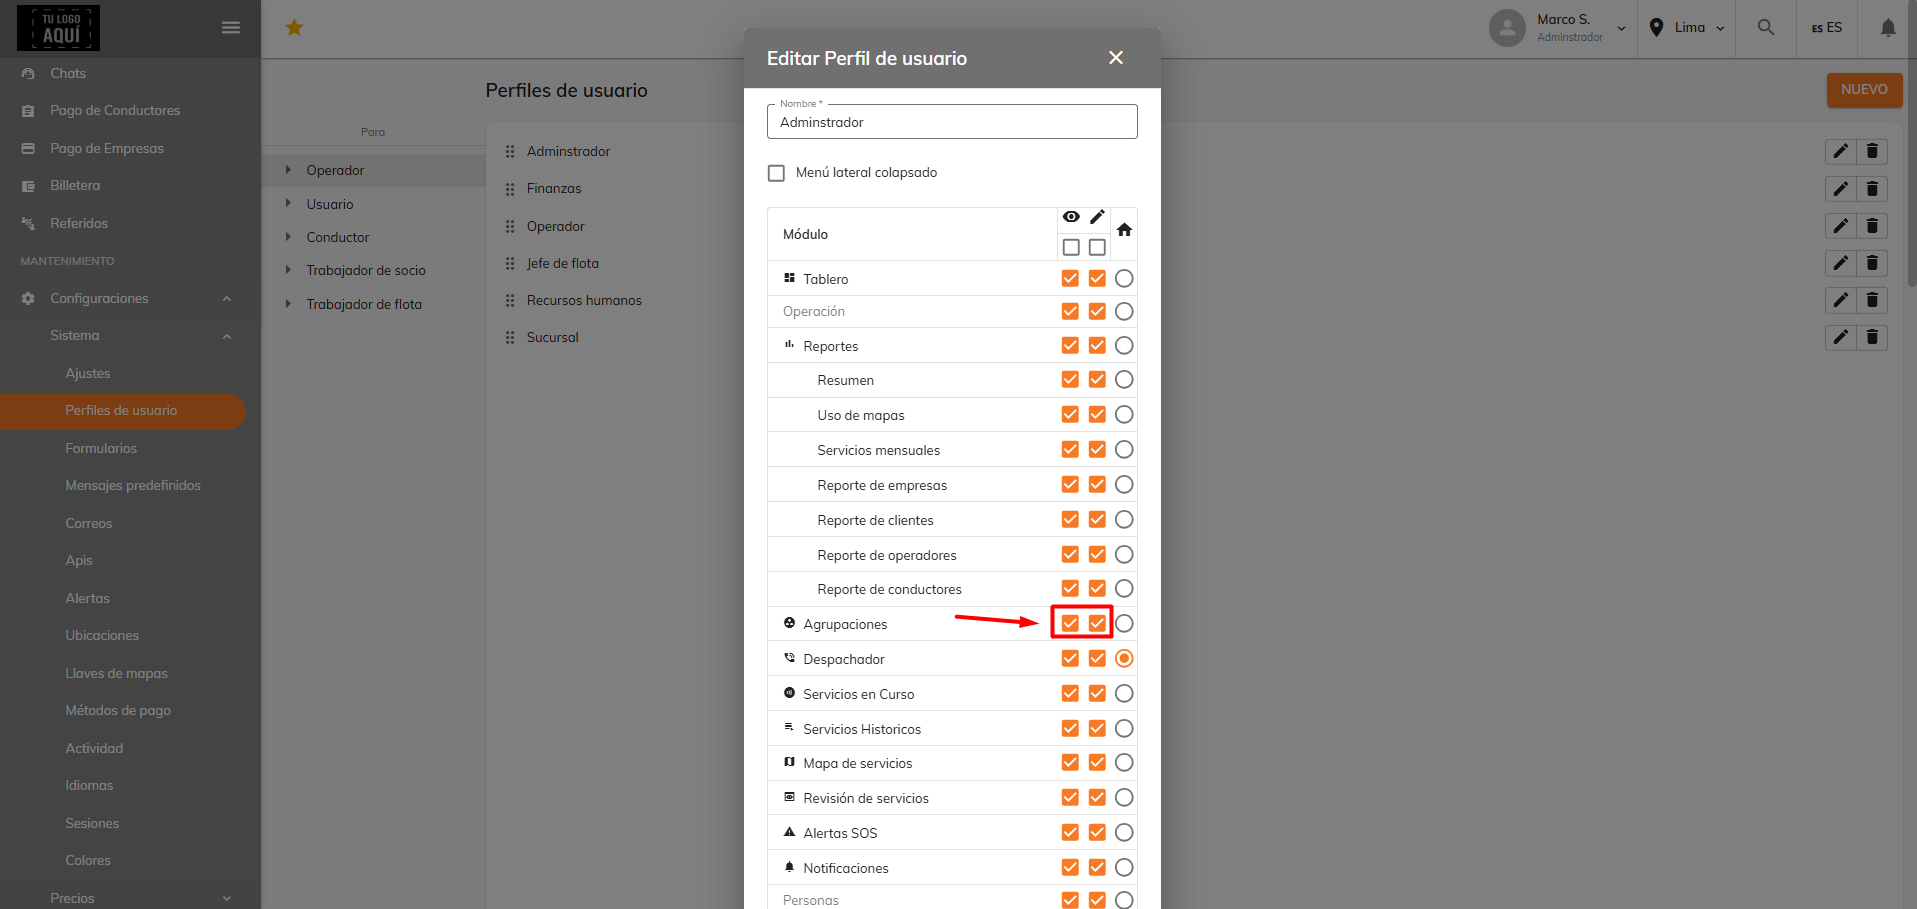
If the eye checkbox is active, it means you'll be able to view the submodule; and if the pencil checkbox is active, it means you can edit that submodule.
Was this article helpful?
Companies (Corporate Services)
- Creating Companies and Corporate Users
- Signing In as a Company User: Admin / Passenger
- Corporate users: Changing your password
- Setting Up Trip Validation for Company Users
- Bulk user import for companies
- Bulk import of ride bookings
- Forms: Dynamic field for company rides
- Groupings
- Bulk-deactivating users for a company