
 Use cases
 Messaging
 Taxi Companies
 Private Transport
 Transportation Entrepreneurs
 Last Mile
 SuperApp
 Software
 Taxi dispatch
 Corporate transportation
 Auction
 Products
 Booking Software
 Dispatch Platform
 Driver App
 Passenger App
 Web Widget
 Functions
 Schedule & Booking
 Driver Management
 Custom
 Corporate Portal
 Security & Support
 Resources
 Learn
Learn



Guide to auto-assignment in the web panel
In this guide we'll learn how trip auto-assignment works through the web panel, using the priority and schedule parameters assigned to each driver.
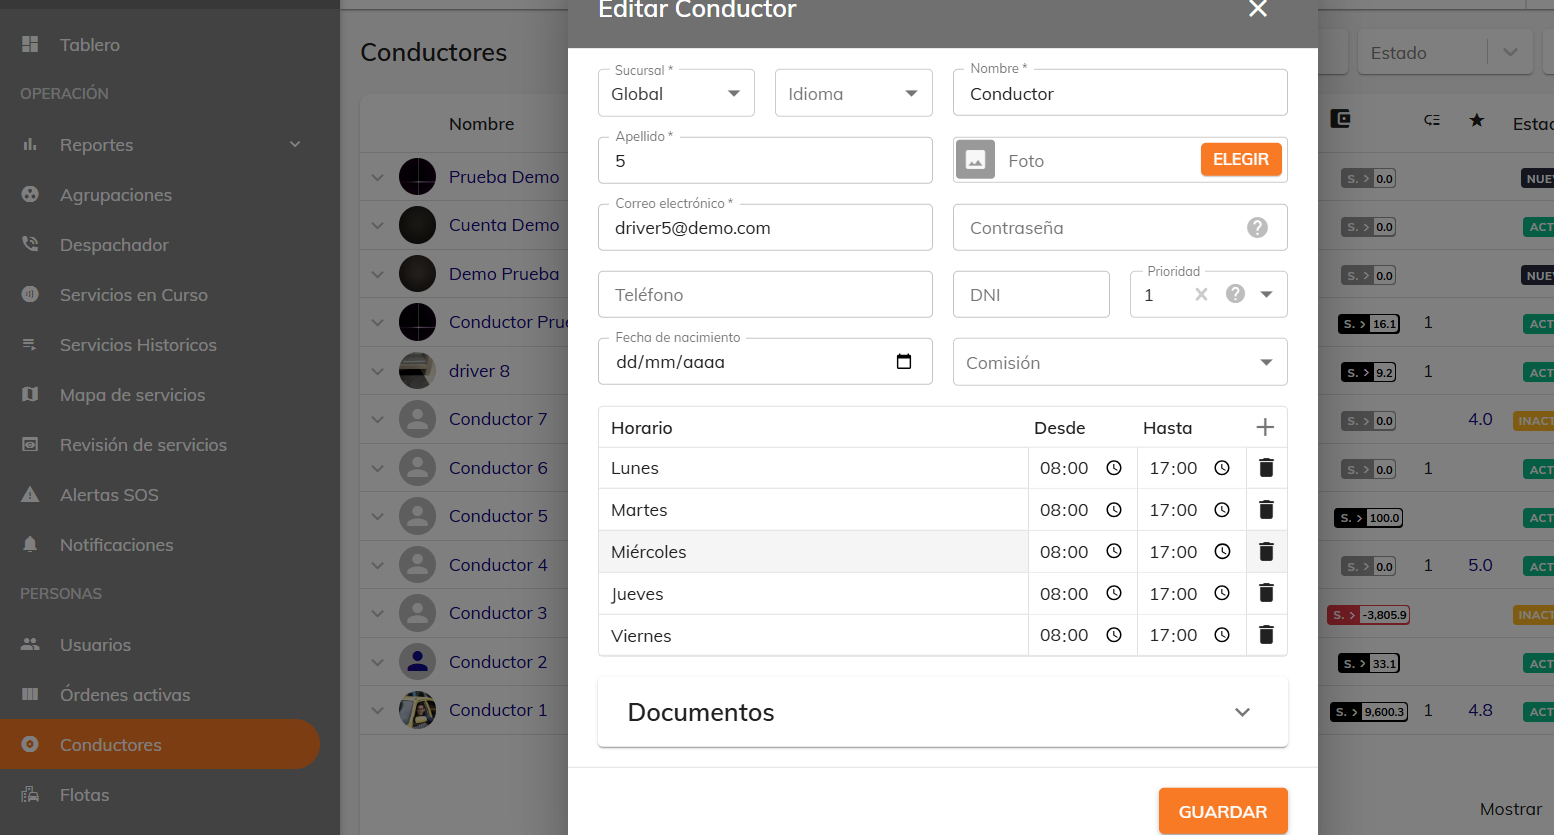
To use the priority and schedule section correctly, it's important to understand that the two are connected. The first step is to define the priority assigned to each driver.
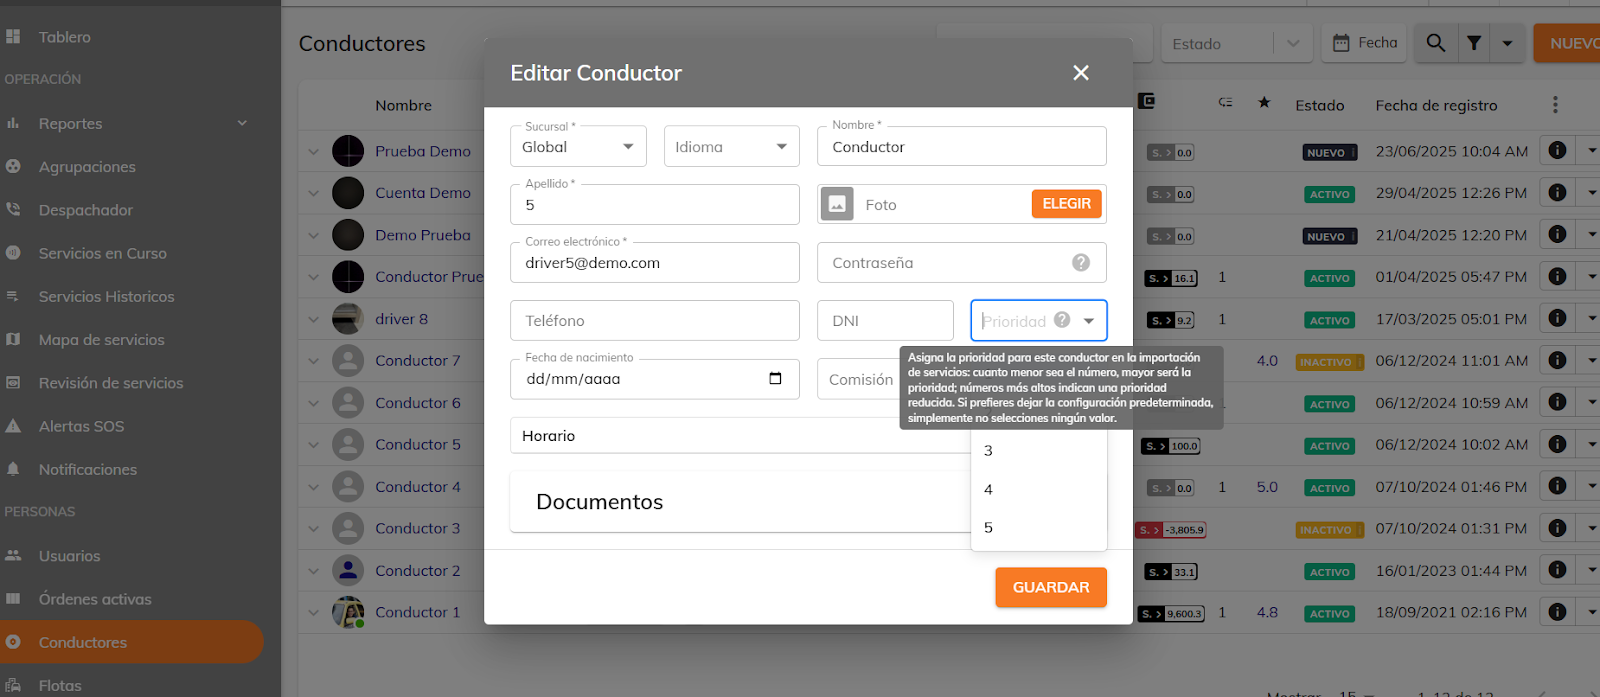
This priority directly affects the order in which trips are assigned, also taking into account each driver's working hours and parking location. Keep in mind that the schedule you define doesn't affect any other system features; its sole purpose is to organize this auto-assignment module.
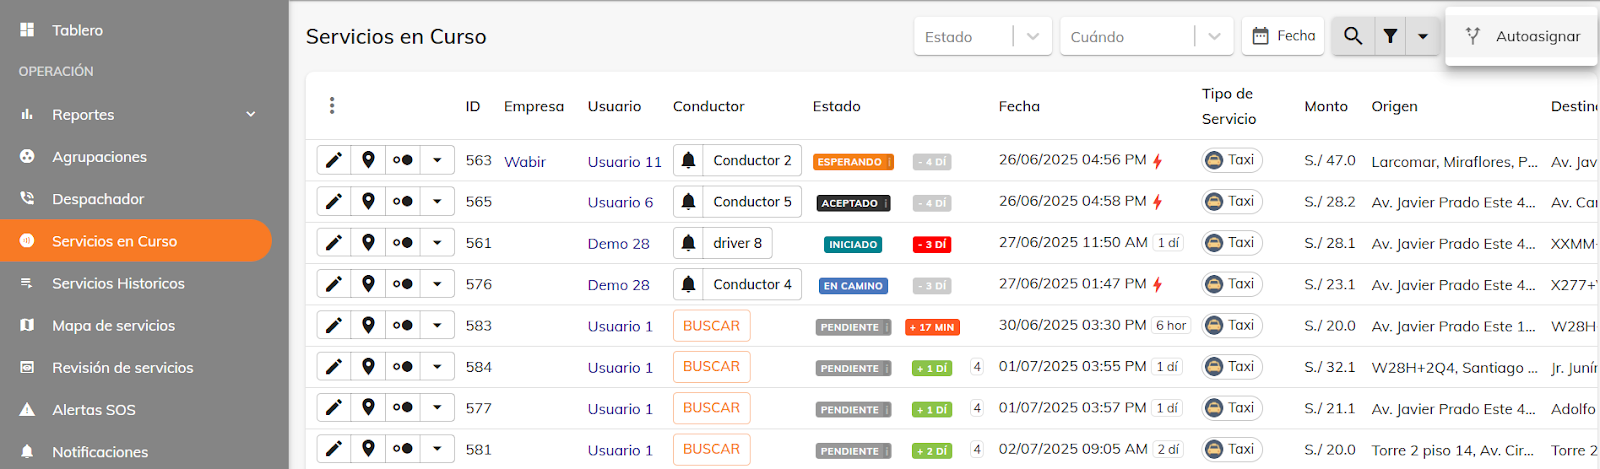
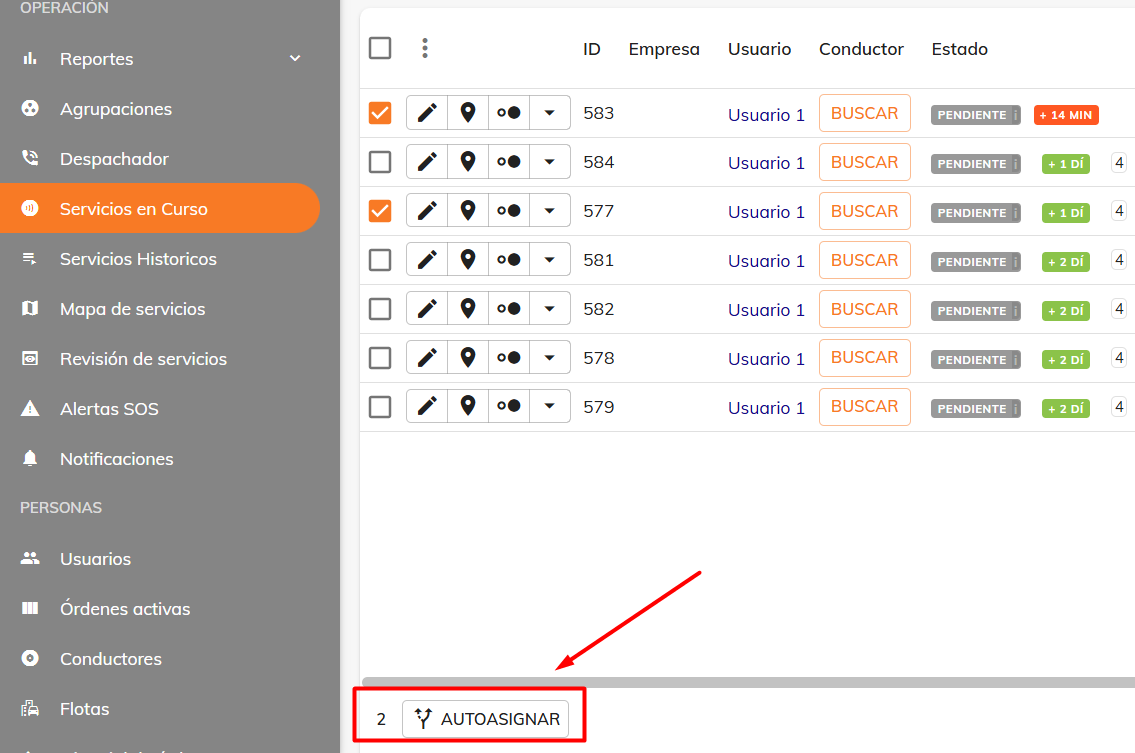
This feature is designed exclusively for the web panel. To get started, go to the "Trips in progress" section and check that there are scheduled trips without an assigned driver. Once confirmed, open the "Auto-assign" section.
When you click this option, a list of all trips that haven't been assigned yet appears. From this view, you can select one, several, or all available trips.
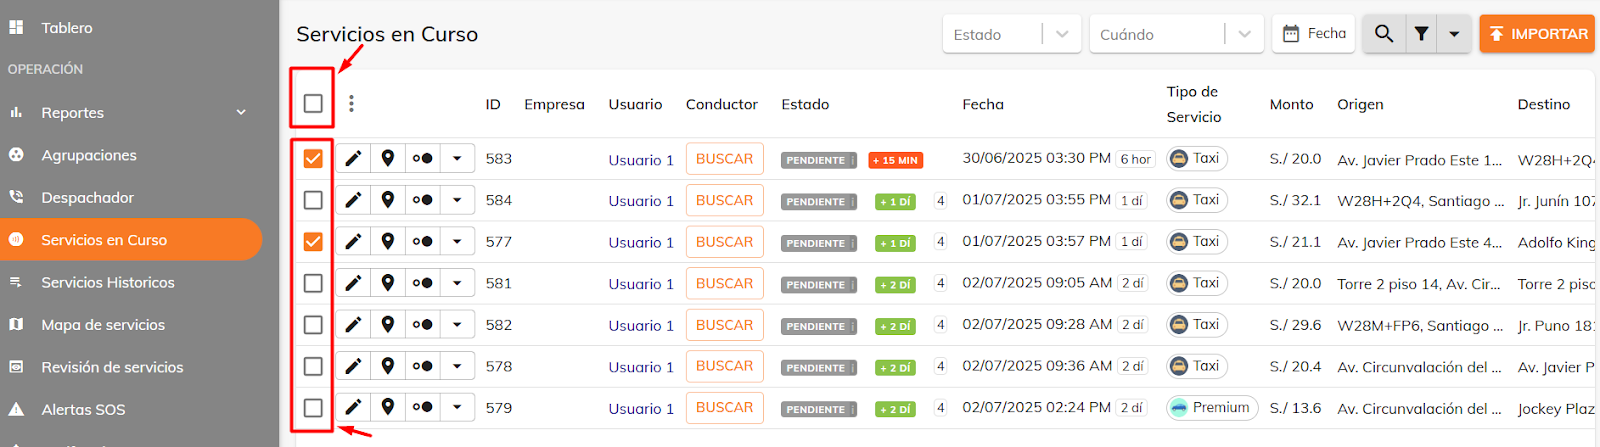
After selecting the services, click the “AUTO-ASSIGN” button to continue. Bear in mind the vehicle's location, as it's taken into account when assigning trips based on proximity.
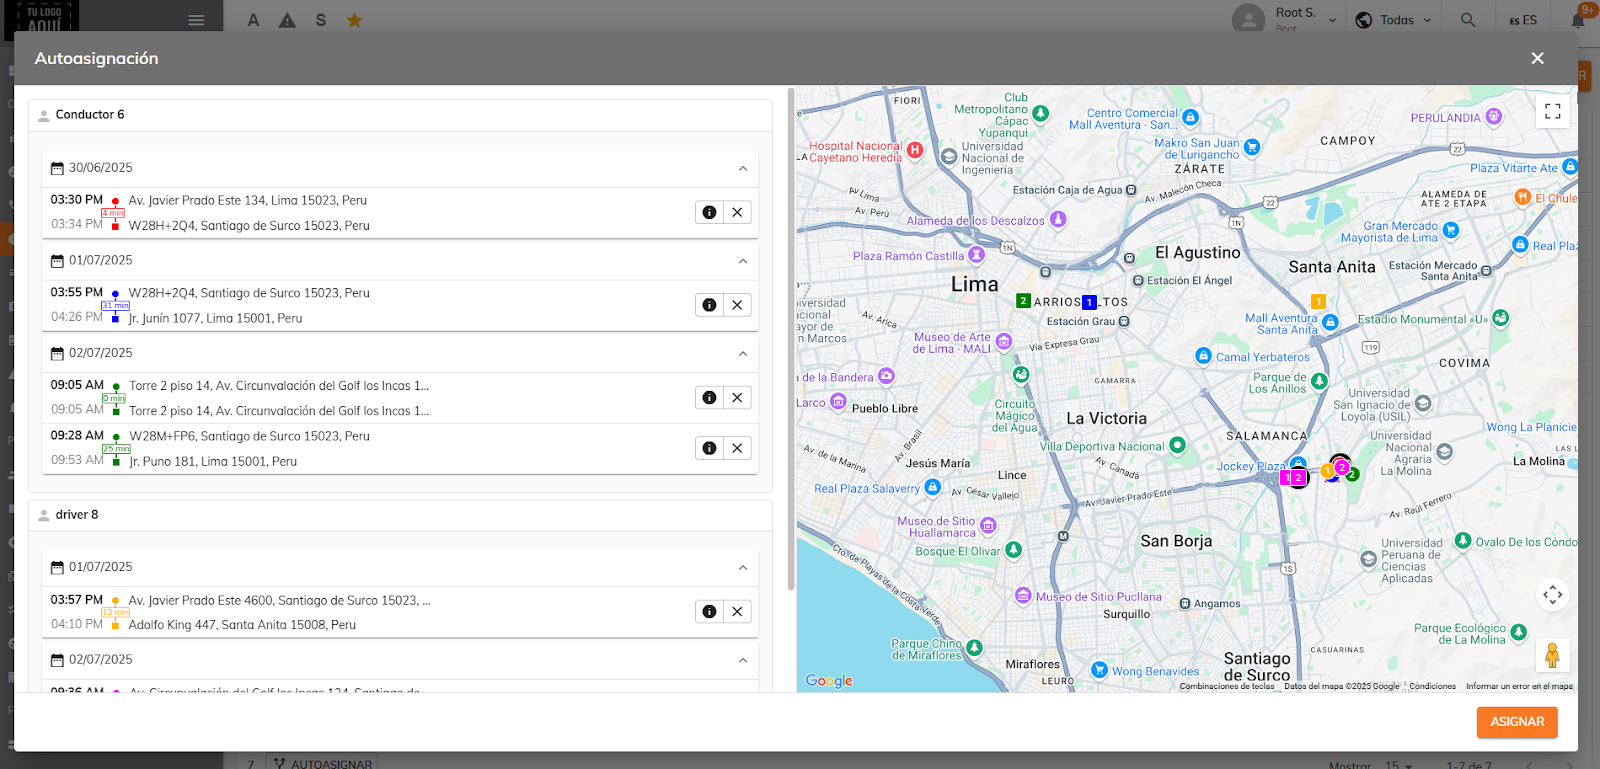
On the next screen, you'll see a list of drivers ordered by priority, along with the dates and trips available for each day. This distribution aims to optimize routes by factoring in the distance between trips. From this view, you can:
- Assign all suggested trips.
- Cancel some of them.
- Confirm only the trips the driver will take.
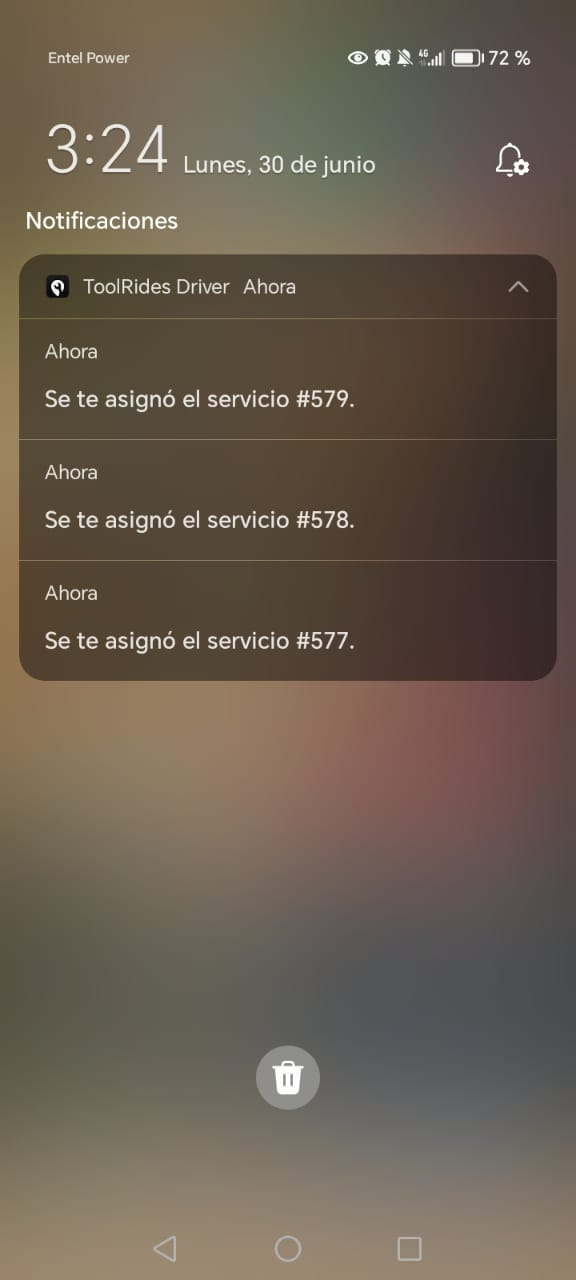
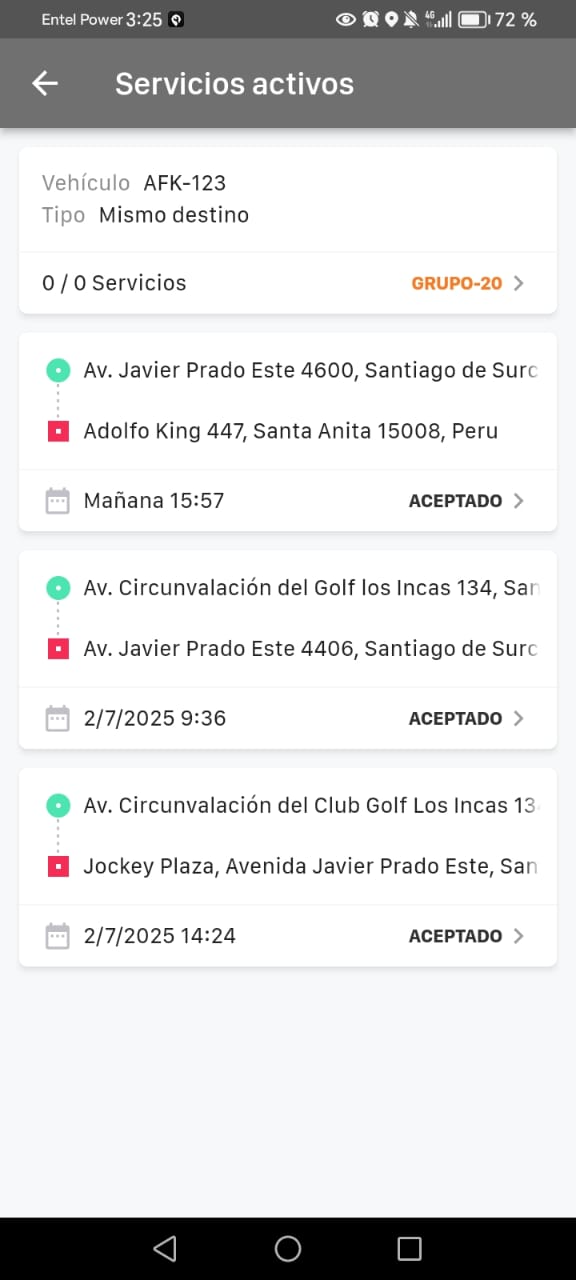
Finally, the driver receives a notification letting them know they have scheduled trips. To review them, they'll need to open their app and go to the “Active trips” section.
Was this article helpful?
Drivers and Vehicles
- Web Panel: Registering Drivers and Vehicles
- Web Panel: Approving Drivers and Vehicles
- Web panel: trip self-assignment for drivers
- Forms: Additional fields for Drivers and Vehicles
- Web Panel: Set up connection shifts for drivers
- Driver Forms: Document Expiration
- Cancel a Trip from the Driver App When the Customer Is a No-Show
- Adding extra charges when finishing a trip
- Web Panel: Changing vehicle images
- Guide to auto-assignment in the web panel