
 Use cases
 Messaging
 Taxi Companies
 Private Transport
 Transportation Entrepreneurs
 Last Mile
 SuperApp
 Software
 Taxi dispatch
 Corporate transportation
 Auction
 Products
 Booking Software
 Dispatch Platform
 Driver App
 Passenger App
 Web Widget
 Functions
 Schedule & Booking
 Driver Management
 Custom
 Corporate Portal
 Security & Support
 Resources
 Learn
Learn



Web panel: trip self-assignment for drivers
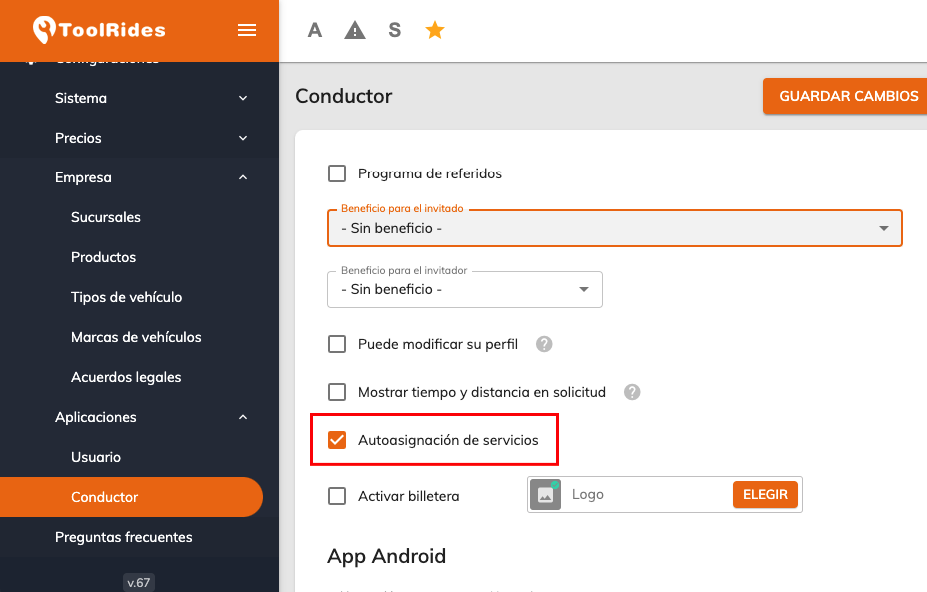
Trip self-assignment lets drivers request and take scheduled trips, subject to prior approval by the operator. First, enable this option under Settings > Apps > Driver.
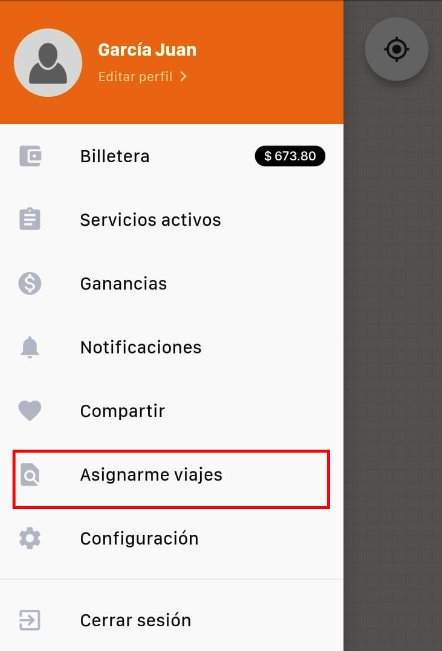
Once the option is enabled, open the Driver app and look for the Assign trips to me option in the side menu.
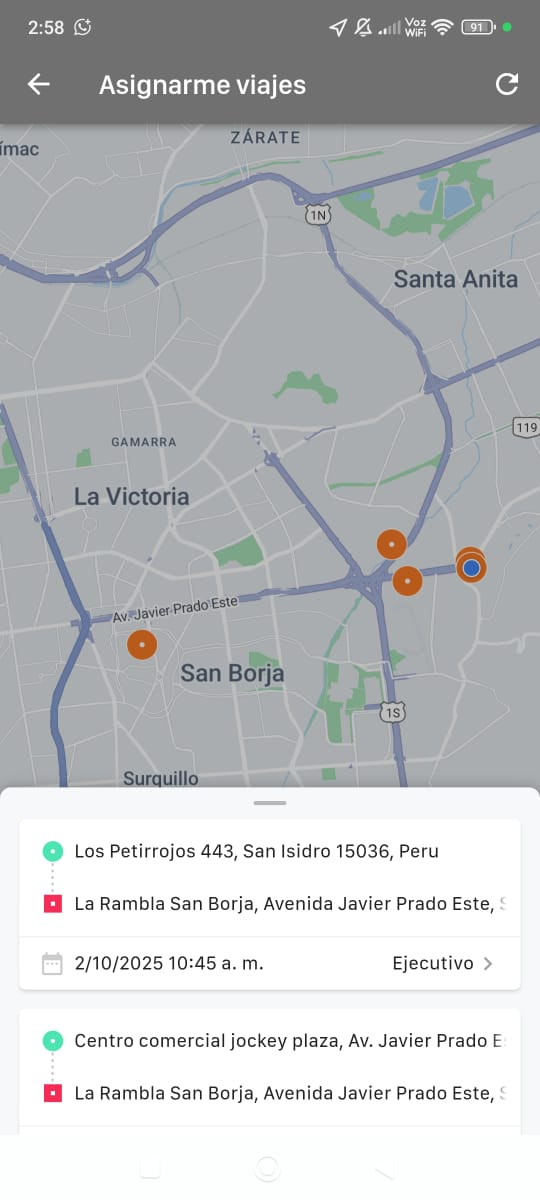
On the map that appears, drivers can see scheduled trips and request to be assigned to them.
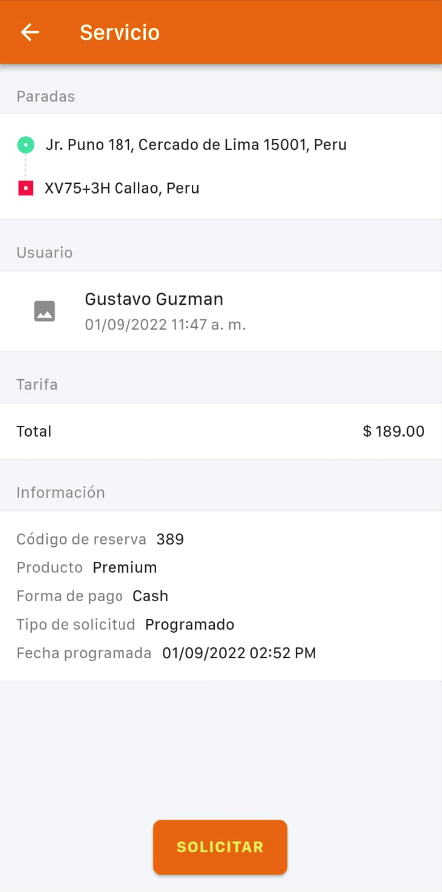
When you open a trip, you can see its details, the pickup location, and the fare. If everything looks good, tap the REQUEST button.
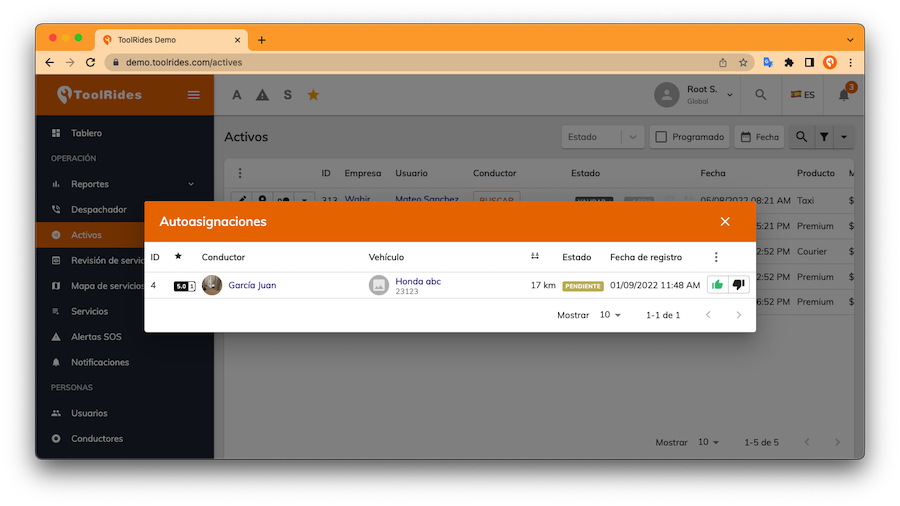
Once drivers request a trip, you can review those requests in the "Active" or "Trips in progress" module. Tapping the "SEARCH" button shows every driver who requested that trip, so you can assign it to a specific one.
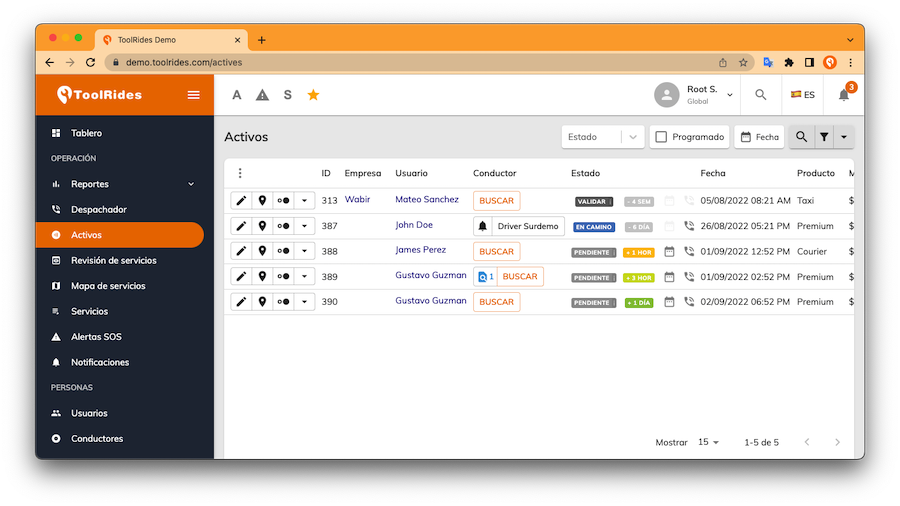
When you tap the green approval button, the driver will see the requested trip on their "Active trips" screen.
Was this article helpful?
Drivers and Vehicles
- Web Panel: Registering Drivers and Vehicles
- Web Panel: Approving Drivers and Vehicles
- Web panel: trip self-assignment for drivers
- Forms: Additional fields for Drivers and Vehicles
- Web Panel: Set up connection shifts for drivers
- Driver Forms: Document Expiration
- Cancel a Trip from the Driver App When the Customer Is a No-Show
- Adding extra charges when finishing a trip
- Web Panel: Changing vehicle images
- Guide to auto-assignment in the web panel