
 Use cases
 Messaging
 Taxi Companies
 Private Transport
 Transportation Entrepreneurs
 Last Mile
 SuperApp
 Software
 Taxi dispatch
 Corporate transportation
 Auction
 Products
 Booking Software
 Dispatch Platform
 Driver App
 Passenger App
 Web Widget
 Functions
 Schedule & Booking
 Driver Management
 Custom
 Corporate Portal
 Security & Support
 Resources
 Learn
Learn



Creating a Google Maps Account
Before you start, sign in to the following link with the account you want to activate: https://console.cloud.google.com/
The video below will guide you through activating your Google Maps account, including adding a card to verify it.
Go to https://console.cloud.google.com/ and create a new project in this section if you don't already have one:
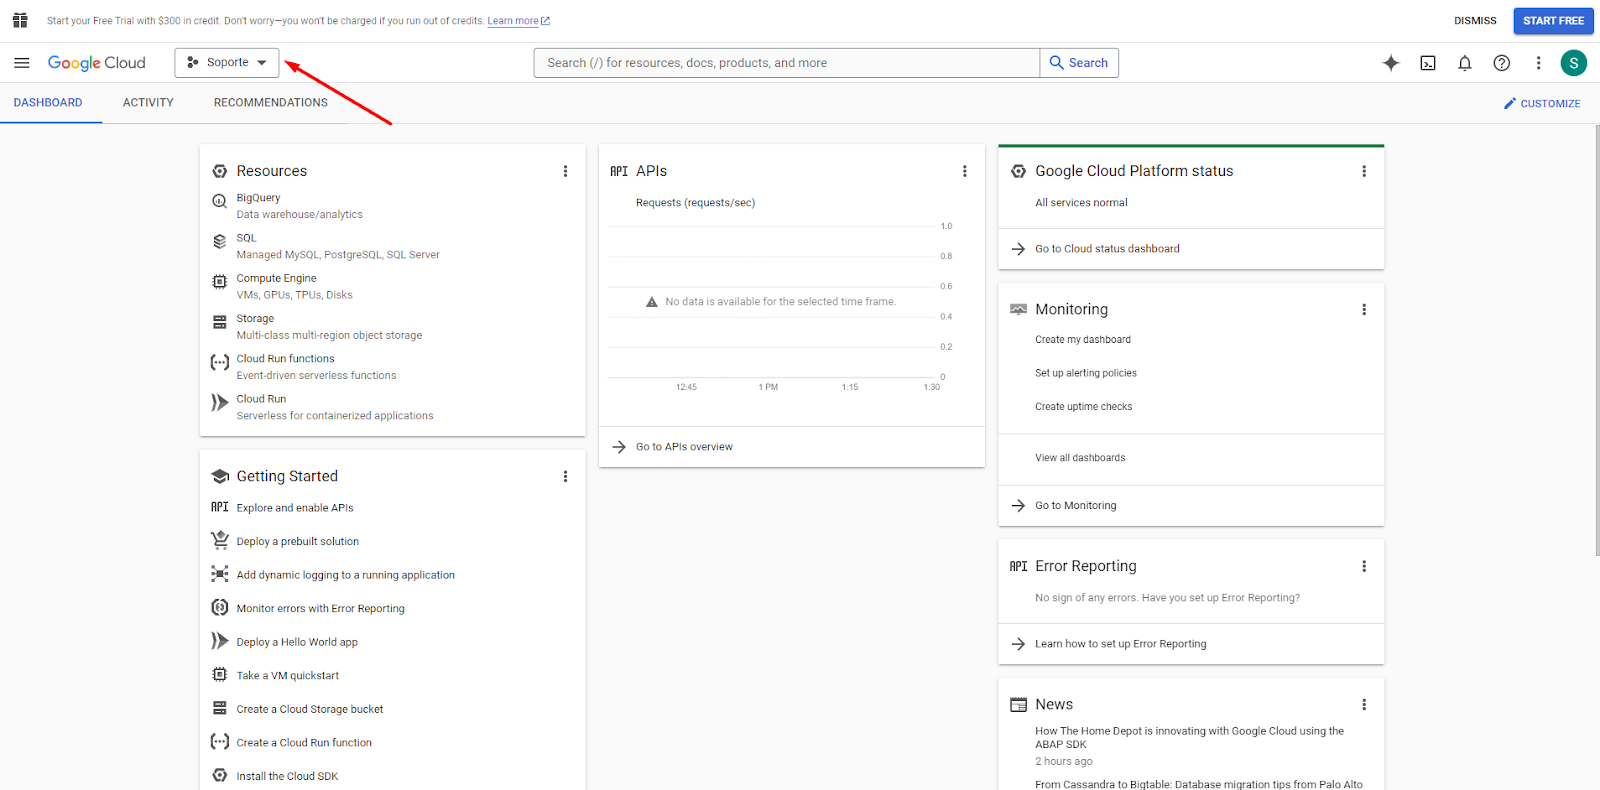
After clicking "Create a new project," this popup will appear:
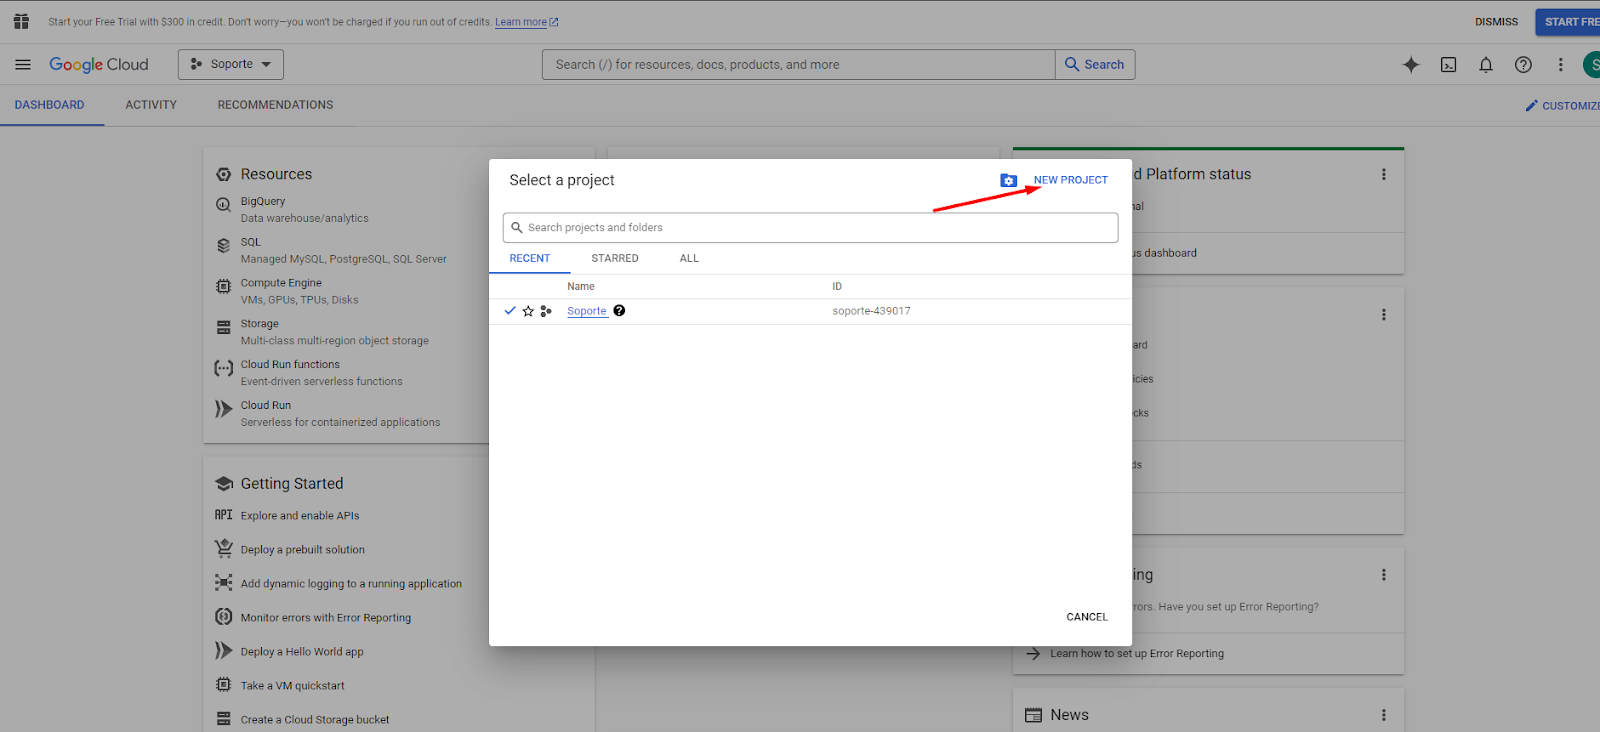
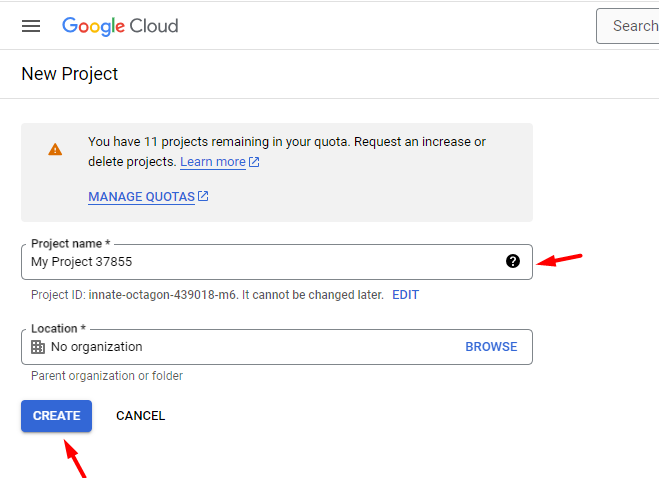
Here, choose the name you want. You don't need to enter anything in "Location." Click "Create" and the project will be set up in a few seconds.
Once your project is created, select it by clicking on it.
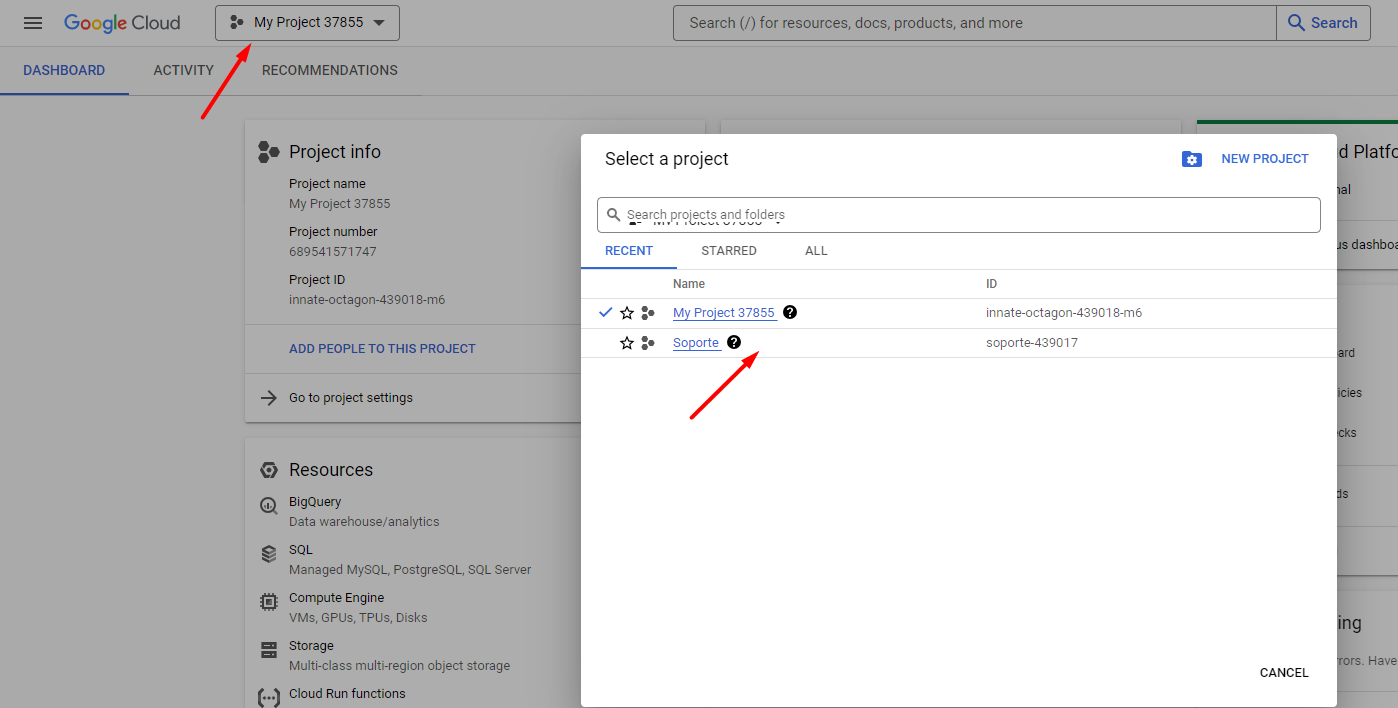
Now that you've created and selected your project, click "Start free":
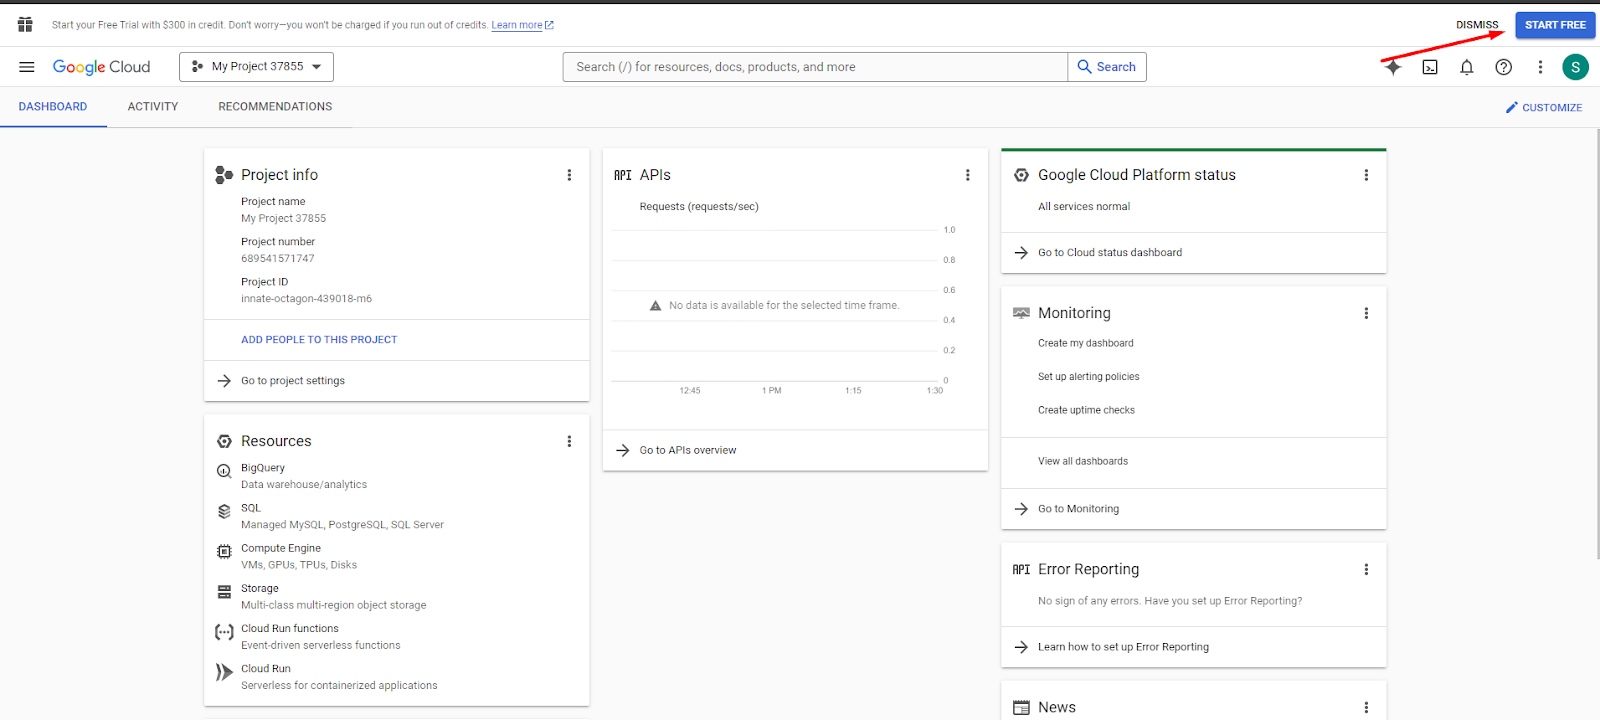
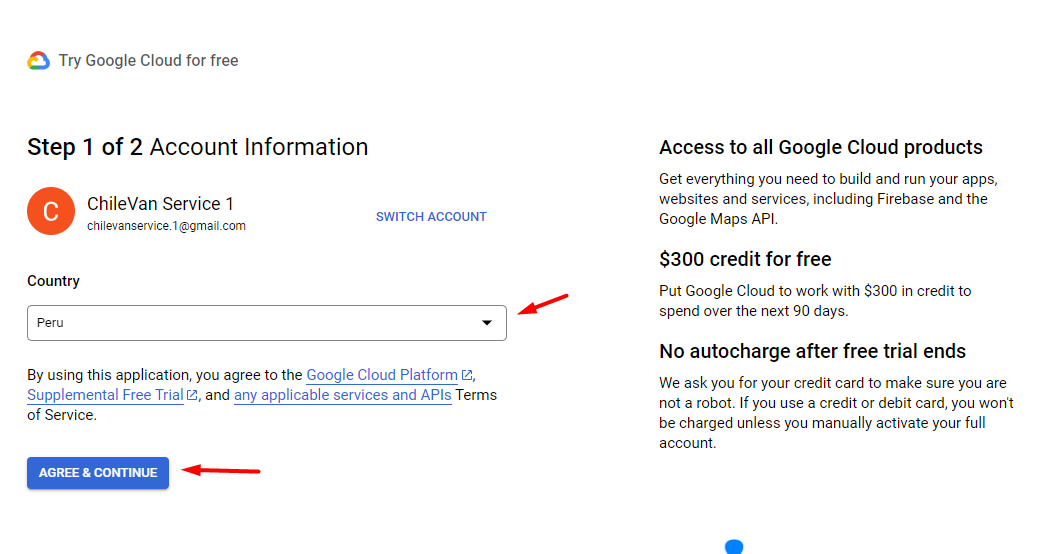
Here, select your country and click "Agree and continue."
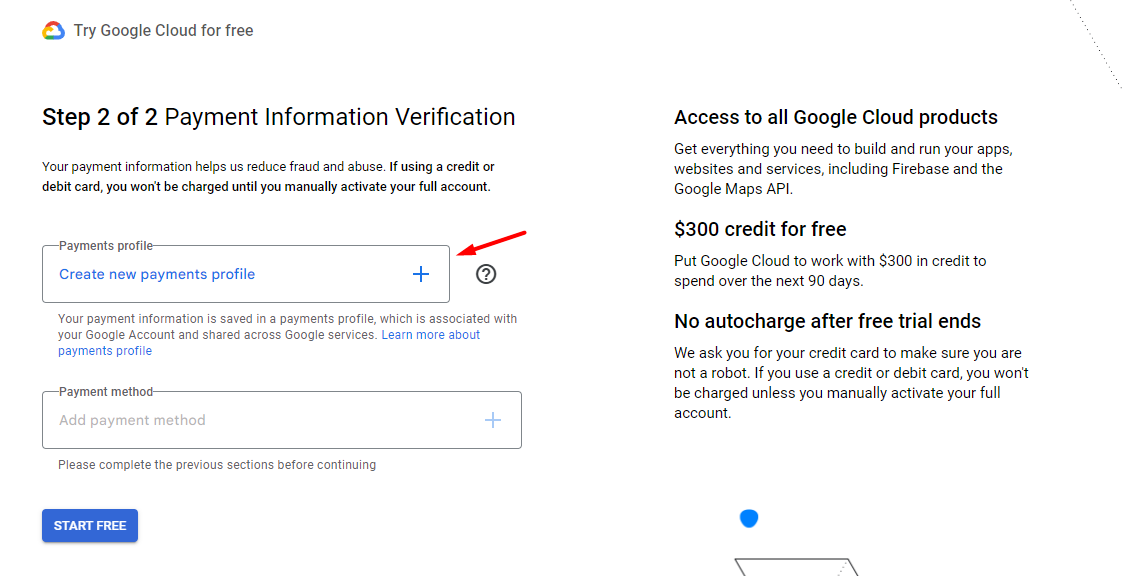
Next, you'll need to create a payment profile.
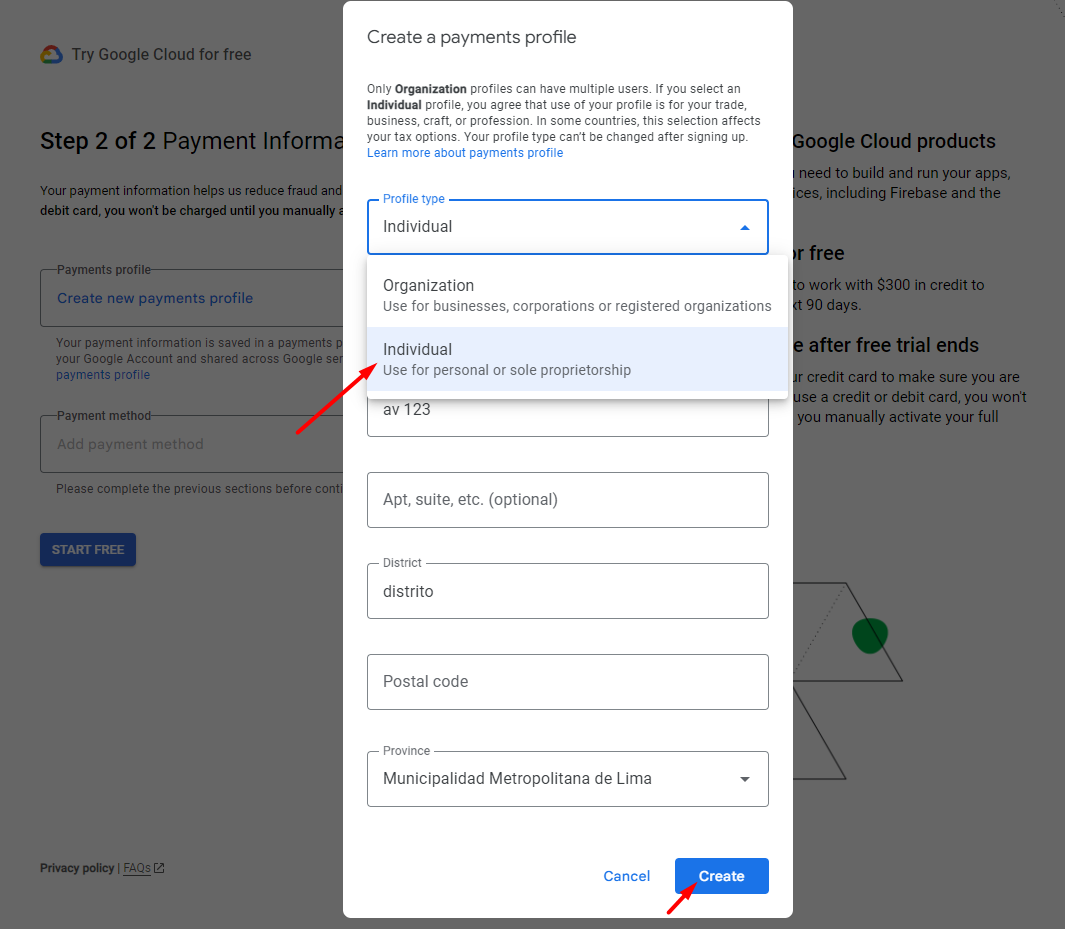
To keep the steps simpler, select "Individual" instead of "Organization," which is the default. Then enter a name, address, district, and province, and click "Create."
After your profile is created, you'll be asked to add a payment method. In this step, you'll need to add a card.
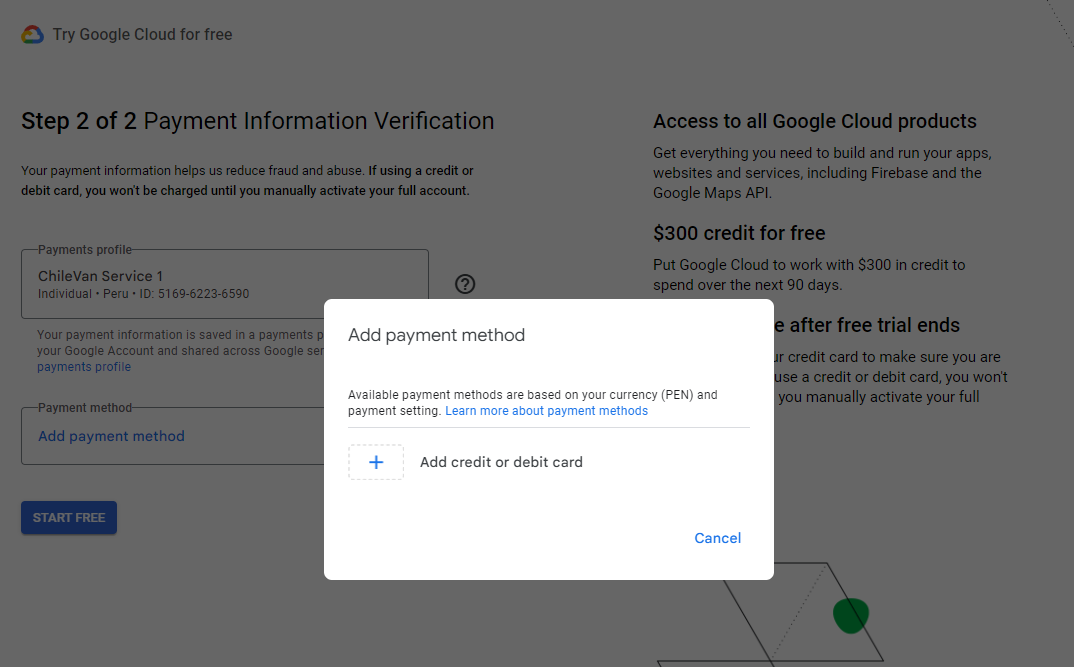
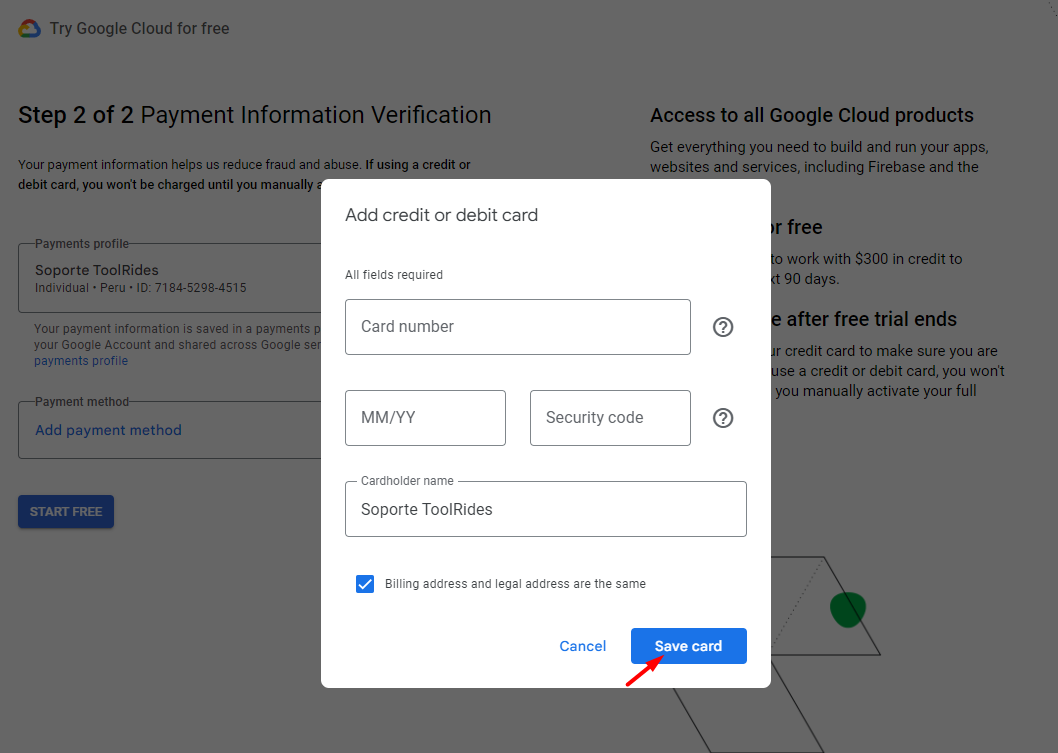
This is the form you'll complete with your card details. After filling in the information, click "Save card."
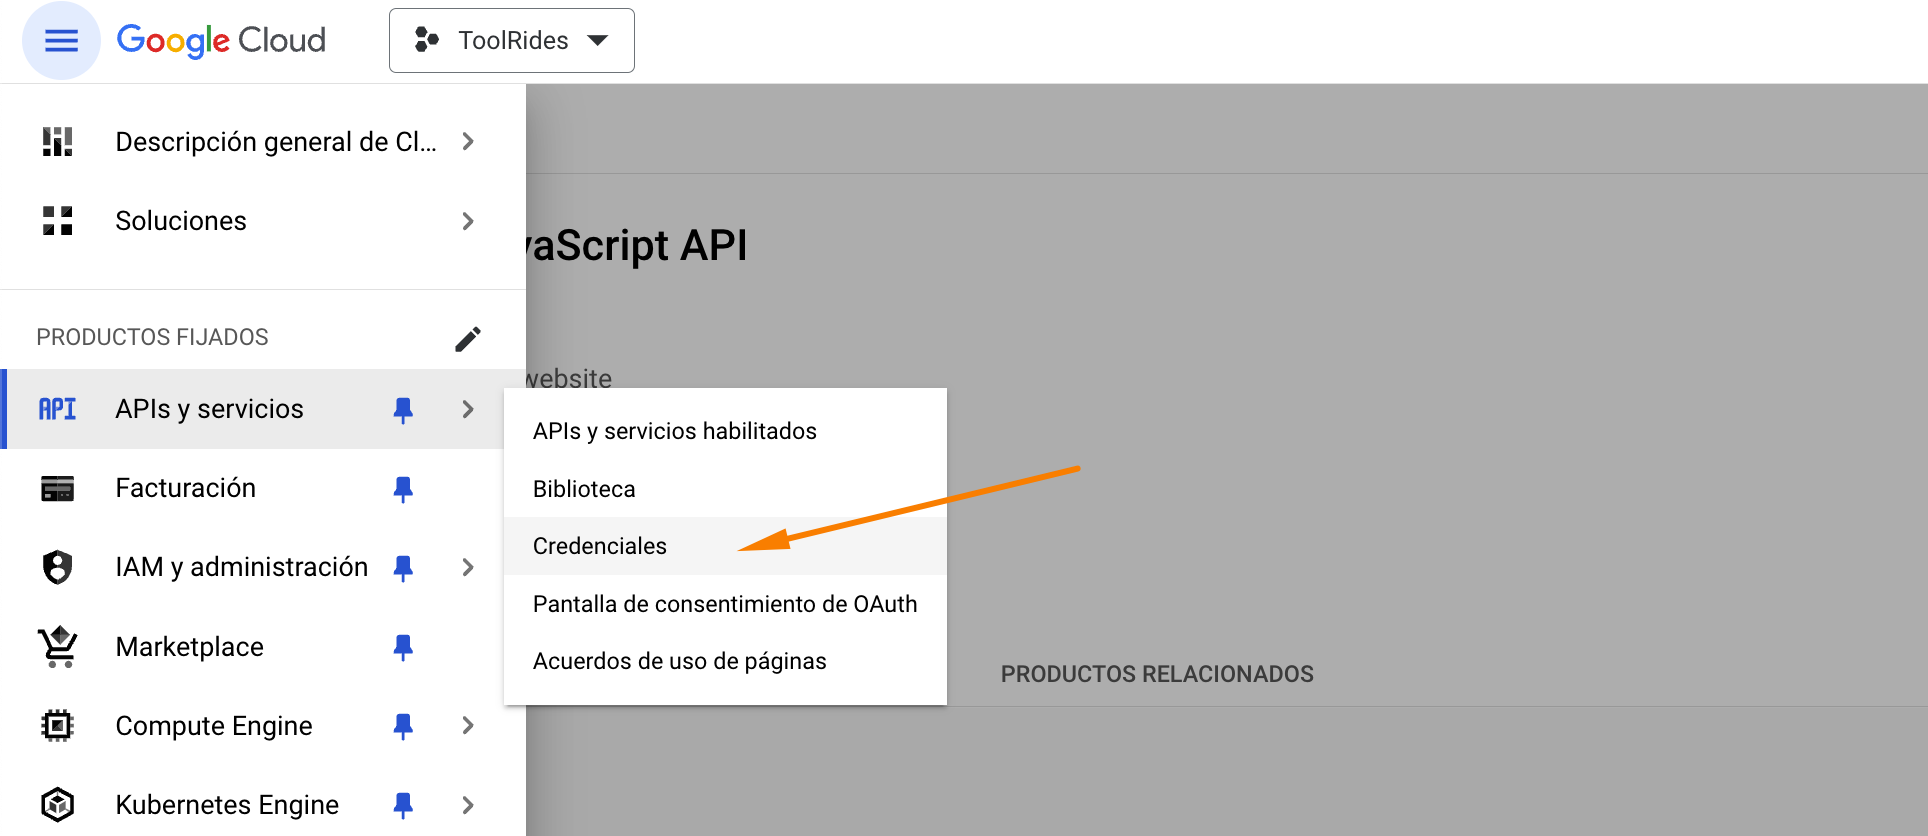
Once your billing account is verified, you'll need to generate the keys that will later be added to the Web Panel. From the options menu, go to APIs & Services > Credentials.
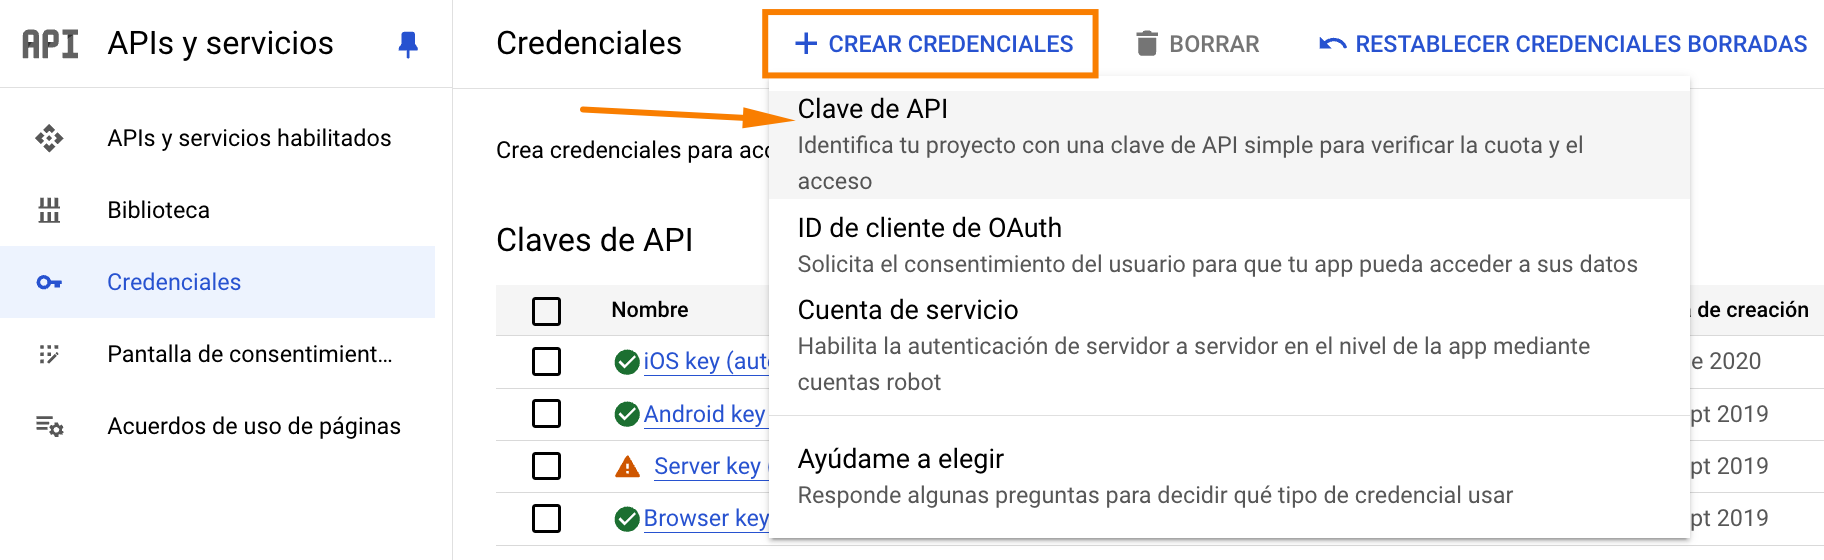
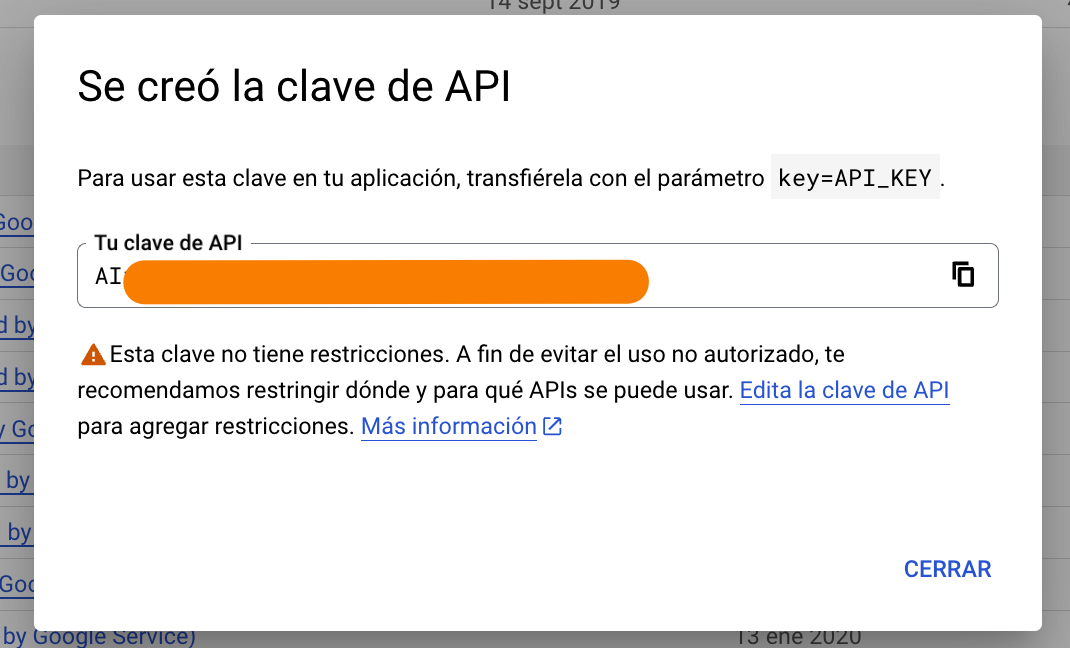
Here, click the "+ CREATE CREDENTIALS" button and choose "API key."
Once the key is generated, copy it to use later in the web panel. You'll also need to create another key for the apps. Both should be shared in the setup form we provide.
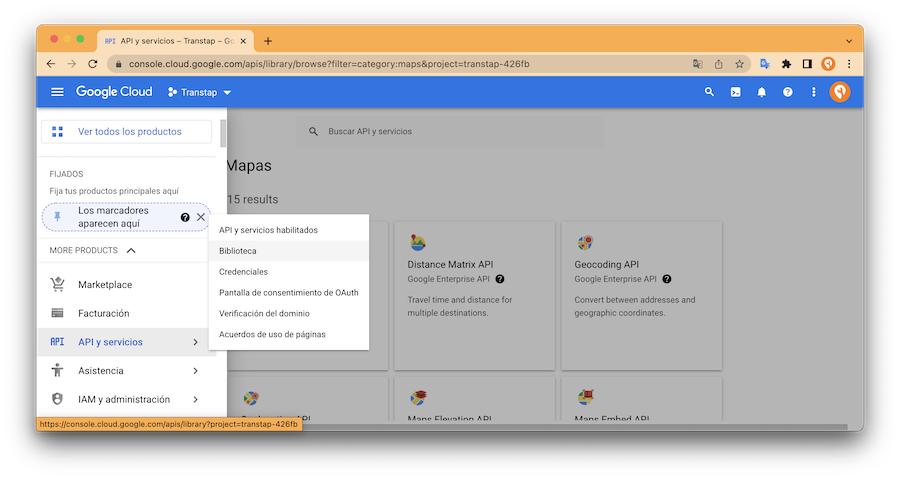
Once the keys are generated, you need to enable the APIs that can be integrated into our system. From the options menu, go to APIs & Services > Library.
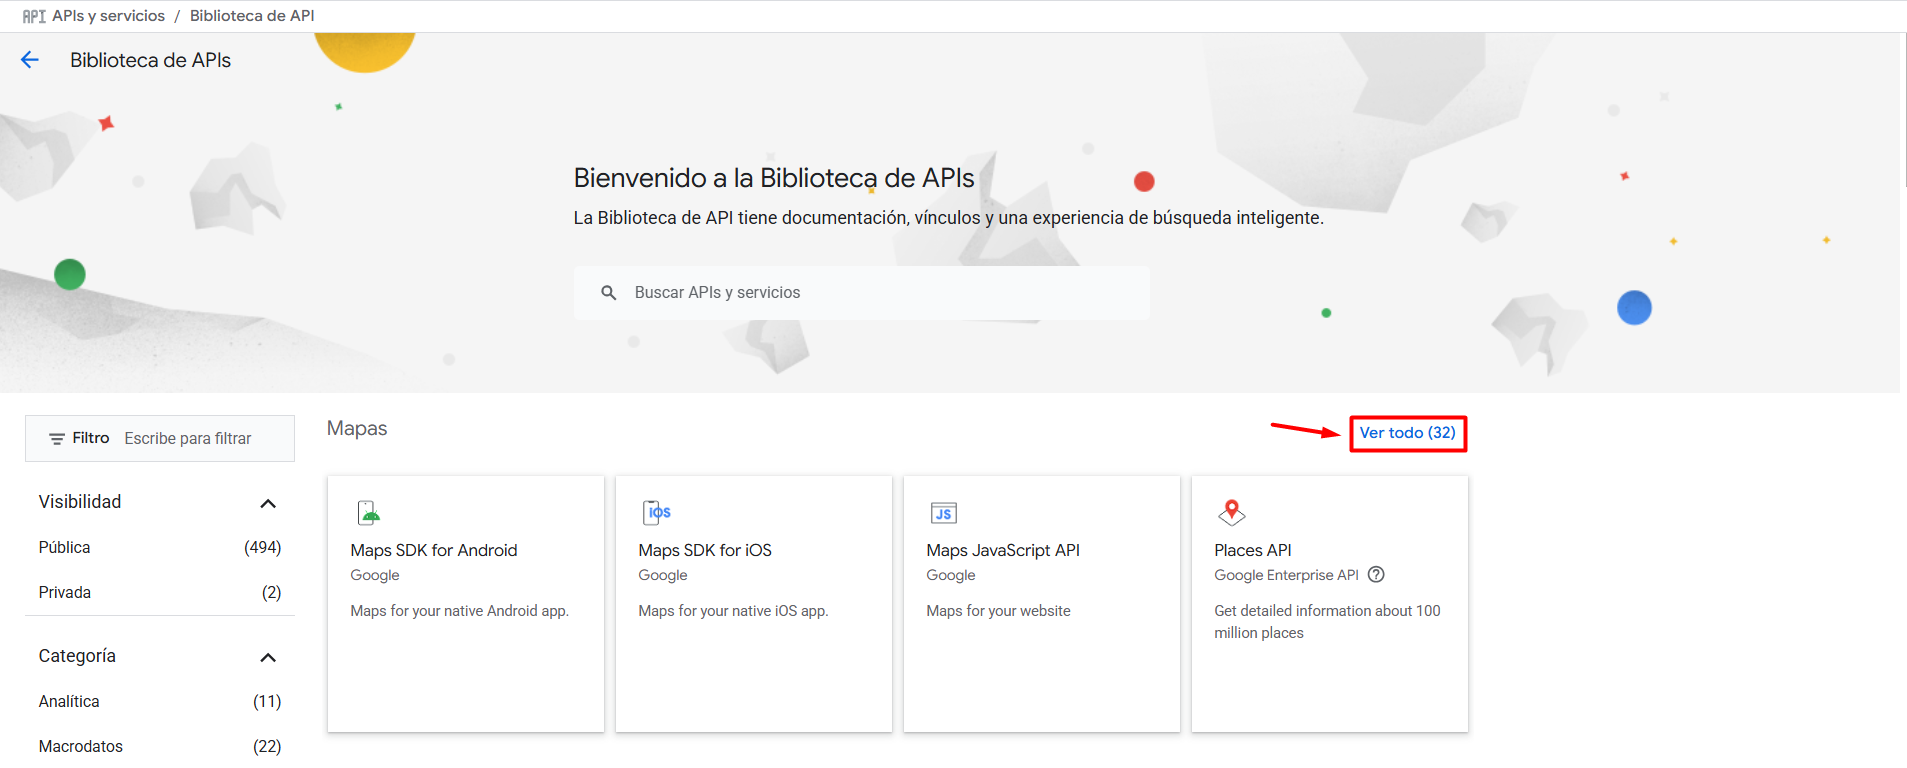
On this screen, click "View all" at the "Maps" level:
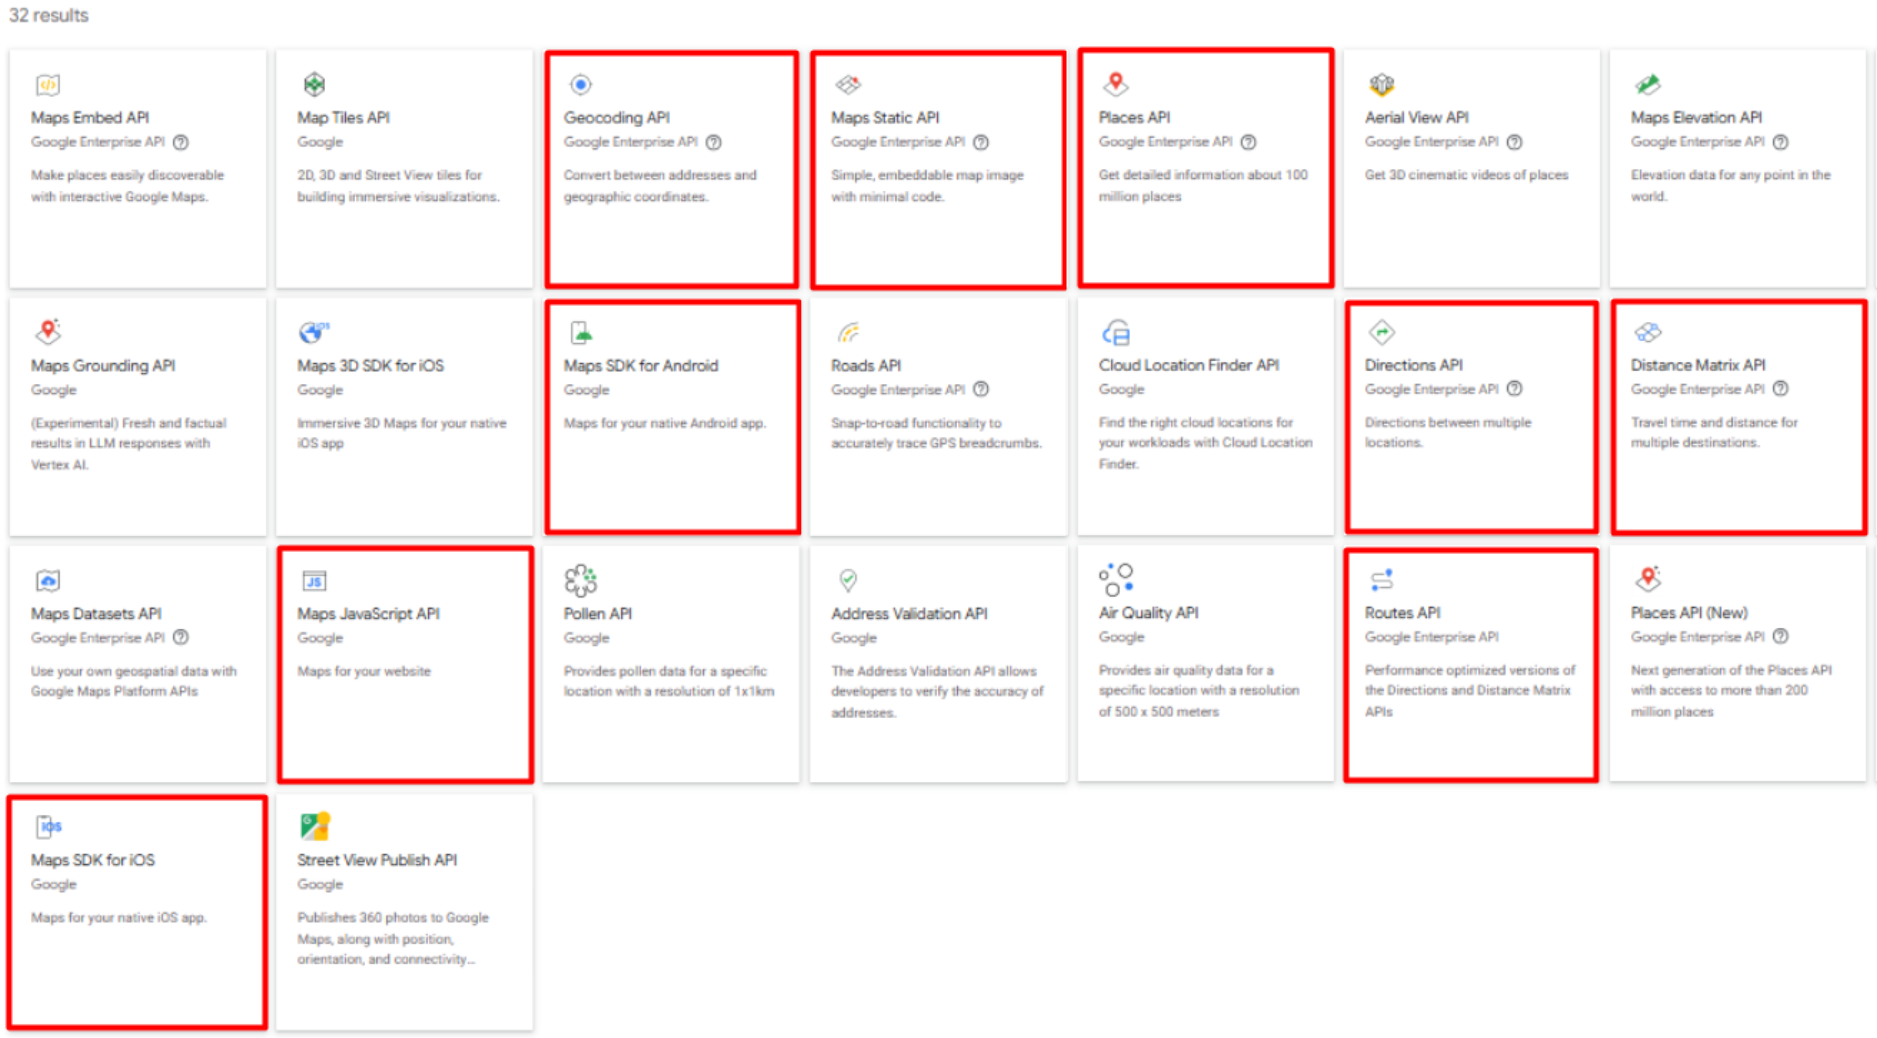
Once all the Maps API results are shown, you'll need to enable the following APIs, outlined in red.
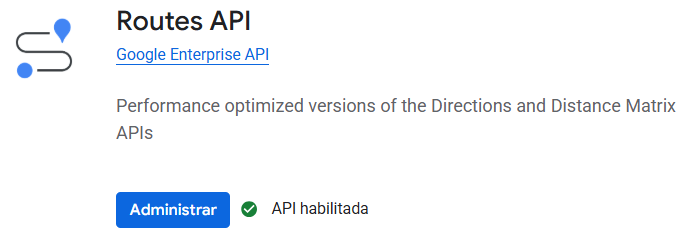
When you open each marked option, the "Enable" button below will appear. Click it.
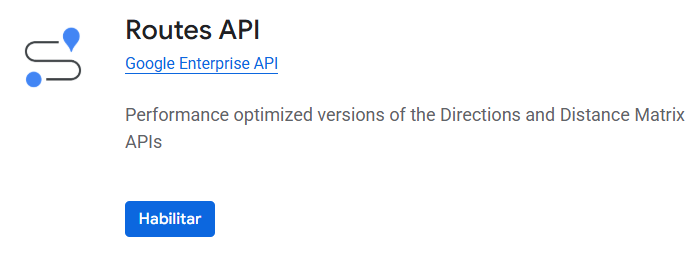
If it's already enabled, it should look like this:
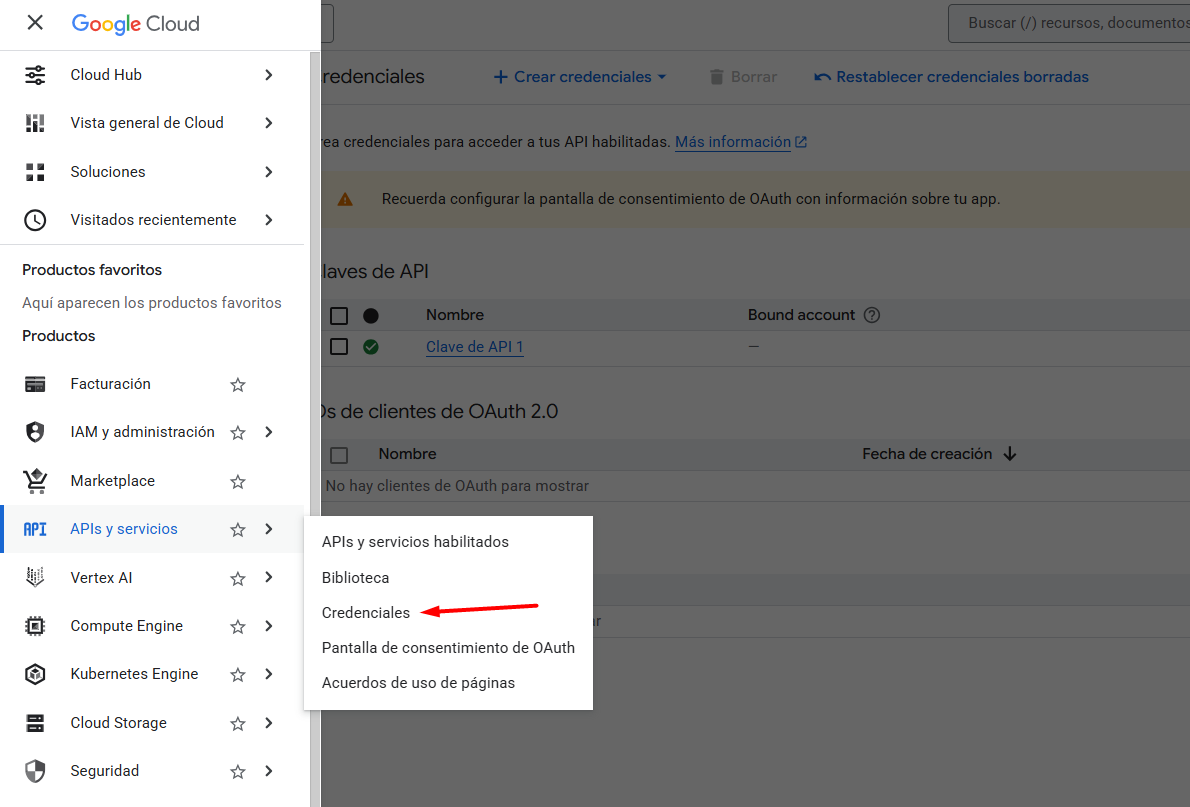
Go back to the Menu and head to the APIs & Services > Credentials section.
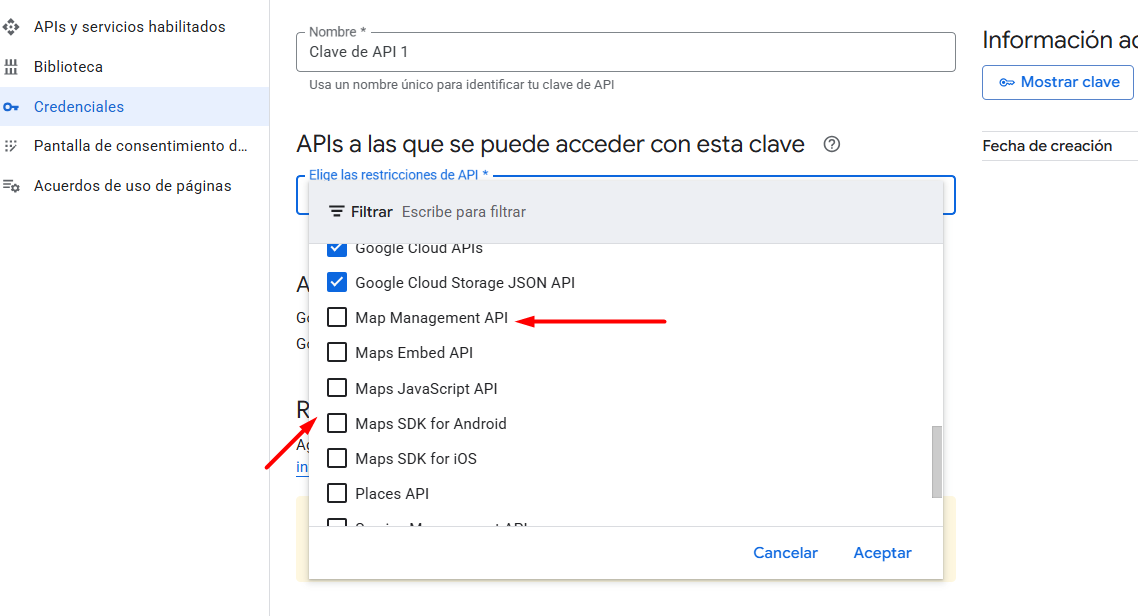
Then go to the "Edit API key" option. Select the APIs you enabled earlier.
After following these steps, go to the web panel and head to the Settings > System > Map keys section.
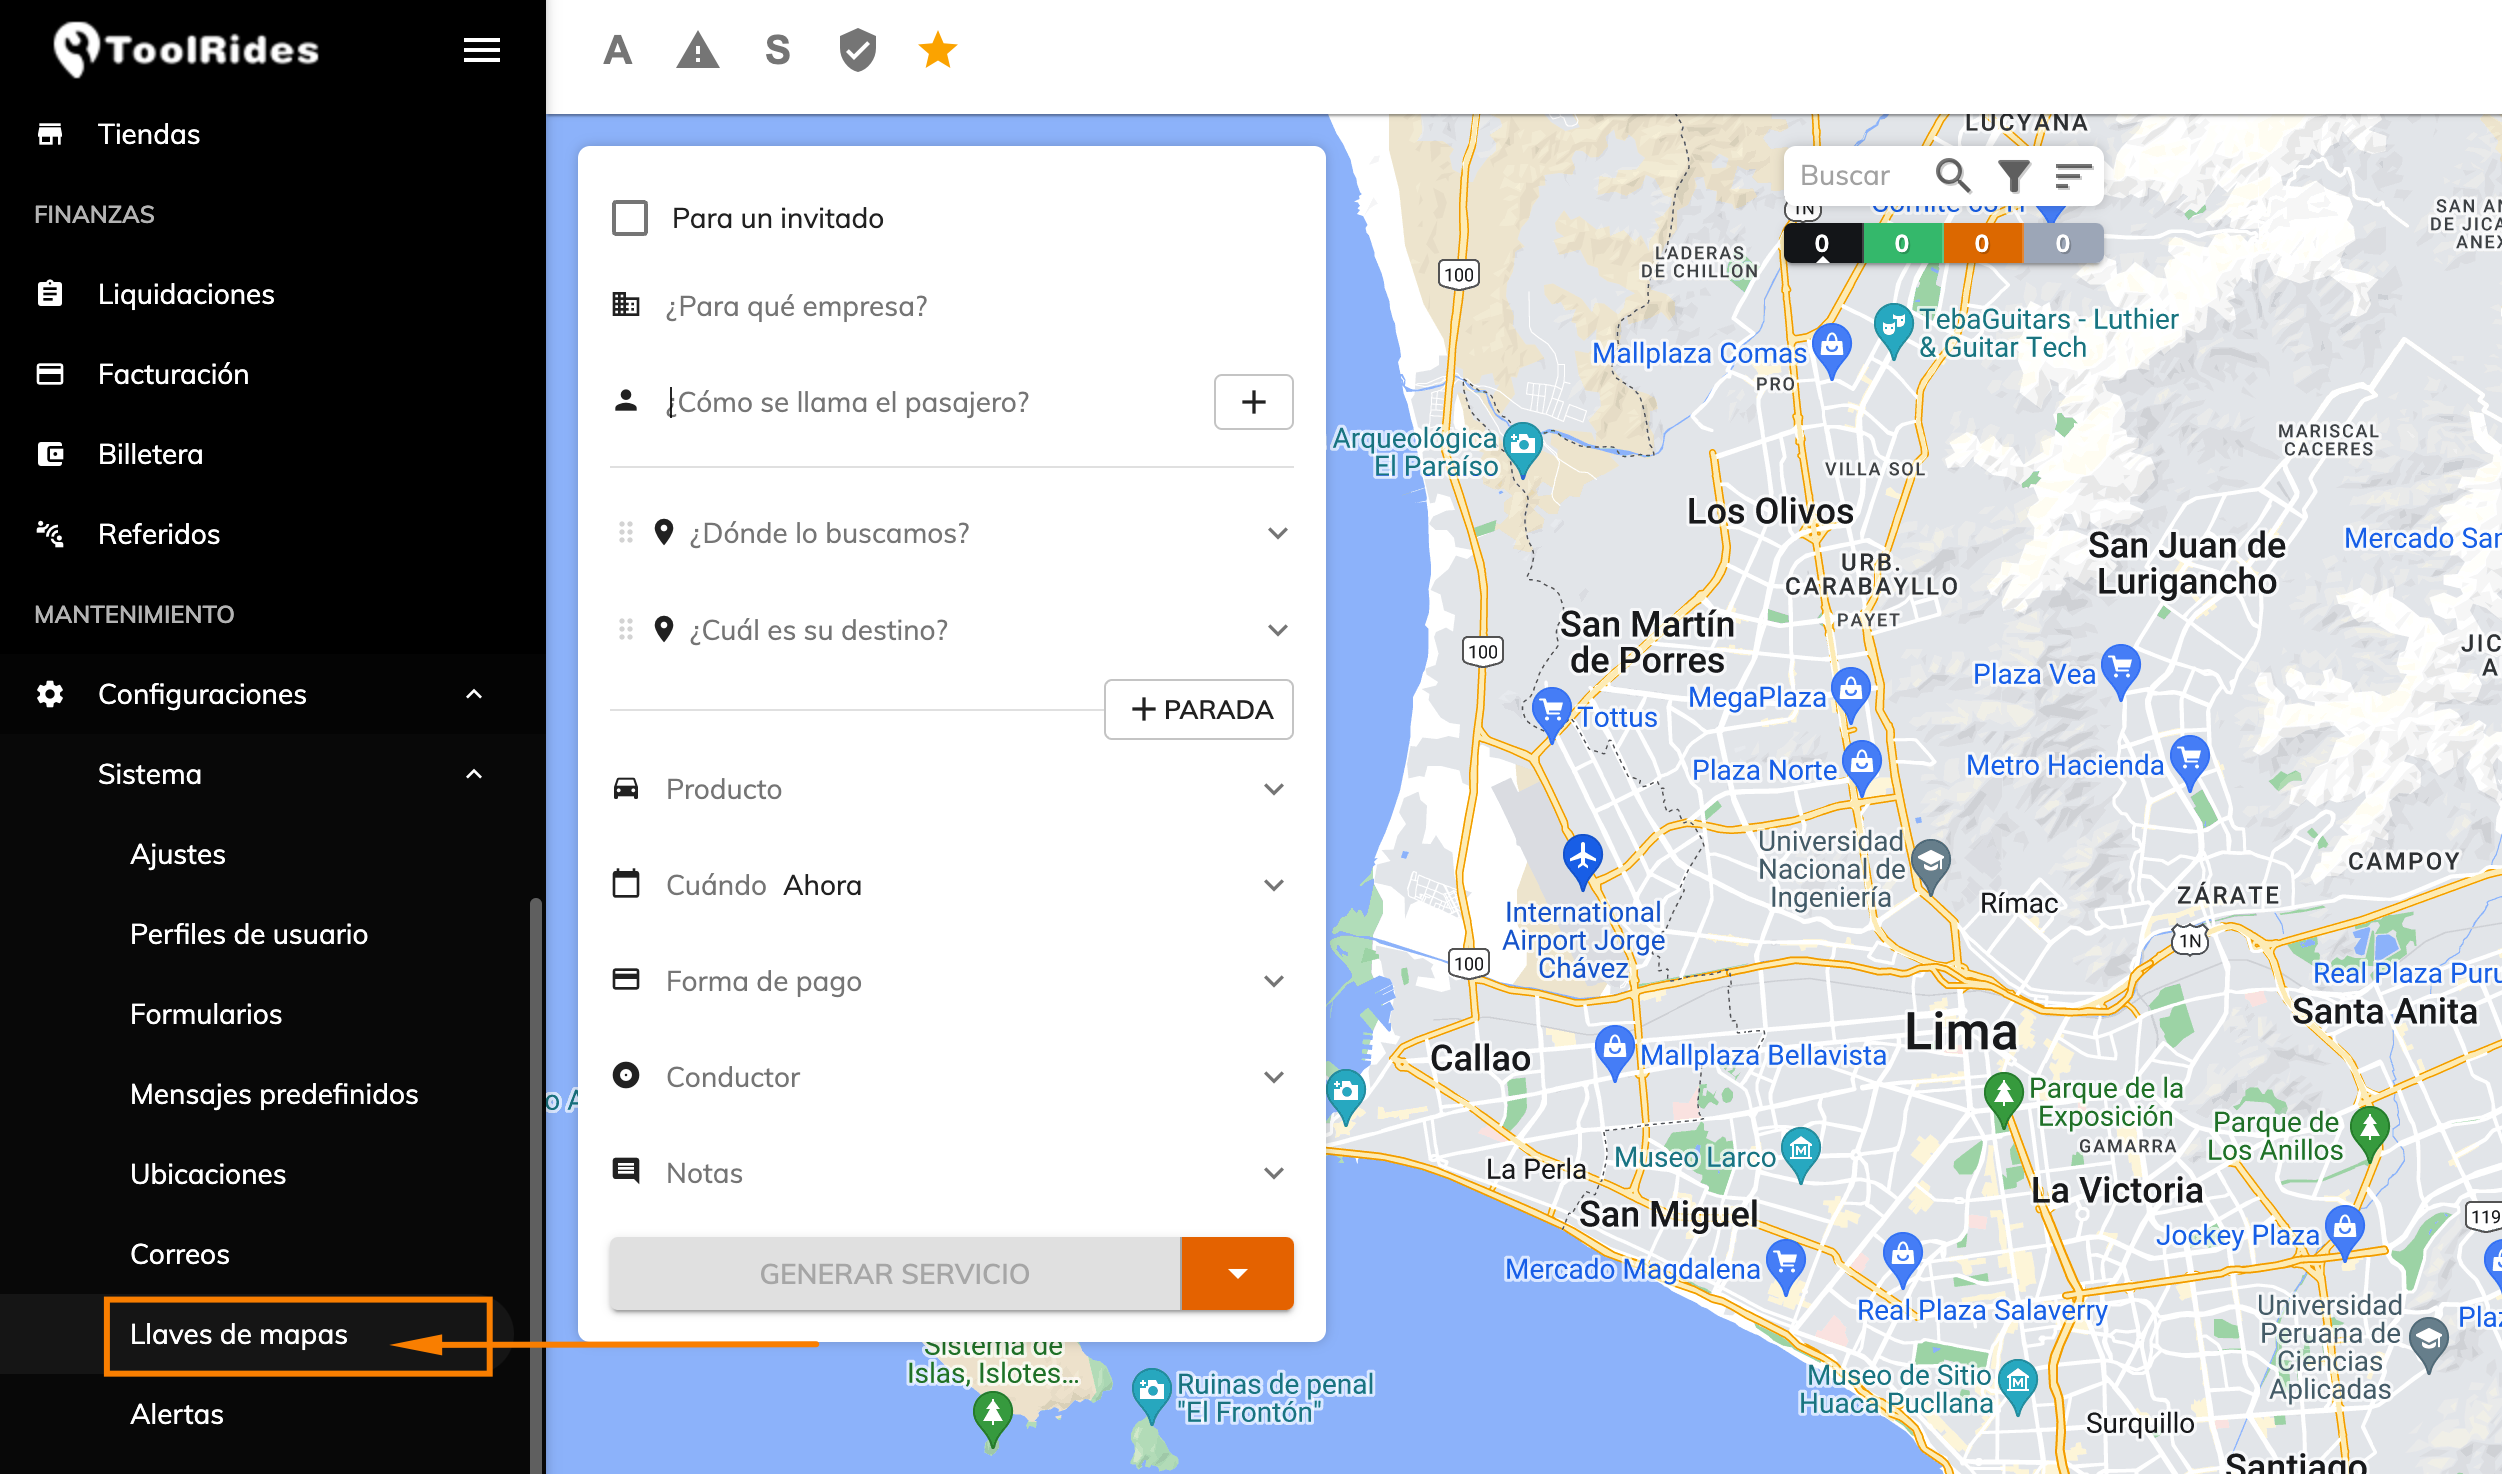
Inside the "Map keys" section, click the "NEW" button to open a form where you can register your Google Maps account credentials.
In the "Key" field, add the code generated in Google Maps. In the "Limit" field, you can enter $200 to see roughly what percentage of the free plan you're using up. In the "Name" and "Notes" fields, you can note the email the key was registered with to keep your accounts organized.
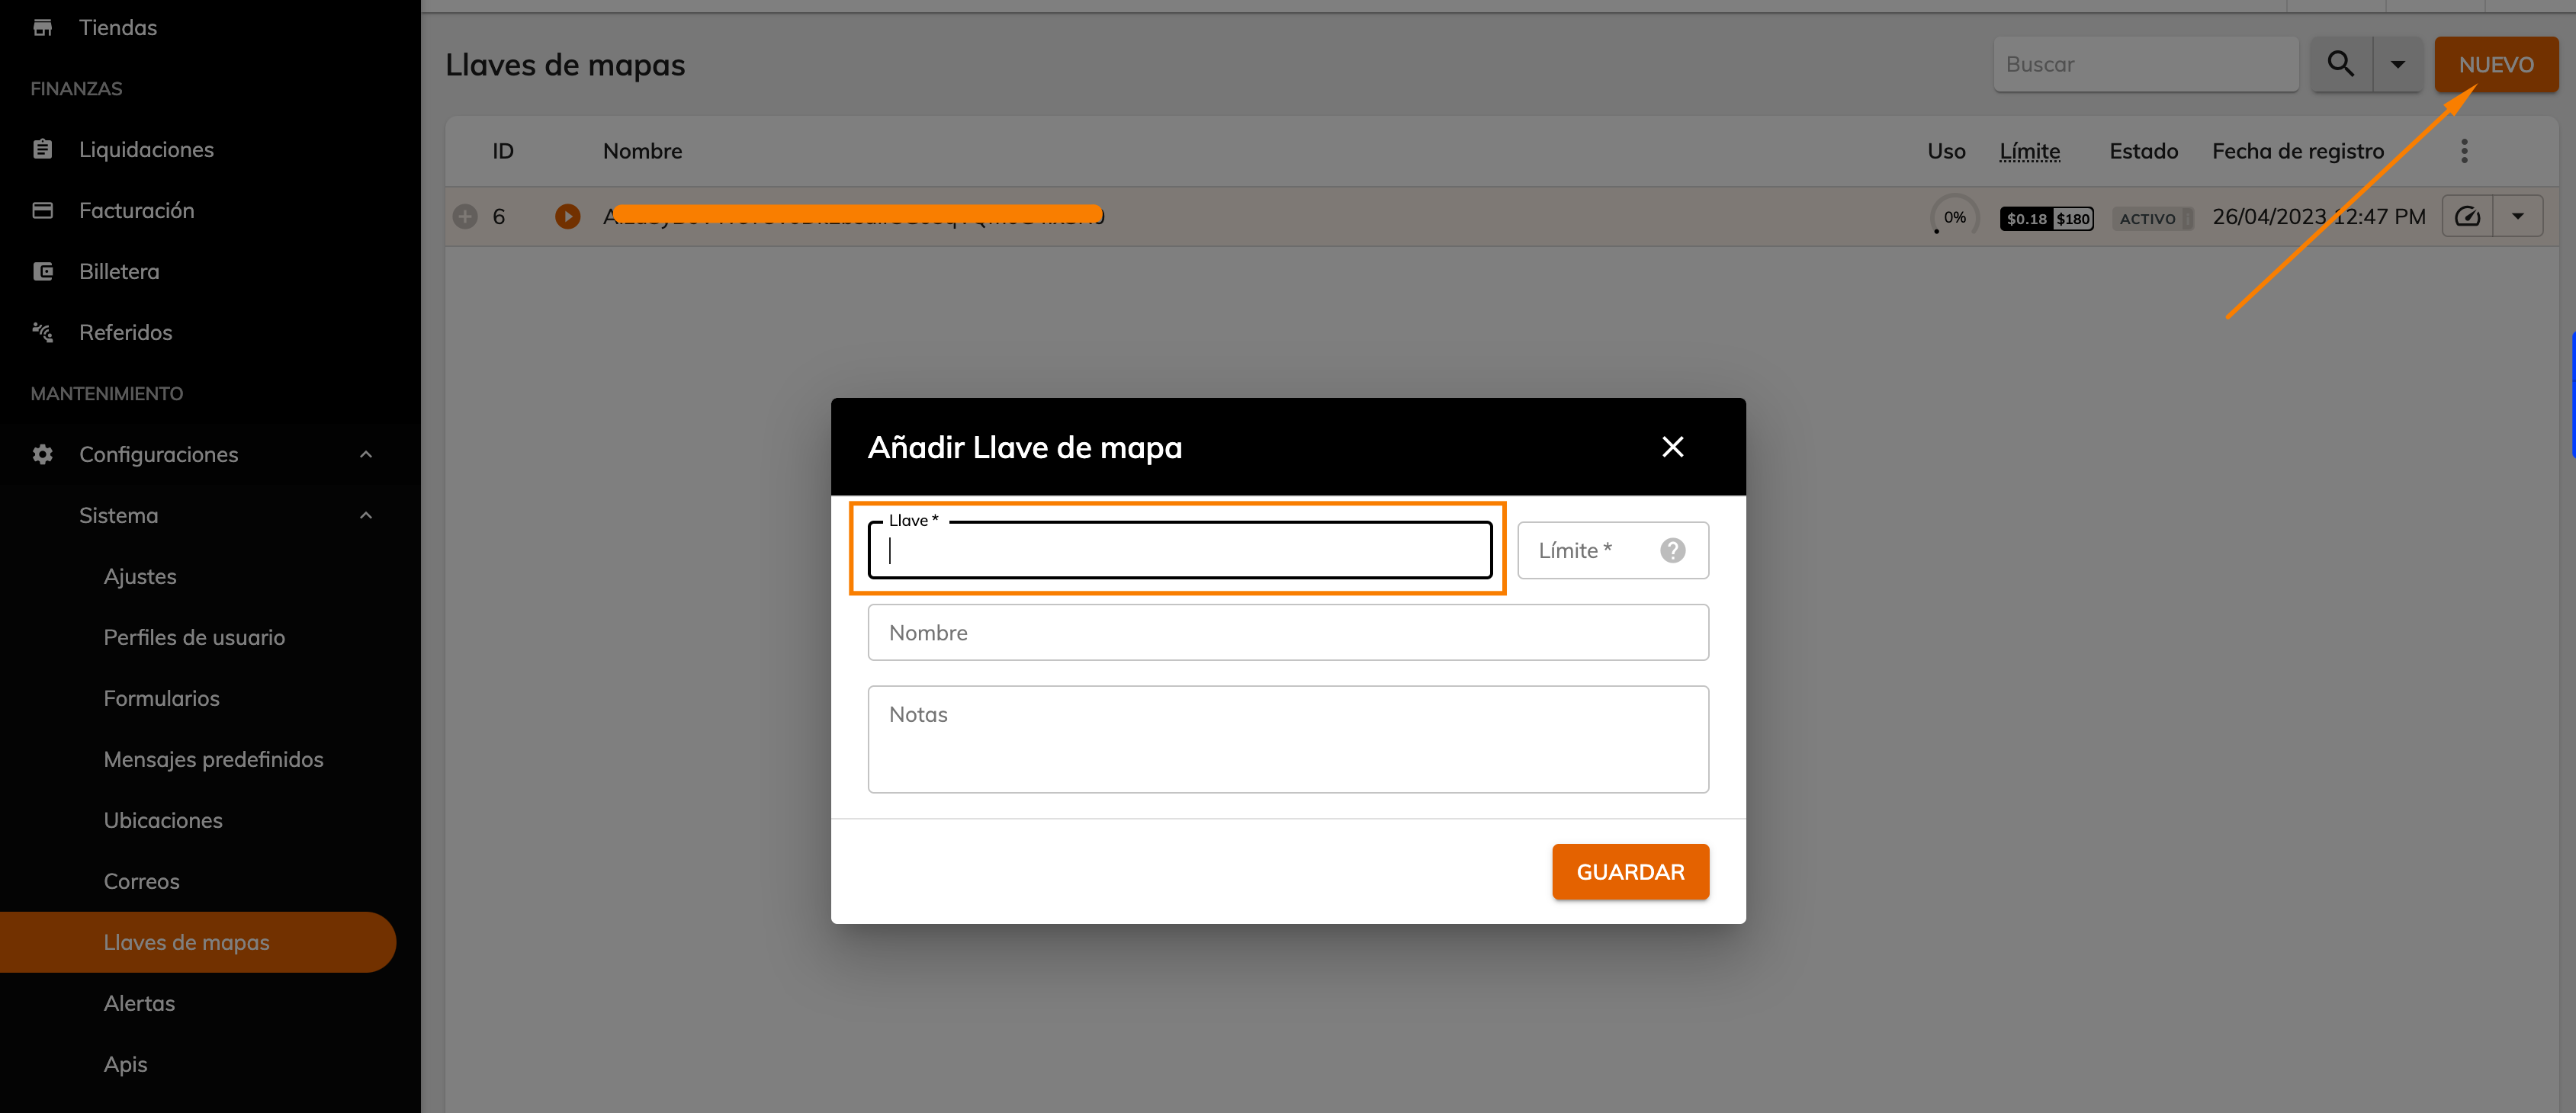
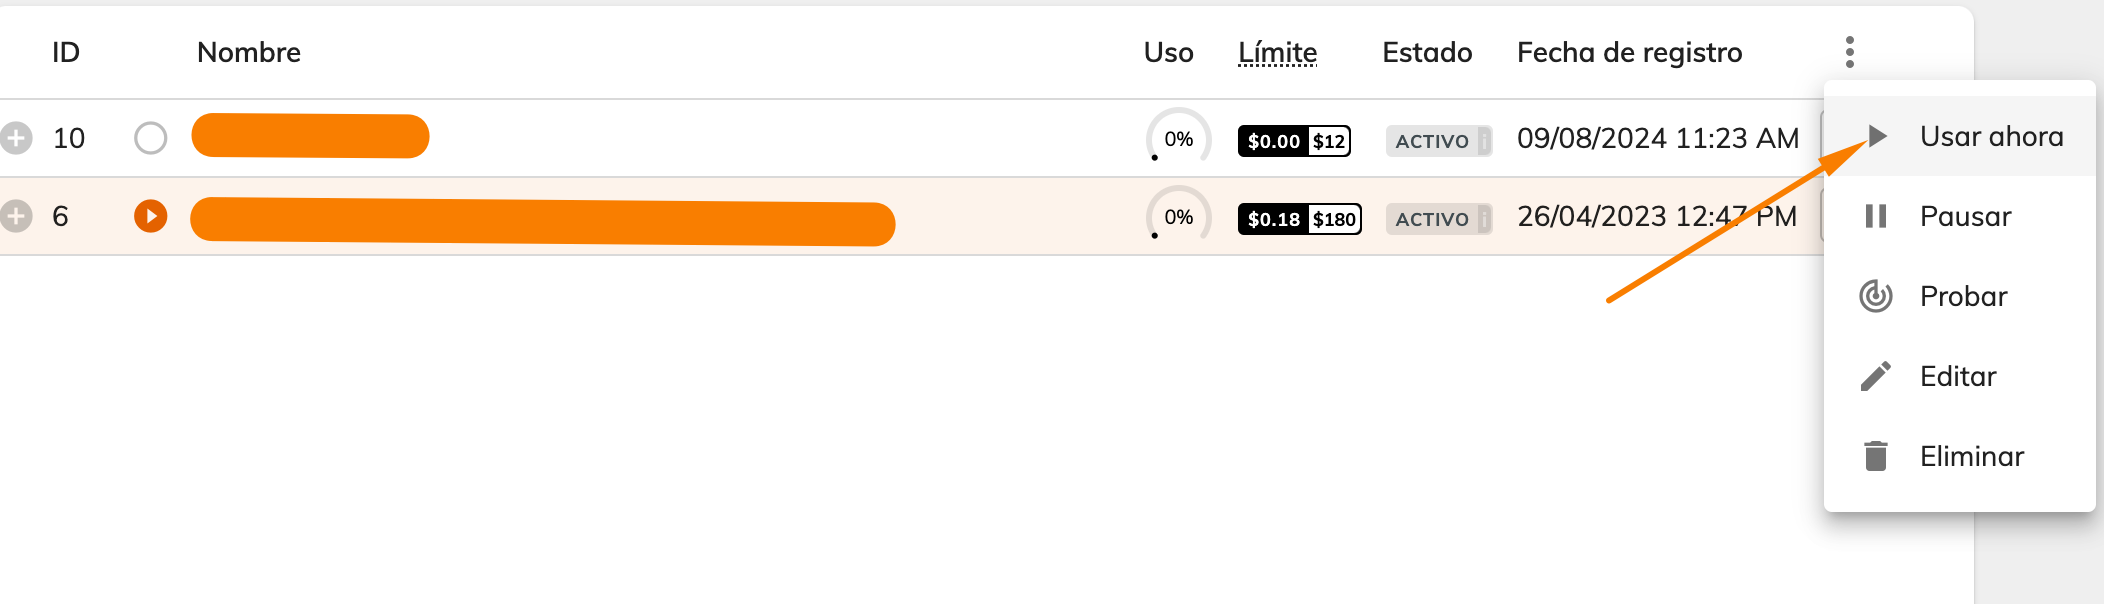
Once it's registered, you can click the ⬇️ button on the right and choose the "Use now" option.
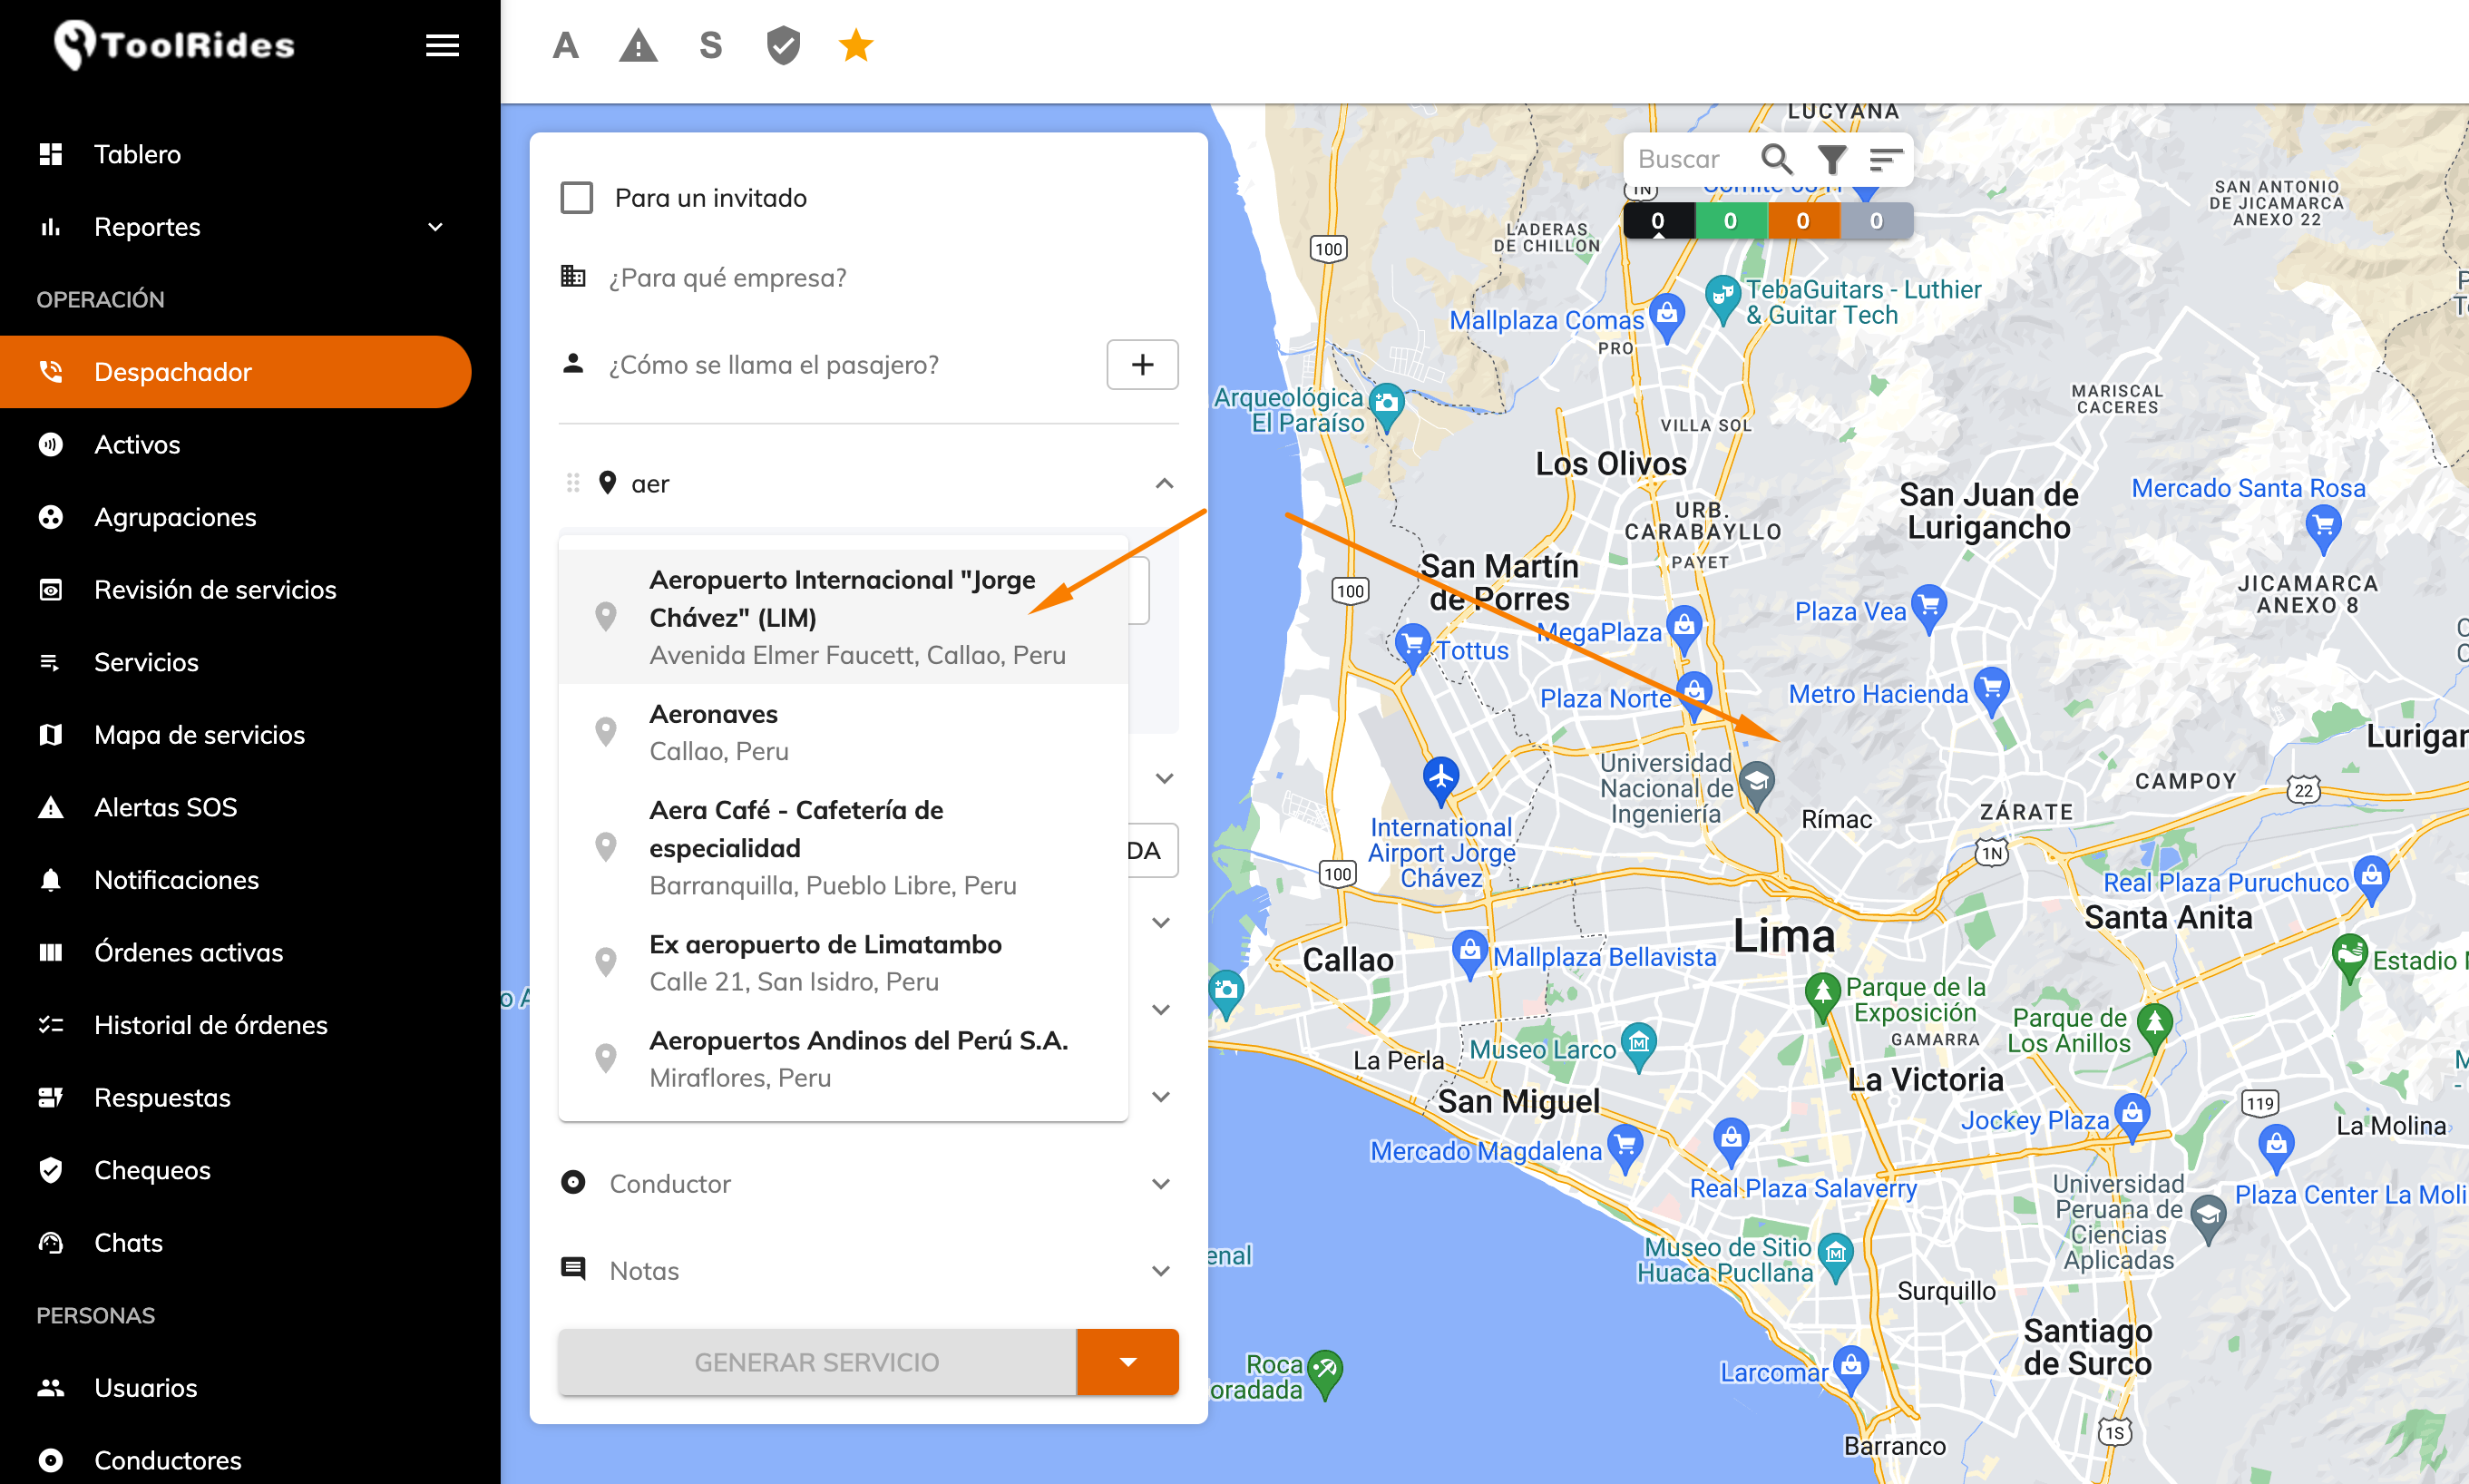
That completes the Google Maps setup. To confirm everything is working, go to the dispatcher and check that the map displays correctly, that address suggestions appear in the origin and destination fields, and that Google Maps shows a suggested route for the trip.
If you need any additional help, feel free to reach out and we'll schedule a meeting to assist you with your setup.
Was this article helpful?
Integrations
- LabsMobile integration: SMS verification for user registration
- How to integrate your system via API
- Creating a Google Maps Account