
 Use cases
 Messaging
 Taxi Companies
 Private Transport
 Transportation Entrepreneurs
 Last Mile
 SuperApp
 Software
 Taxi dispatch
 Corporate transportation
 Auction
 Products
 Booking Software
 Dispatch Platform
 Driver App
 Passenger App
 Web Widget
 Functions
 Schedule & Booking
 Driver Management
 Custom
 Corporate Portal
 Security & Support
 Resources
 Learn
Learn



Integrating Culqi in the Web Panel for Card Payments
When you create a Culqi account, you should receive a message like the one shown below.
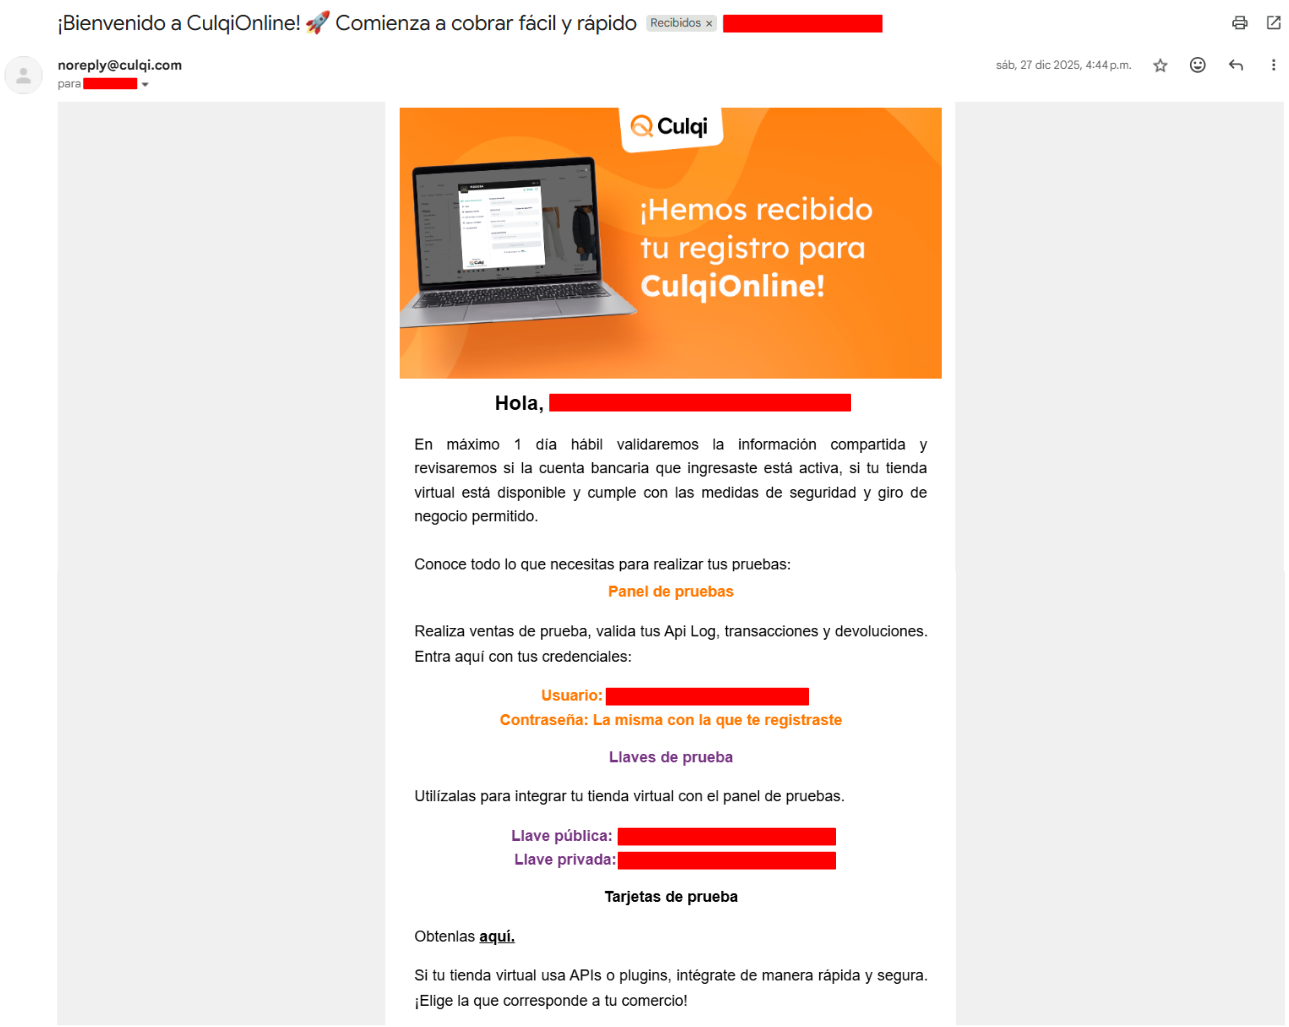
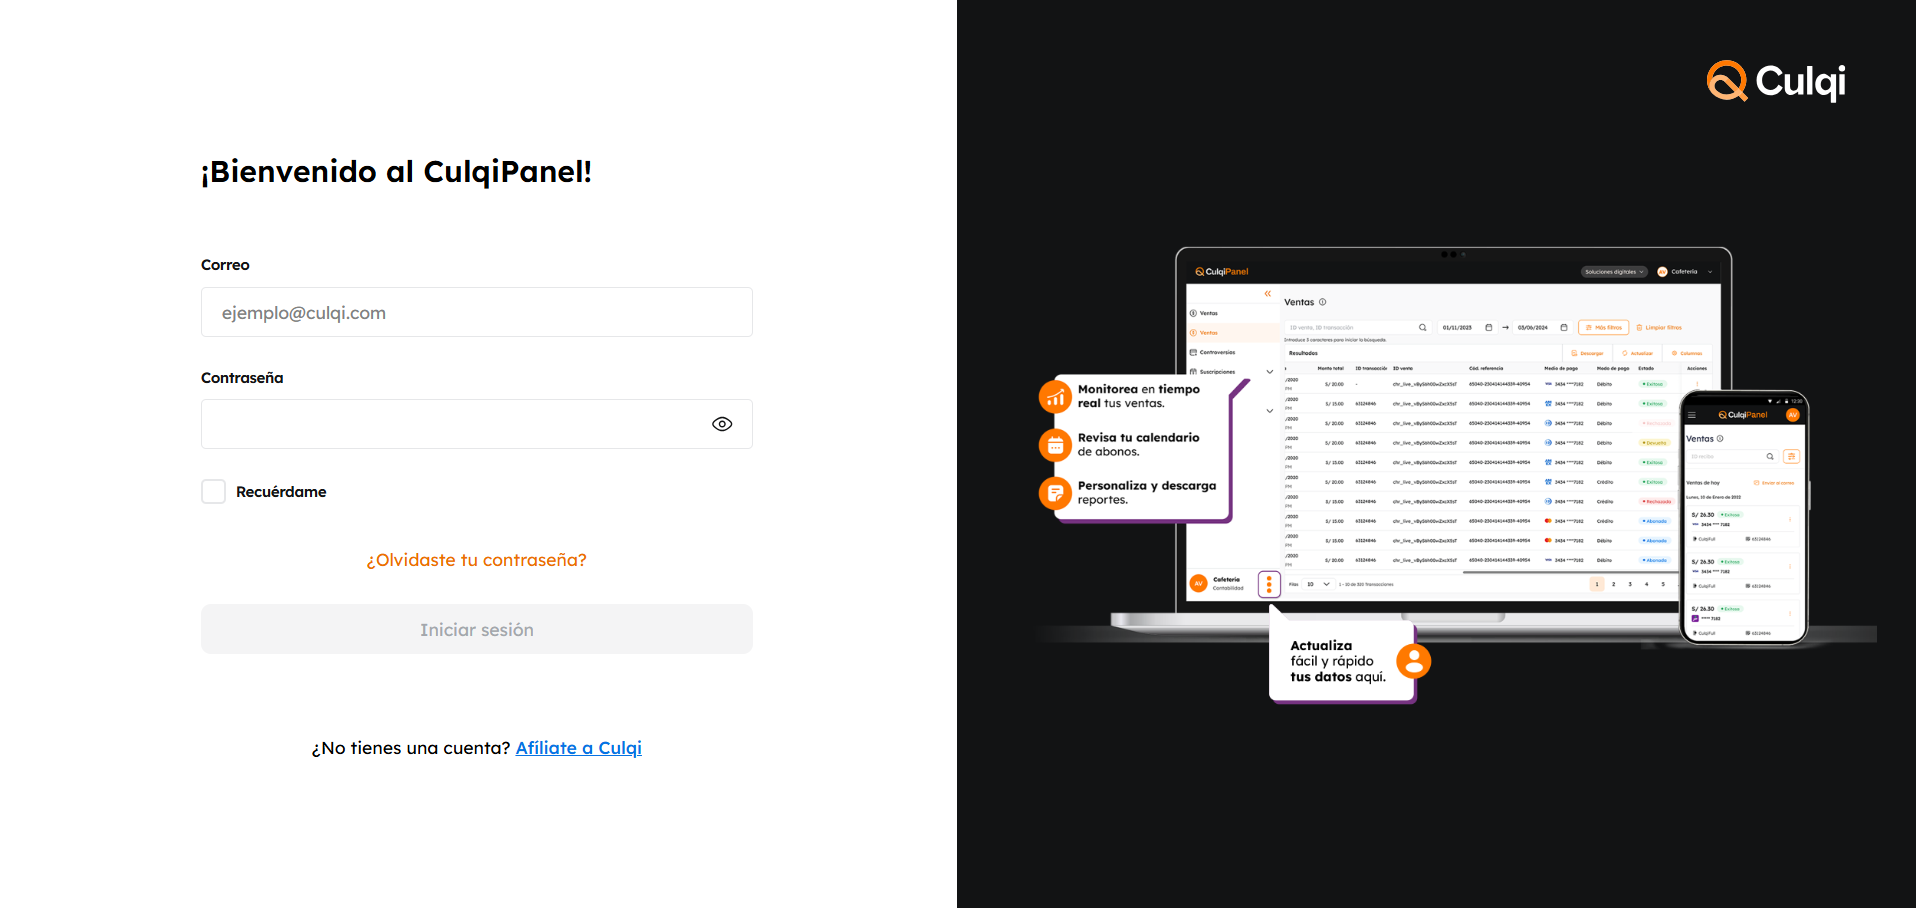
Log in at https://culqipanel.culqi.com/login with your username and password.
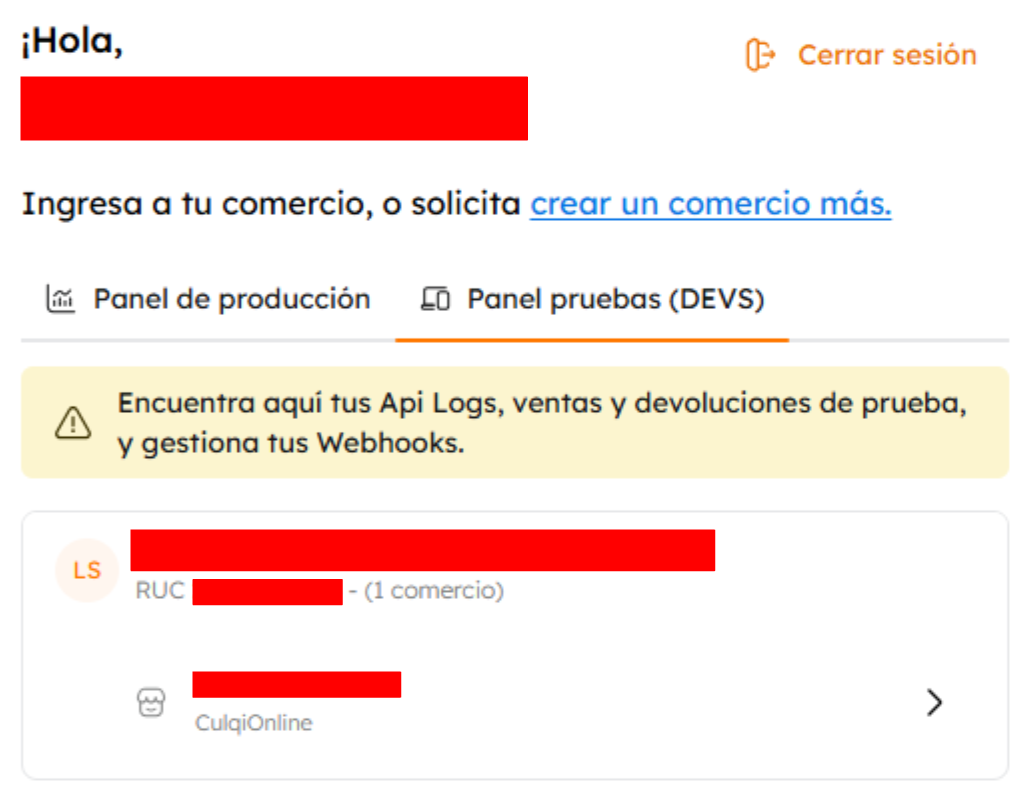
You'll see your production and test environments. Open the test environment.
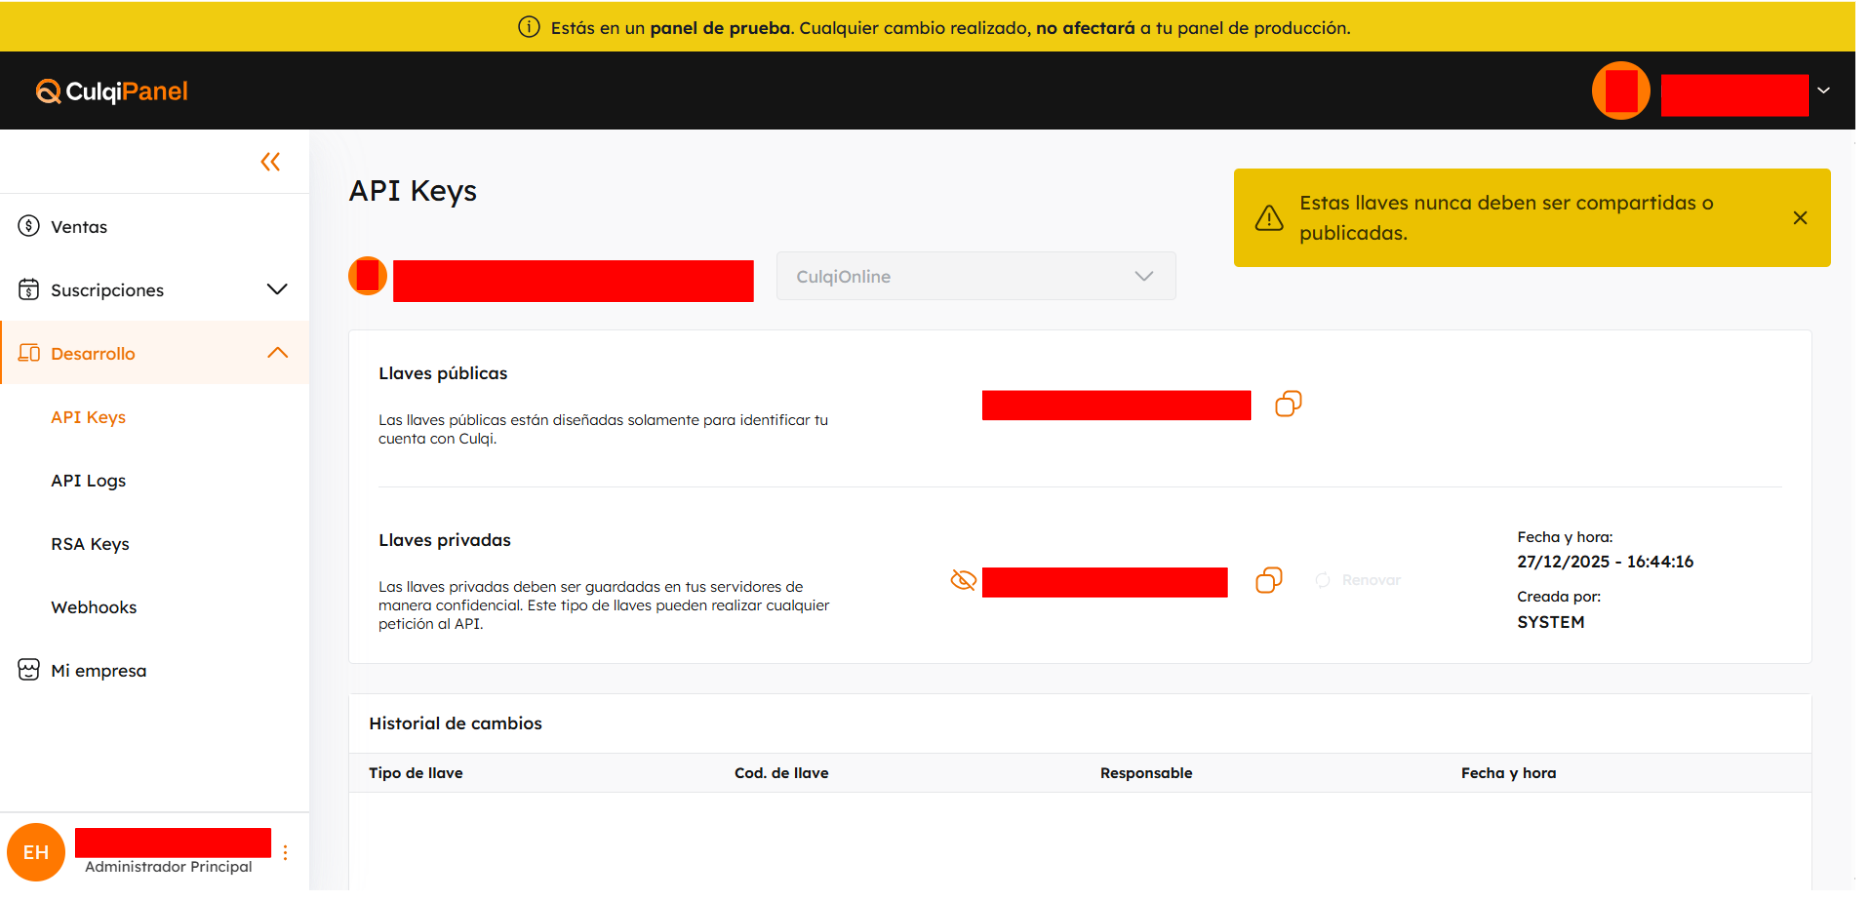
Go to Development > API keys and copy the public and private keys.
Paste those keys in the matching fields of the Culqi section in the web panel, under Maintenance > Settings > System > Payment gateways.
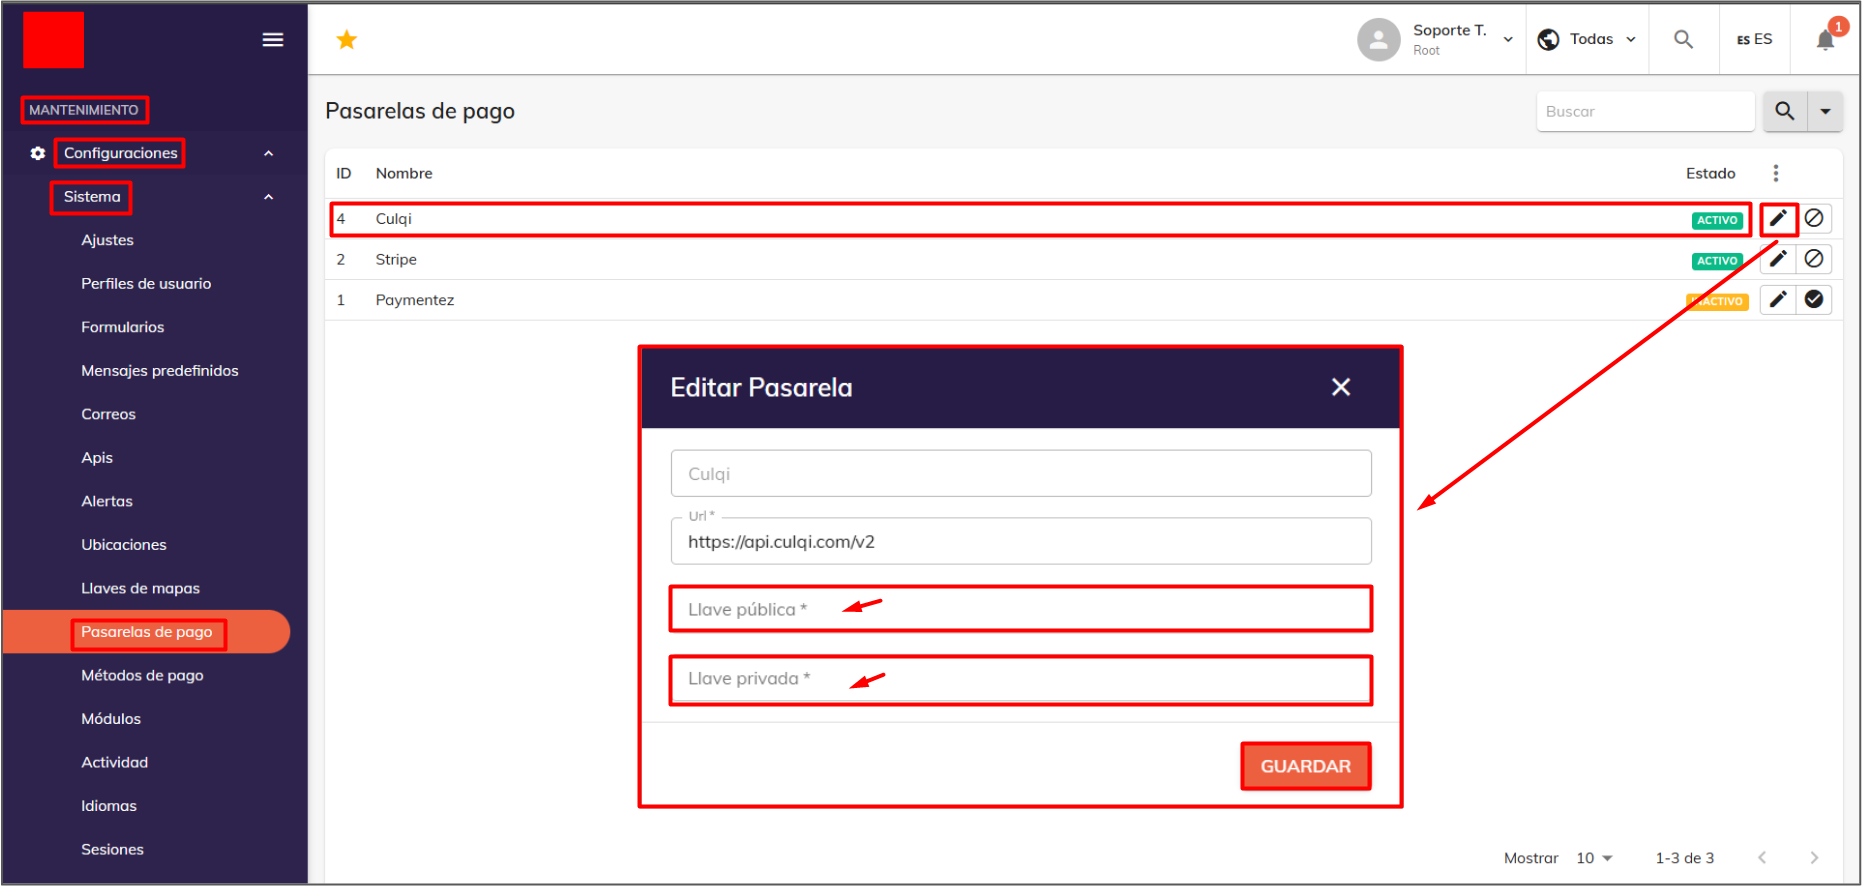
To access this section of the web panel, you need to have it enabled under Maintenance > Settings > System > User profile.
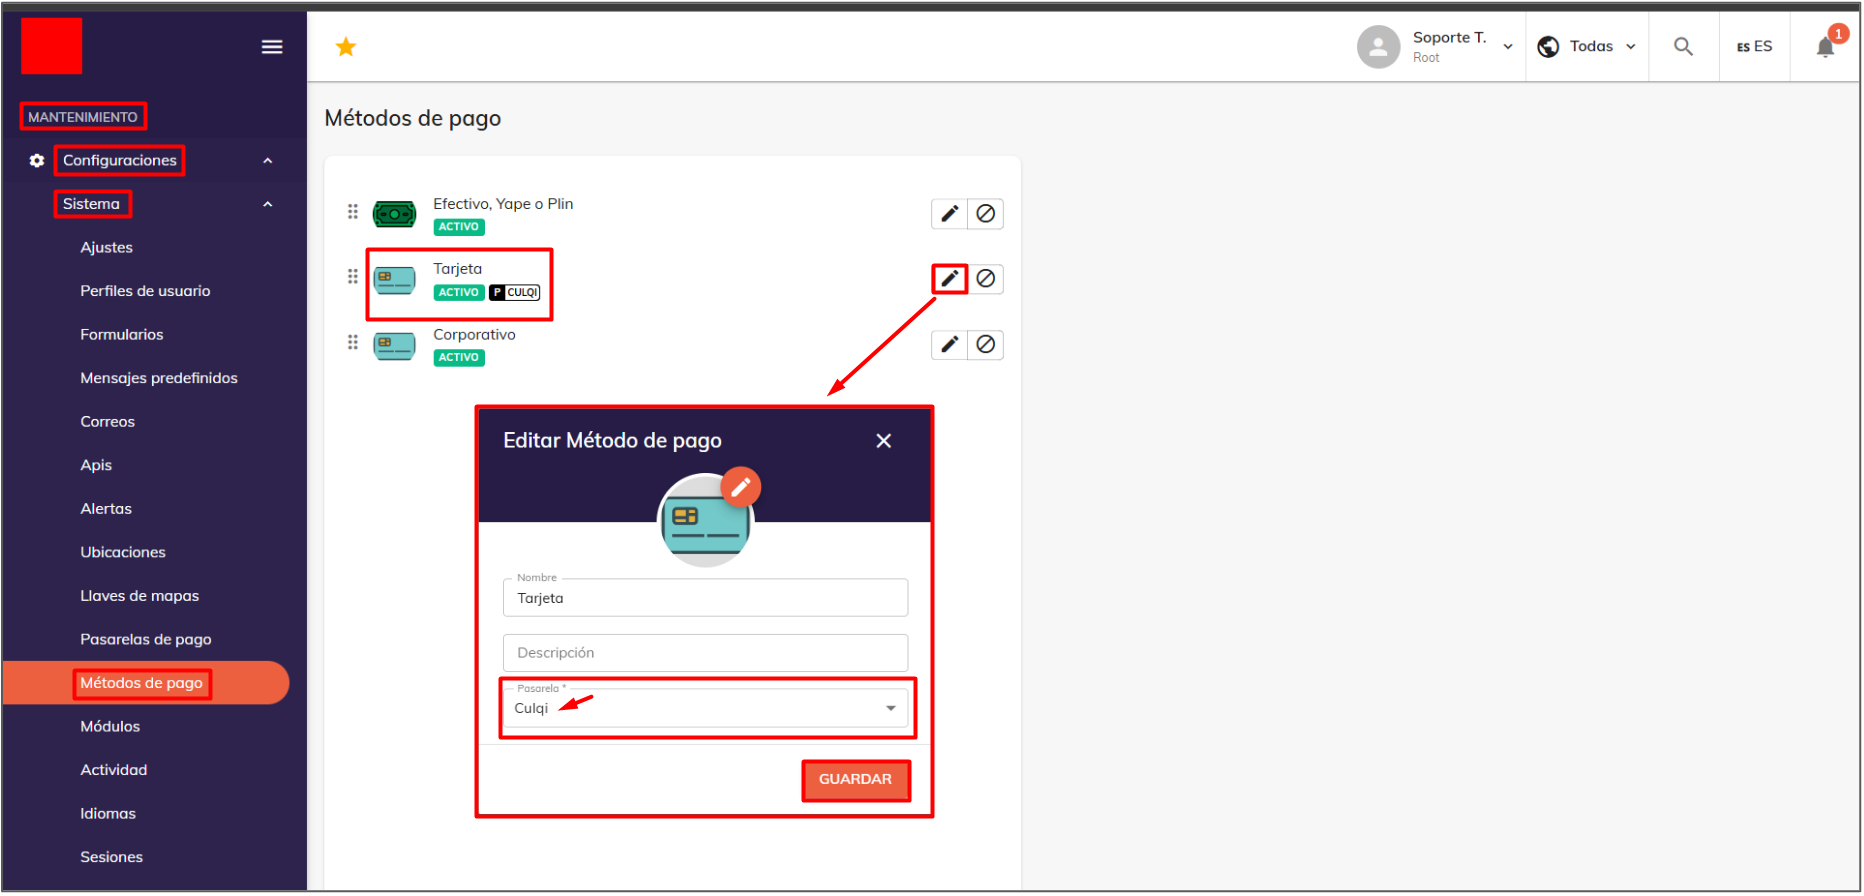
You'll also need to go to Maintenance > Settings > System > Payment methods in the web panel to enable the Culqi card payment method.
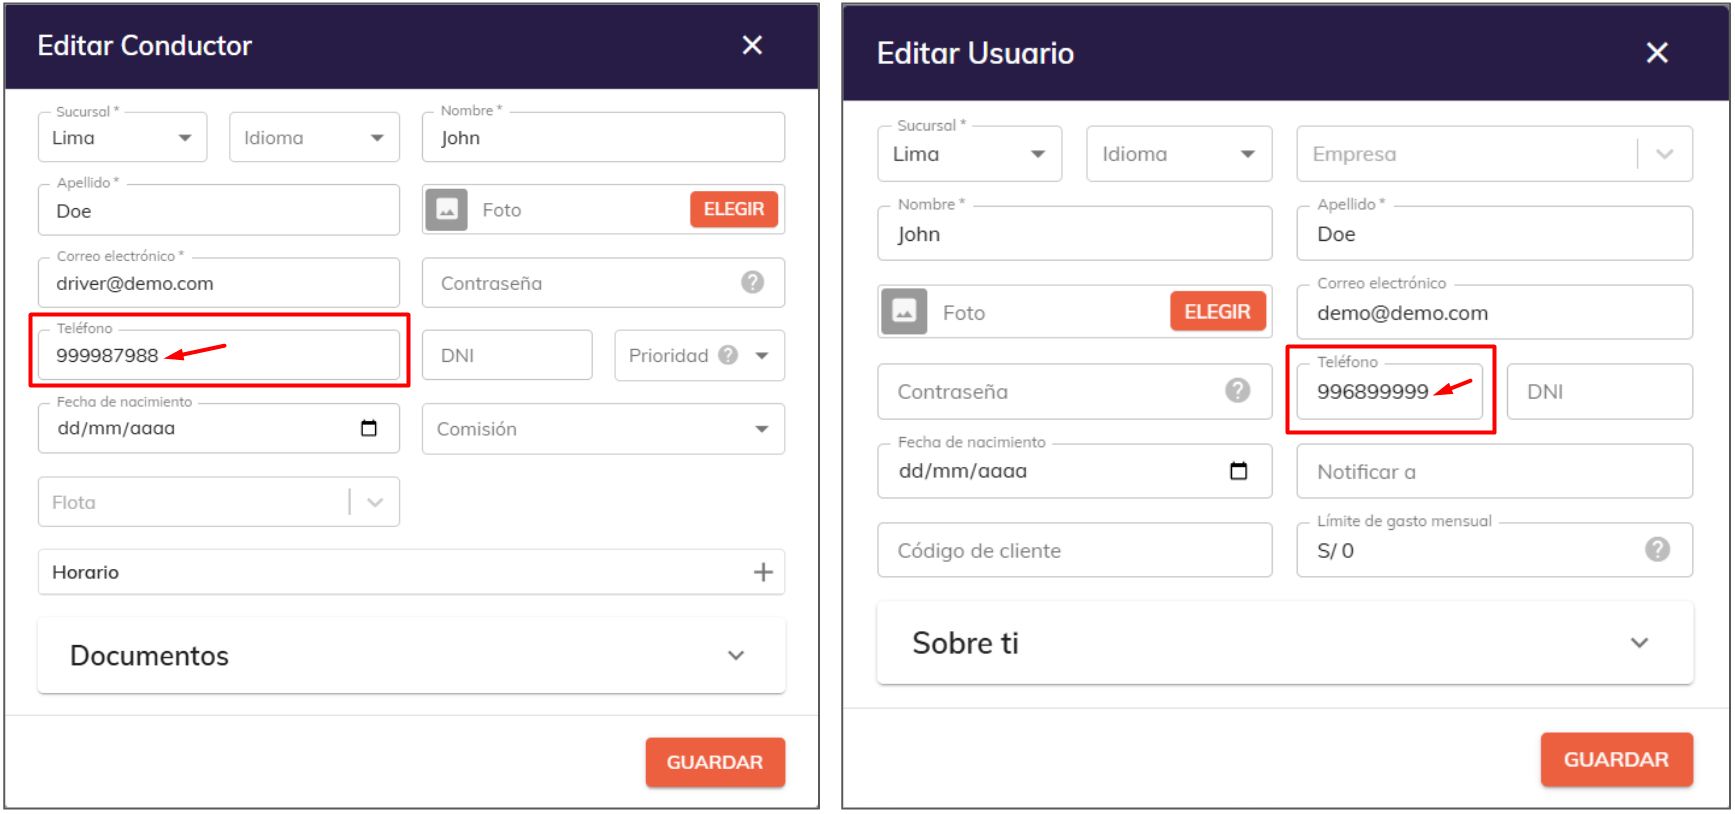
The rider or driver making a card transaction must have a mobile phone number added to their record.
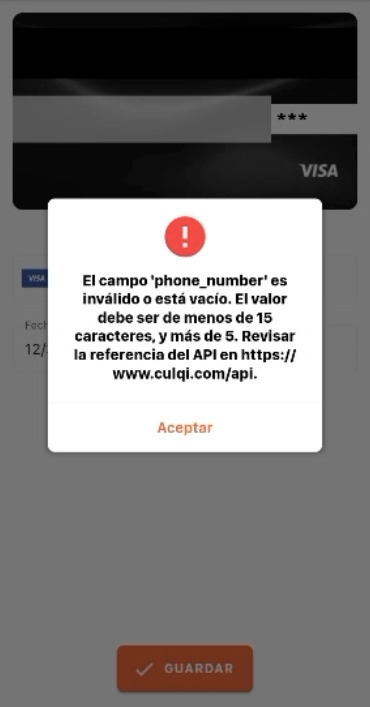
Otherwise, this message will appear when they try to complete a transaction:
You can now run service tests with the card payment method to confirm that the process works correctly.
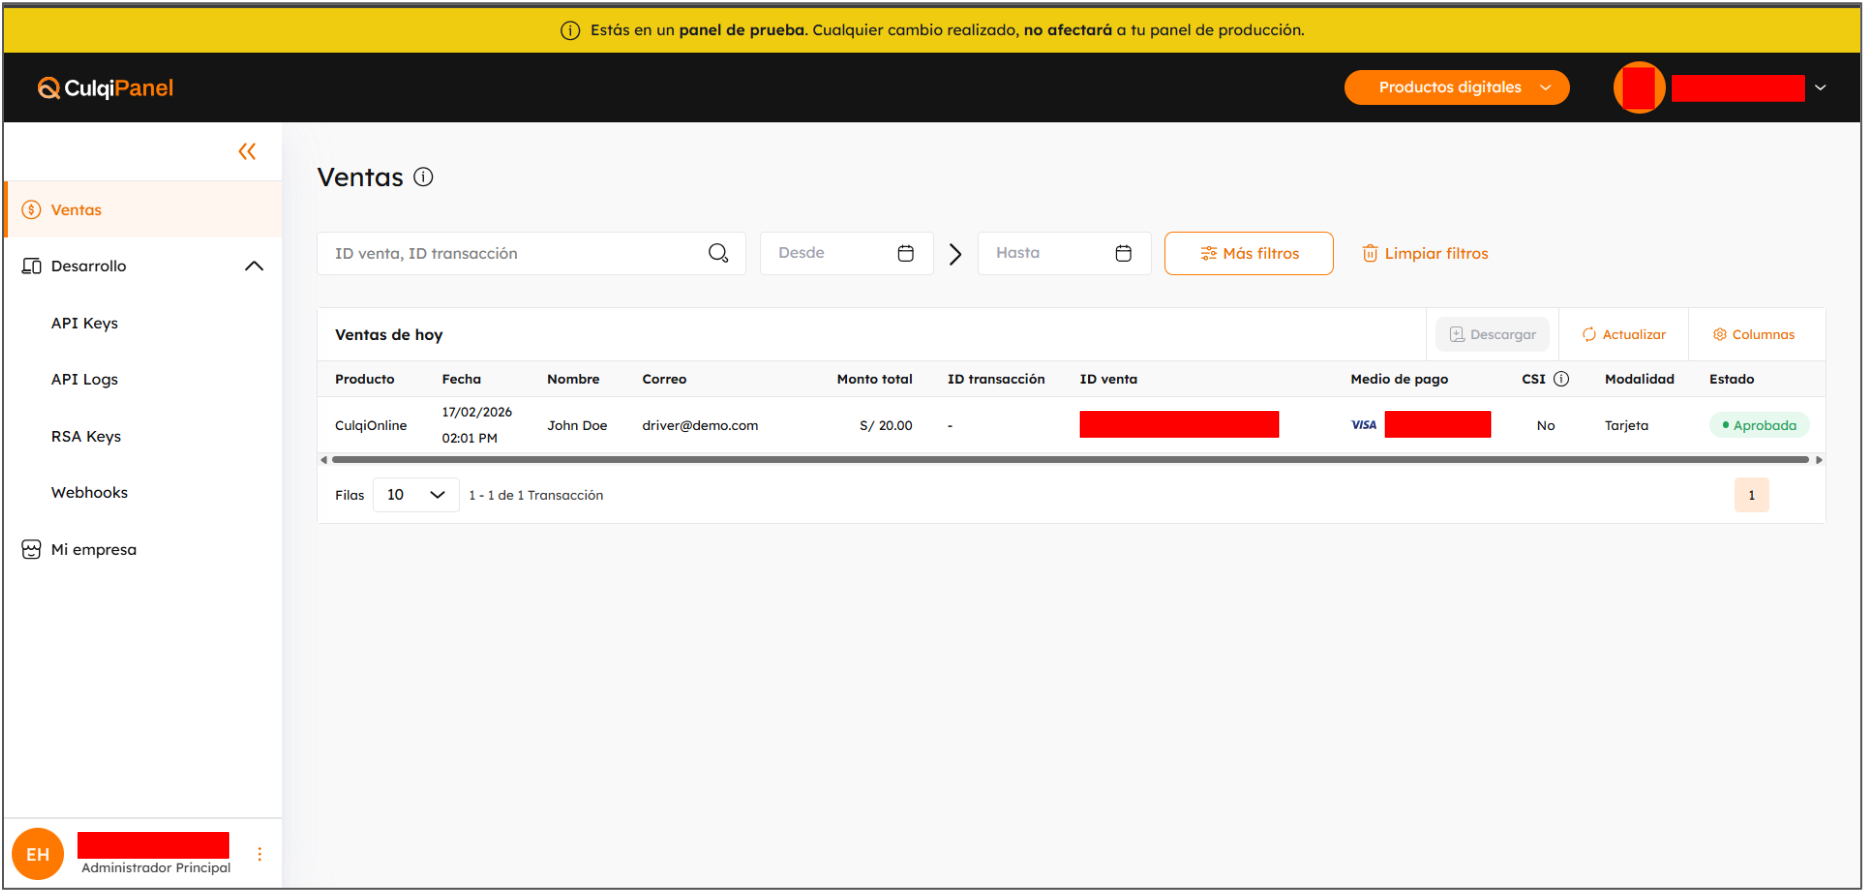
If you go to your Culqi account, you should see the details of the card transactions:
Was this article helpful?
Payment Gateways
- Integrate Stripe into the web panel for card payments
- Opening and Verifying a WebPay Account
- Integrated Payment Gateways for Credit / Debit Cards
- Integrating Culqi in the Web Panel for Card Payments
- Integrating Mercado Pago in the web panel for card payments