
 Use cases
 Messaging
 Taxi Companies
 Private Transport
 Transportation Entrepreneurs
 Last Mile
 SuperApp
 Software
 Taxi dispatch
 Corporate transportation
 Auction
 Products
 Booking Software
 Dispatch Platform
 Driver App
 Passenger App
 Web Widget
 Functions
 Schedule & Booking
 Driver Management
 Custom
 Corporate Portal
 Security & Support
 Resources
 Learn
Learn



Integrate Stripe into the web panel for card payments
Before you start this guide, you'll need a Stripe account that's already created and verified so you can process real payments on the platform.
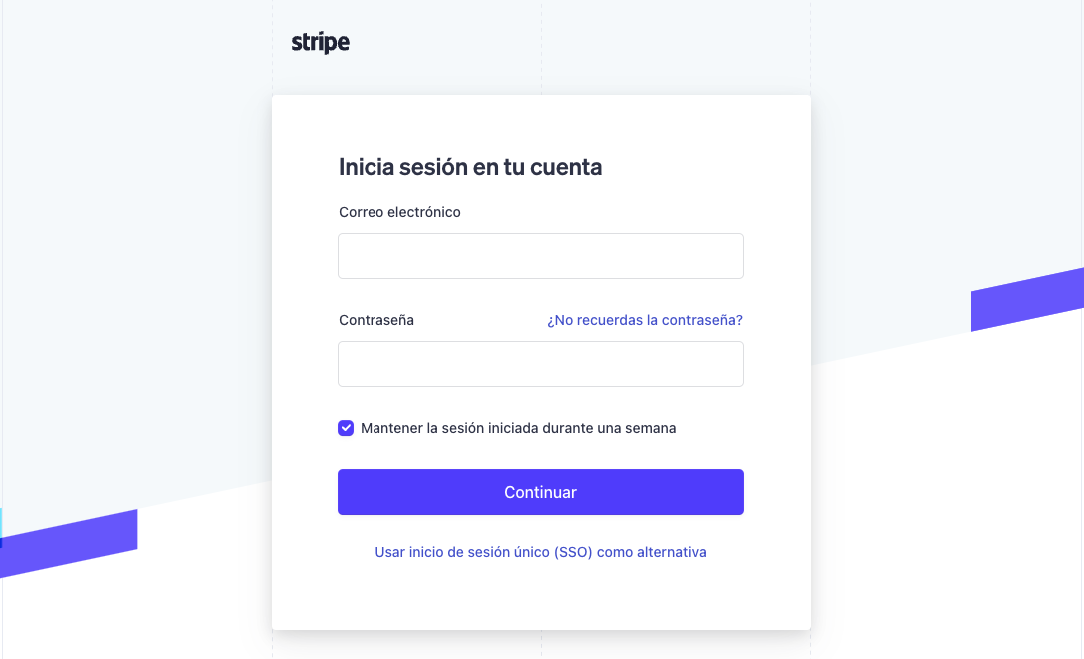
First, sign in to Stripe
https://dashboard.stripe.com/login?redirect=%2Ftest%2Fapikeys
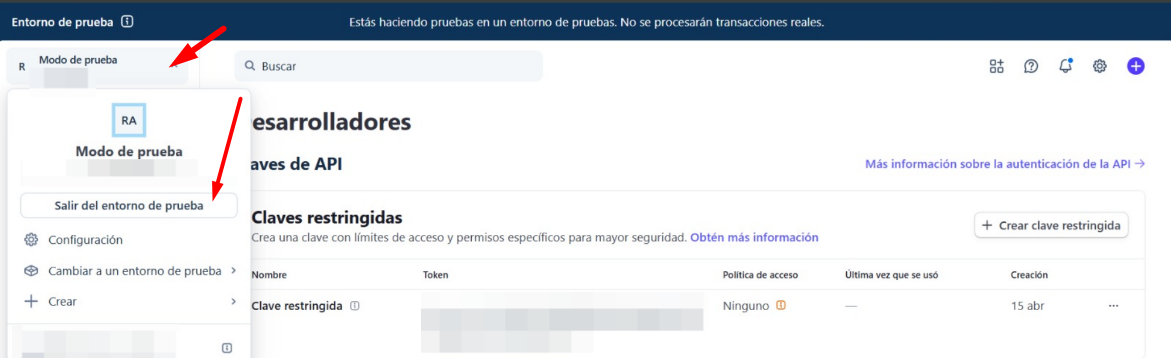
Switch from test mode to production mode
First, turn off Test Mode.
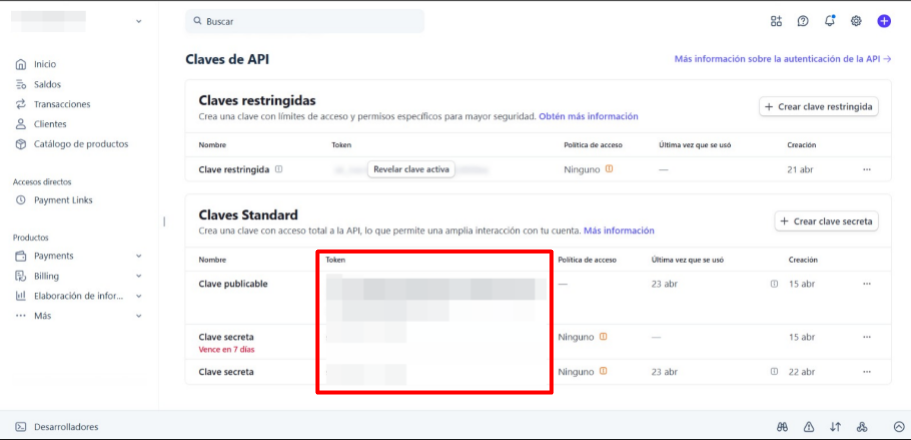
Get your production keys
Once you've turned off Test Mode, copy the secret keys that appear. They'll be in the column labeled "Token."
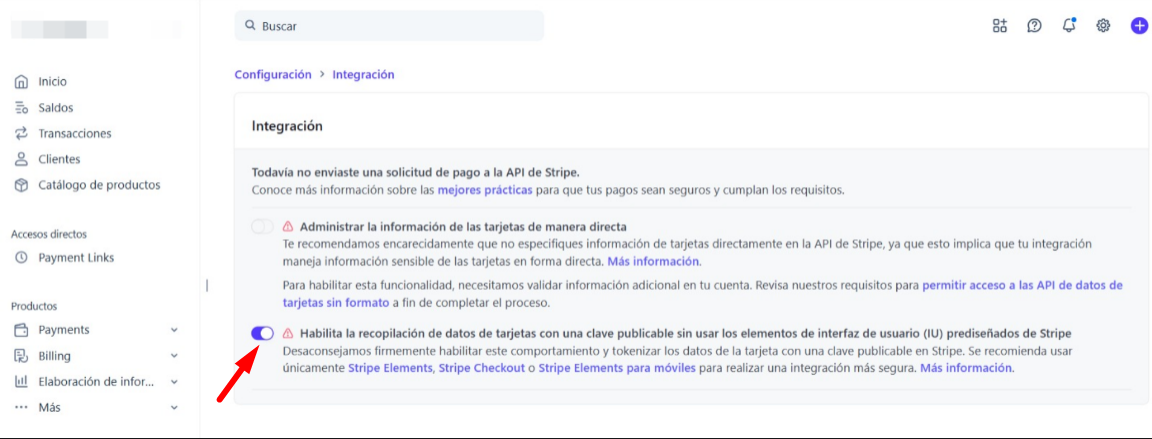
Next, go to the following link and enable the second option.
https://dashboard.stripe.com/acct_1TMcdiBsdQEbvMKd/settings/integration
Once you've copied both keys, paste them into the following form in the web panel.
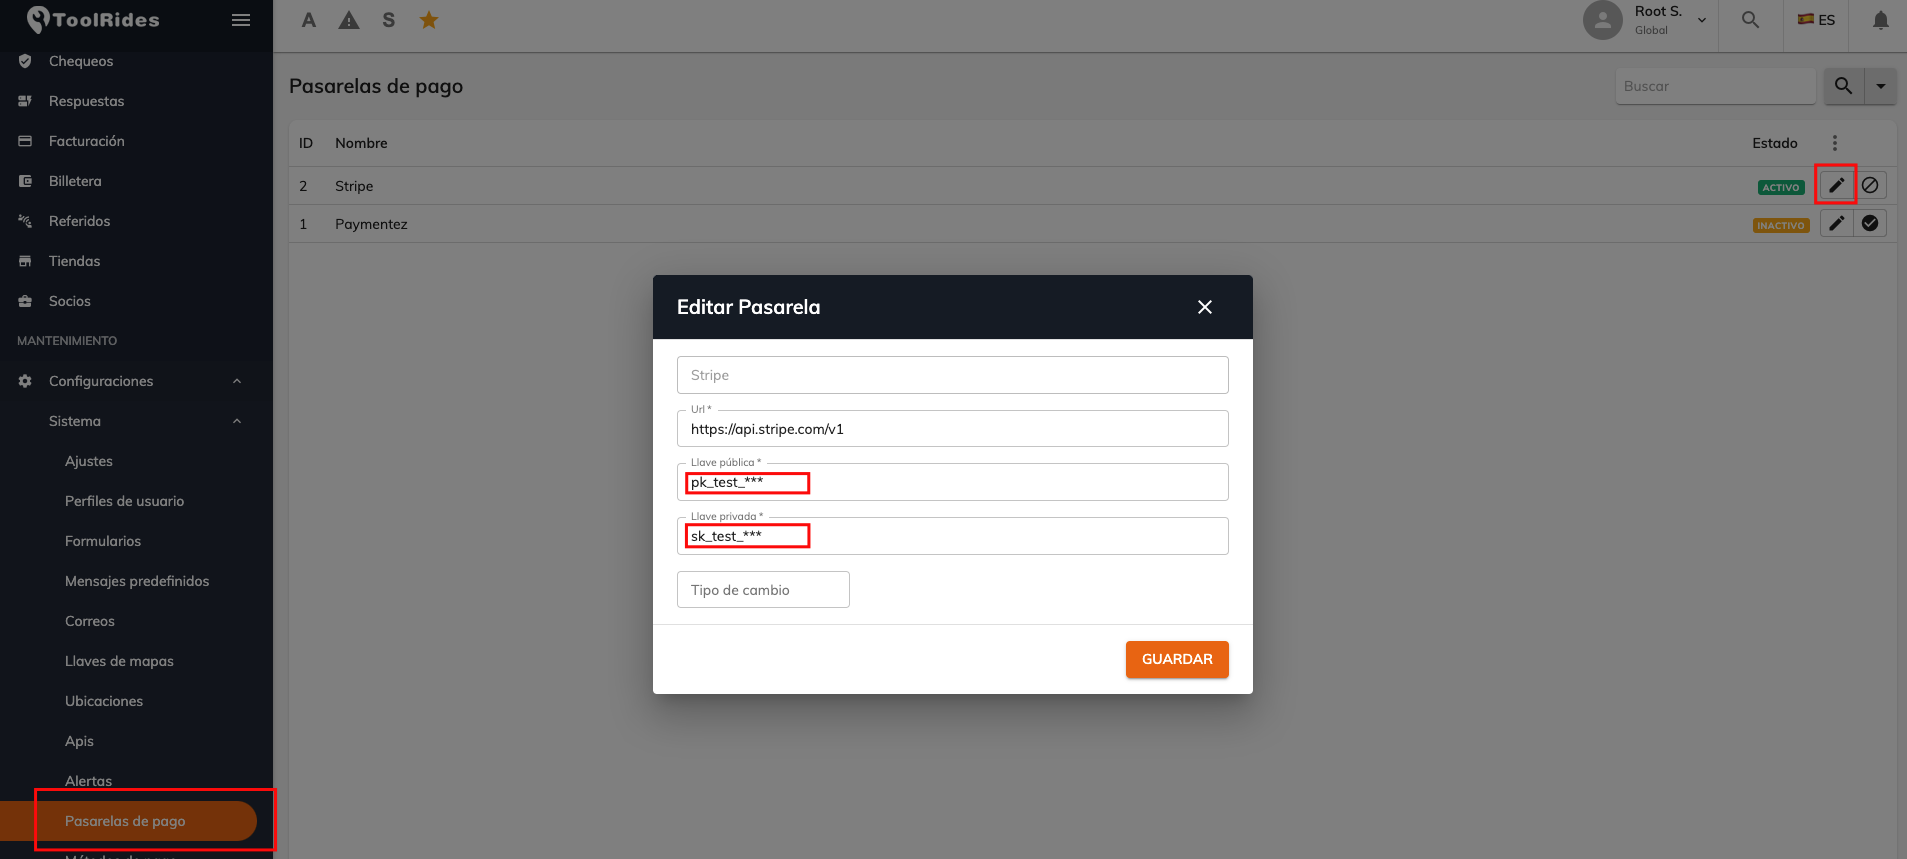
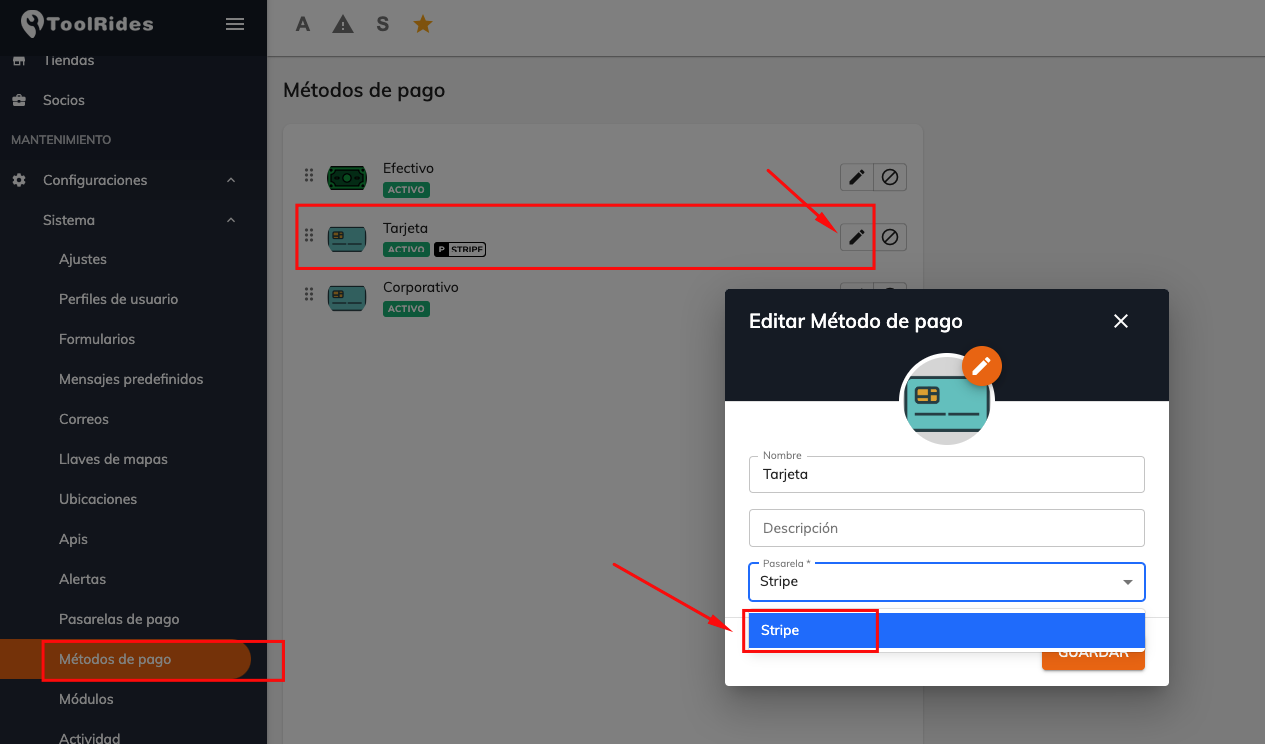
Now go to payment methods
Here you'll need to select Stripe as the payment processor to use.
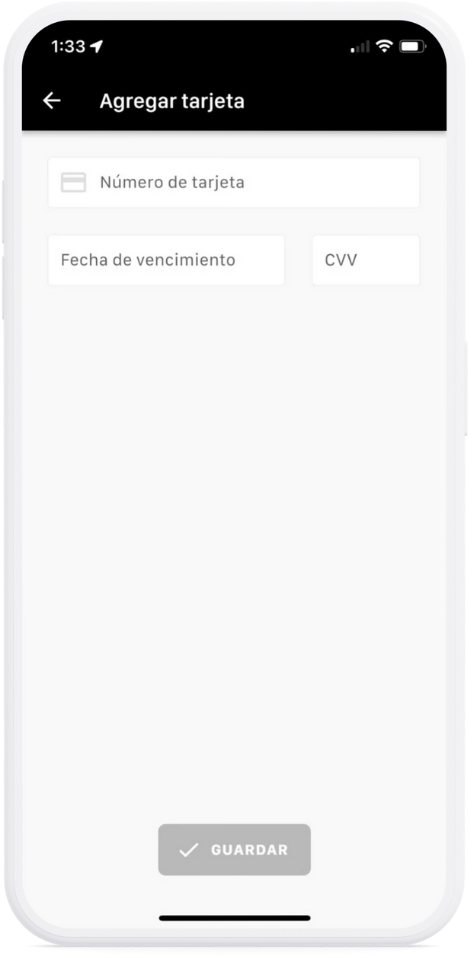
After completing these steps, you can add cards as usual in the user app to process automatic charges on every trip.
Was this article helpful?
Payment Gateways
- Integrate Stripe into the web panel for card payments
- Opening and Verifying a WebPay Account
- Integrated Payment Gateways for Credit / Debit Cards
- Integrating Culqi in the Web Panel for Card Payments
- Integrating Mercado Pago in the web panel for card payments