
 Use cases
 Messaging
 Taxi Companies
 Private Transport
 Transportation Entrepreneurs
 Last Mile
 SuperApp
 Software
 Taxi dispatch
 Corporate transportation
 Auction
 Products
 Booking Software
 Dispatch Platform
 Driver App
 Passenger App
 Web Widget
 Functions
 Schedule & Booking
 Driver Management
 Custom
 Corporate Portal
 Security & Support
 Resources
 Learn
Learn



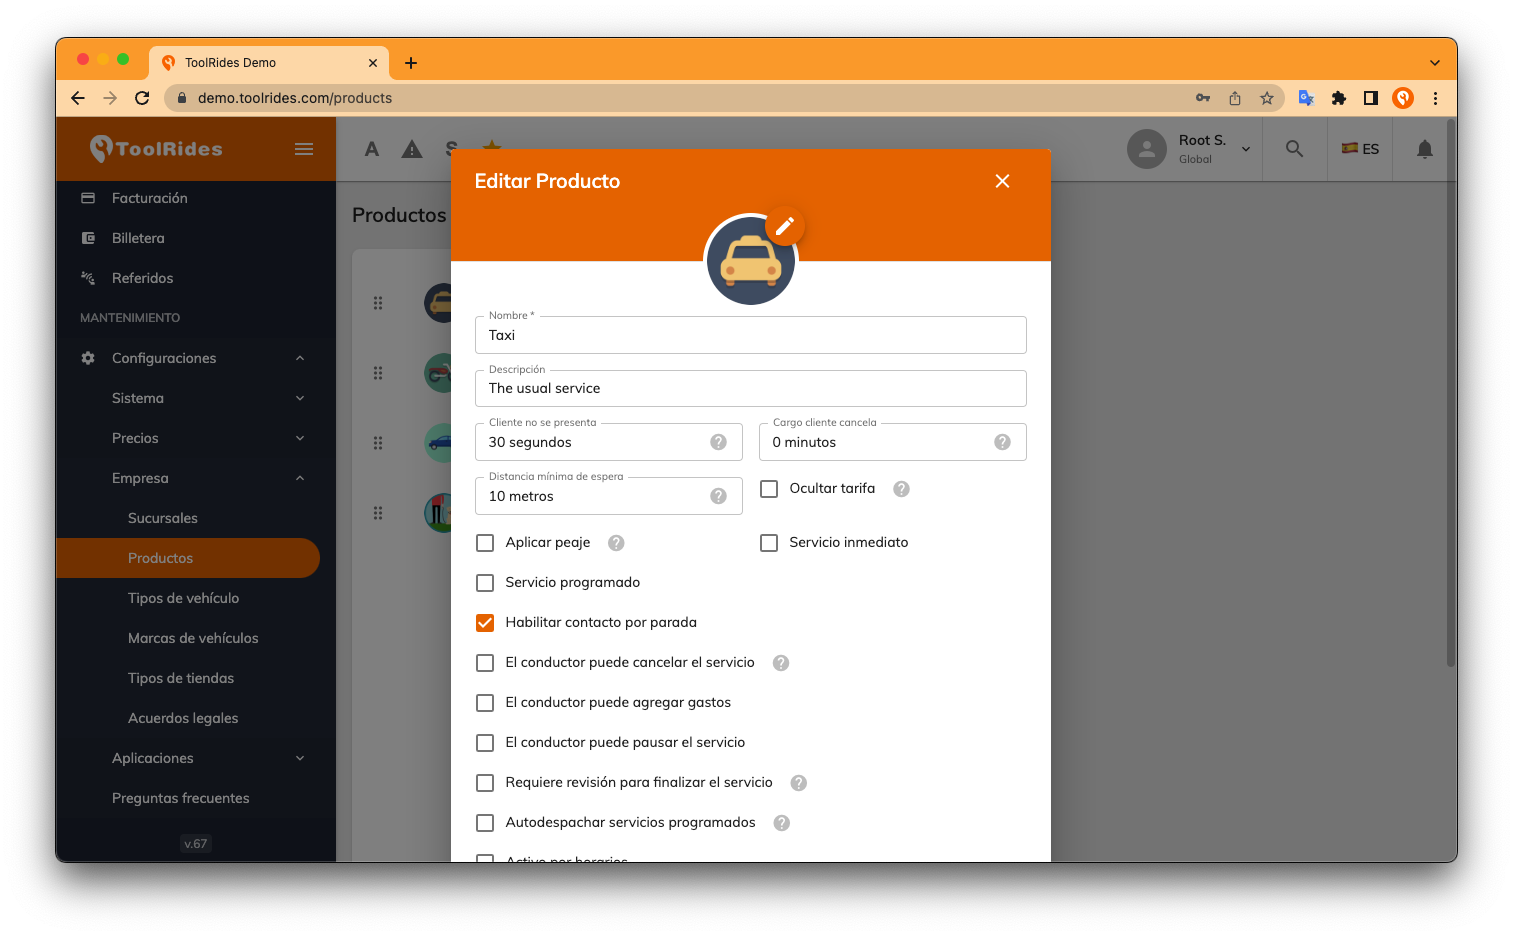
Enabling Stop Contacts
Stop contacts let you add extra details to each address of a user registered on the platform, or enter the details manually.
This helps drivers know who will be waiting at each address and lets you set up automated alert actions from the web panel.
To enable this feature, go to Settings > Company > Products.
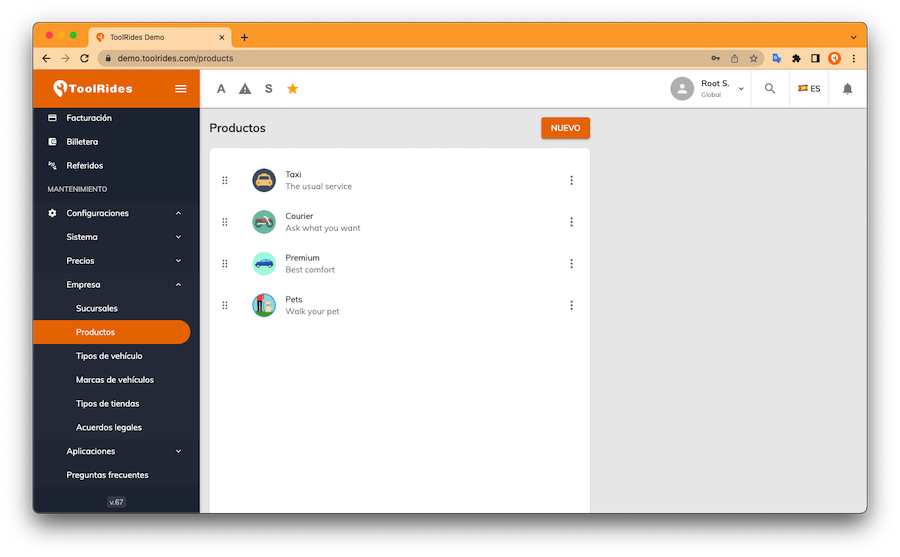
In this section, create or edit a product to customize stop contacts:
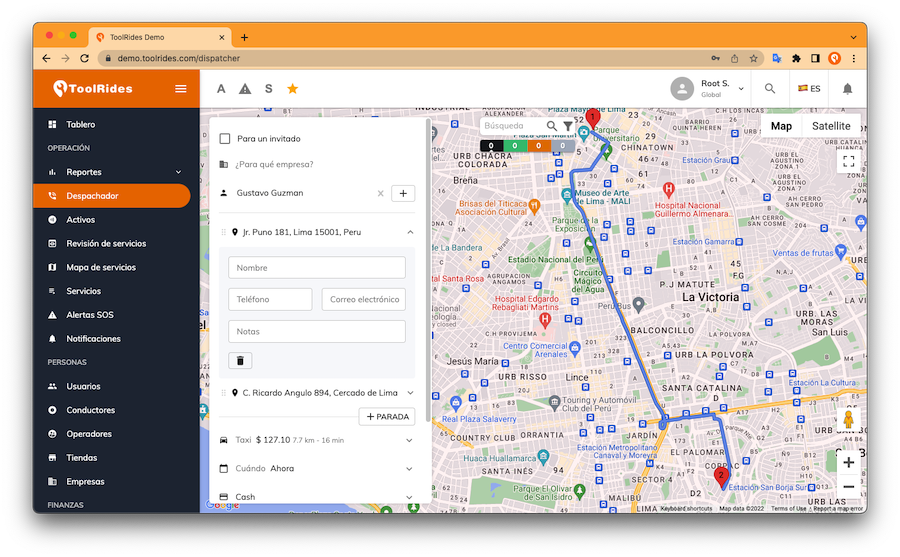
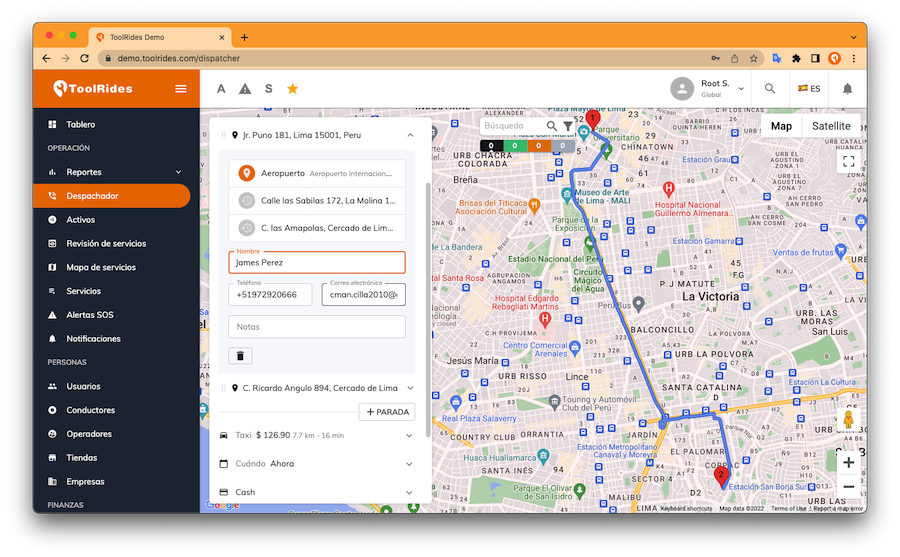
Once enabled, head to the Dispatcher to see the new fields on each address. Keep in mind that these fields appear after you select the main user and the address.
Once the Name, Phone, and Email fields appear, you can auto-fill the user for the first address with the information in your database. If the user isn't registered, you can enter all the details manually.
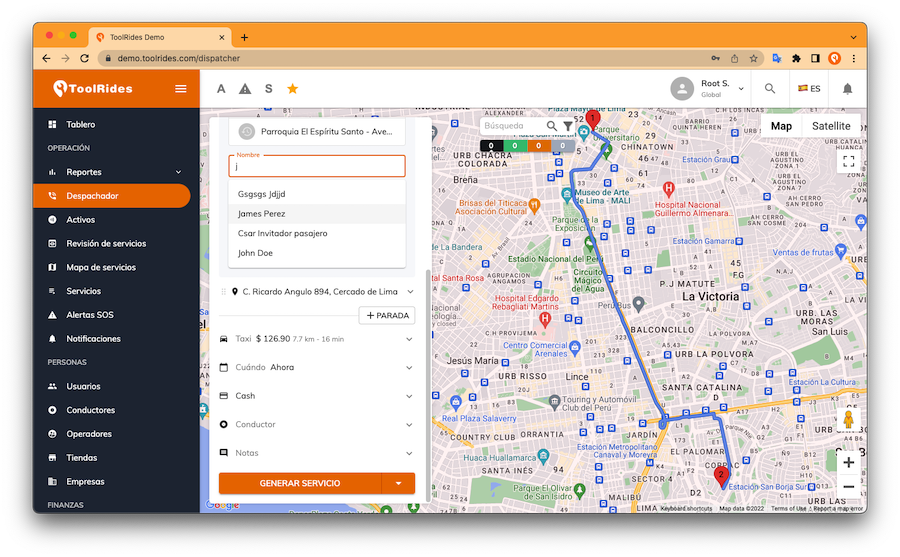
When you choose a user, the other details auto-fill, and the address list is shown based on the user's favorites and history:
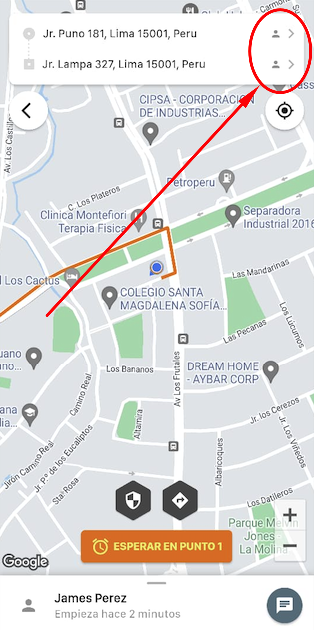
Driver app:
When a trip has passengers at each address, the following icon appears at each stop:
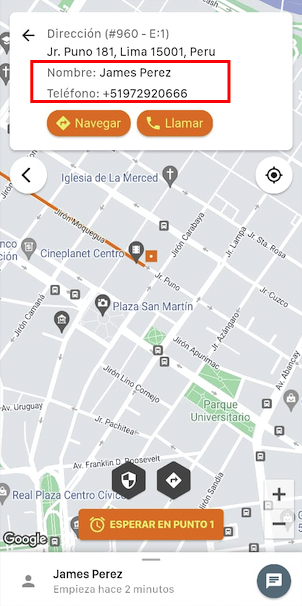
Opening the details shows the contact's name and phone number:
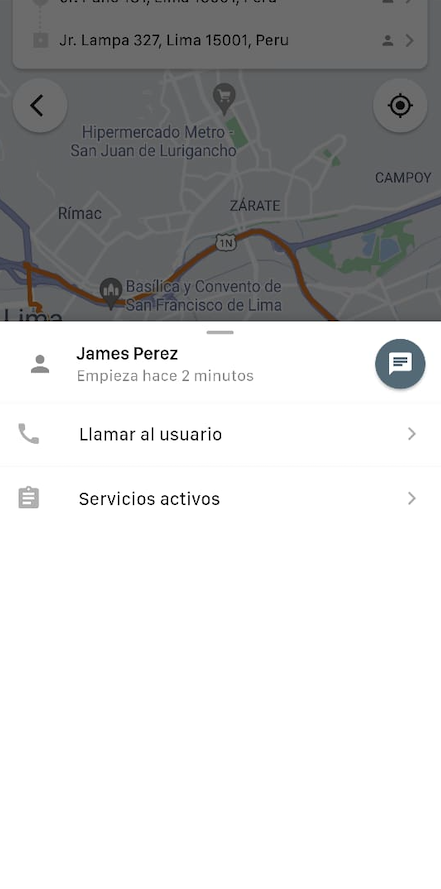
The user shown below also corresponds to the user for each stop, if one was entered:
Was this article helpful?