
 Use cases
 Messaging
 Taxi Companies
 Private Transport
 Transportation Entrepreneurs
 Last Mile
 SuperApp
 Software
 Taxi dispatch
 Corporate transportation
 Auction
 Products
 Booking Software
 Dispatch Platform
 Driver App
 Passenger App
 Web Widget
 Functions
 Schedule & Booking
 Driver Management
 Custom
 Corporate Portal
 Security & Support
 Resources
 Learn
Learn



Create branches and assign rate tables by service type and company
In the following video, you'll learn how to create branches and assign a rate table to each one by service type, also called a product.
🎬 Video: https://www.youtube.com/embed/1v_kDPjKWjQ?&wmode=opaque
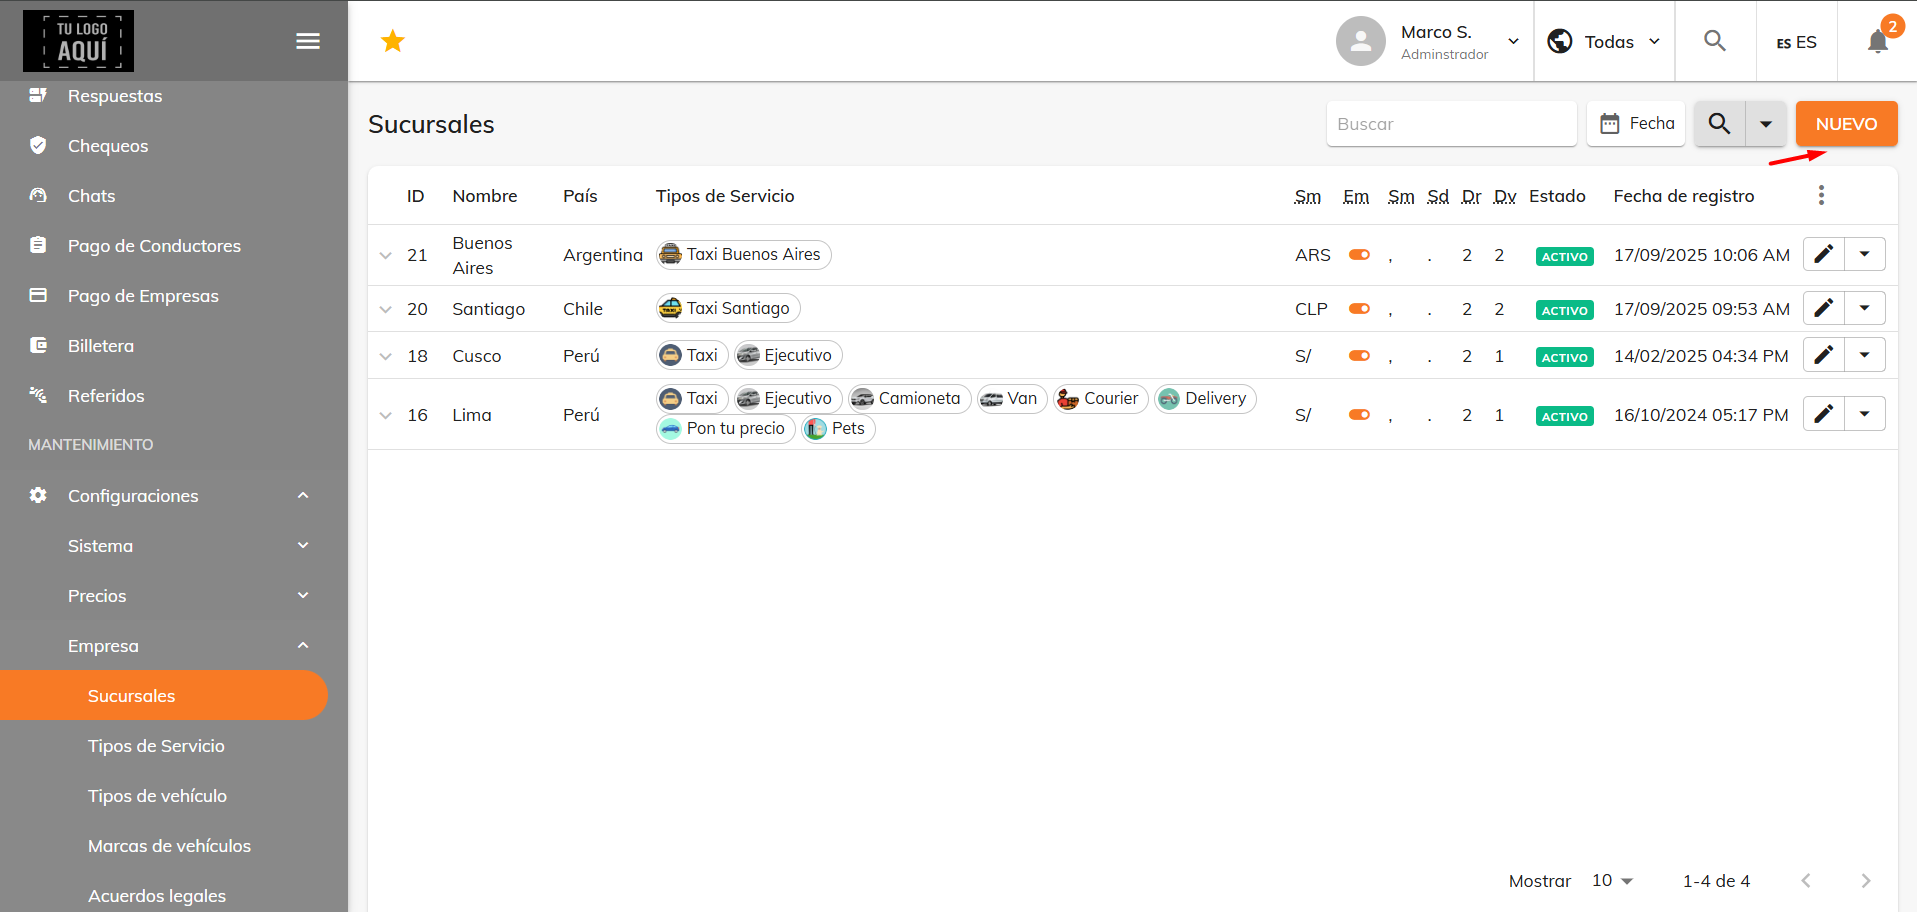
A branch is the coverage area where rides take place—in other words, the zone from which drivers can pick up passengers. Rides can't be requested outside the branch's area. To create a new branch, go to Maintenance > Settings > Company > Branches and click the option to add a new one in the top right.
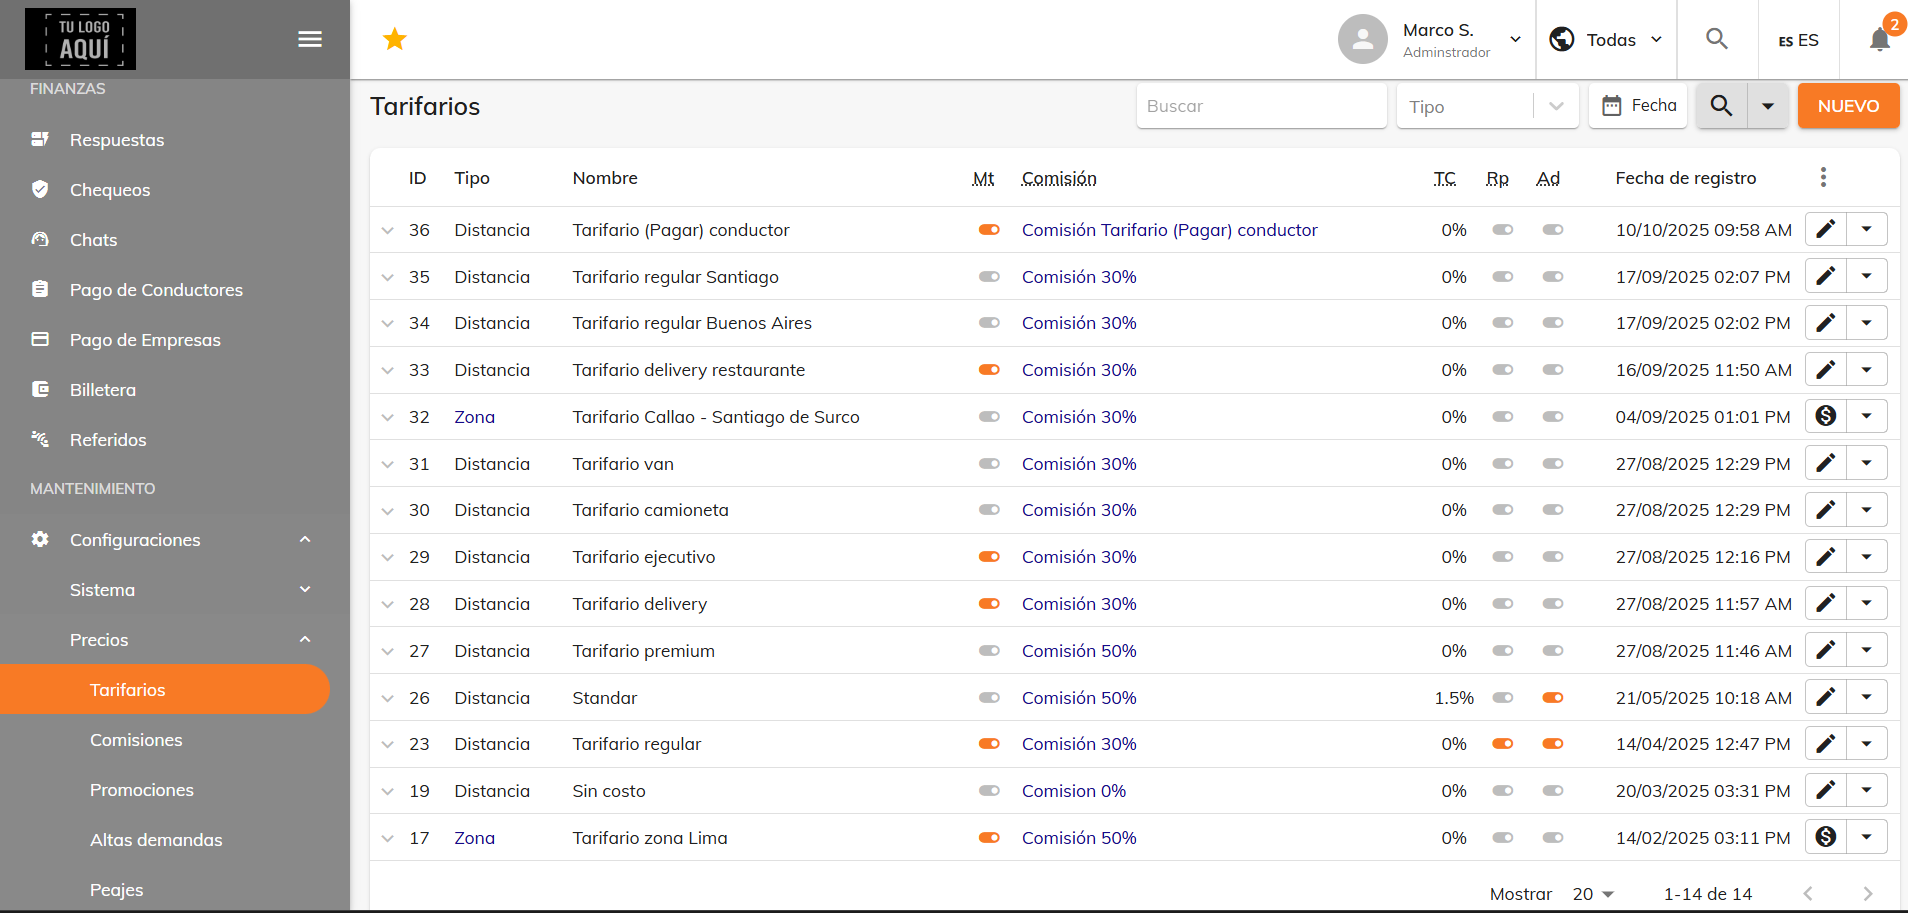
If you want to apply different rate tables to each branch, go to Maintenance > Settings > Pricing > Rate Tables and create the corresponding new rate tables, whether by distance or zone.
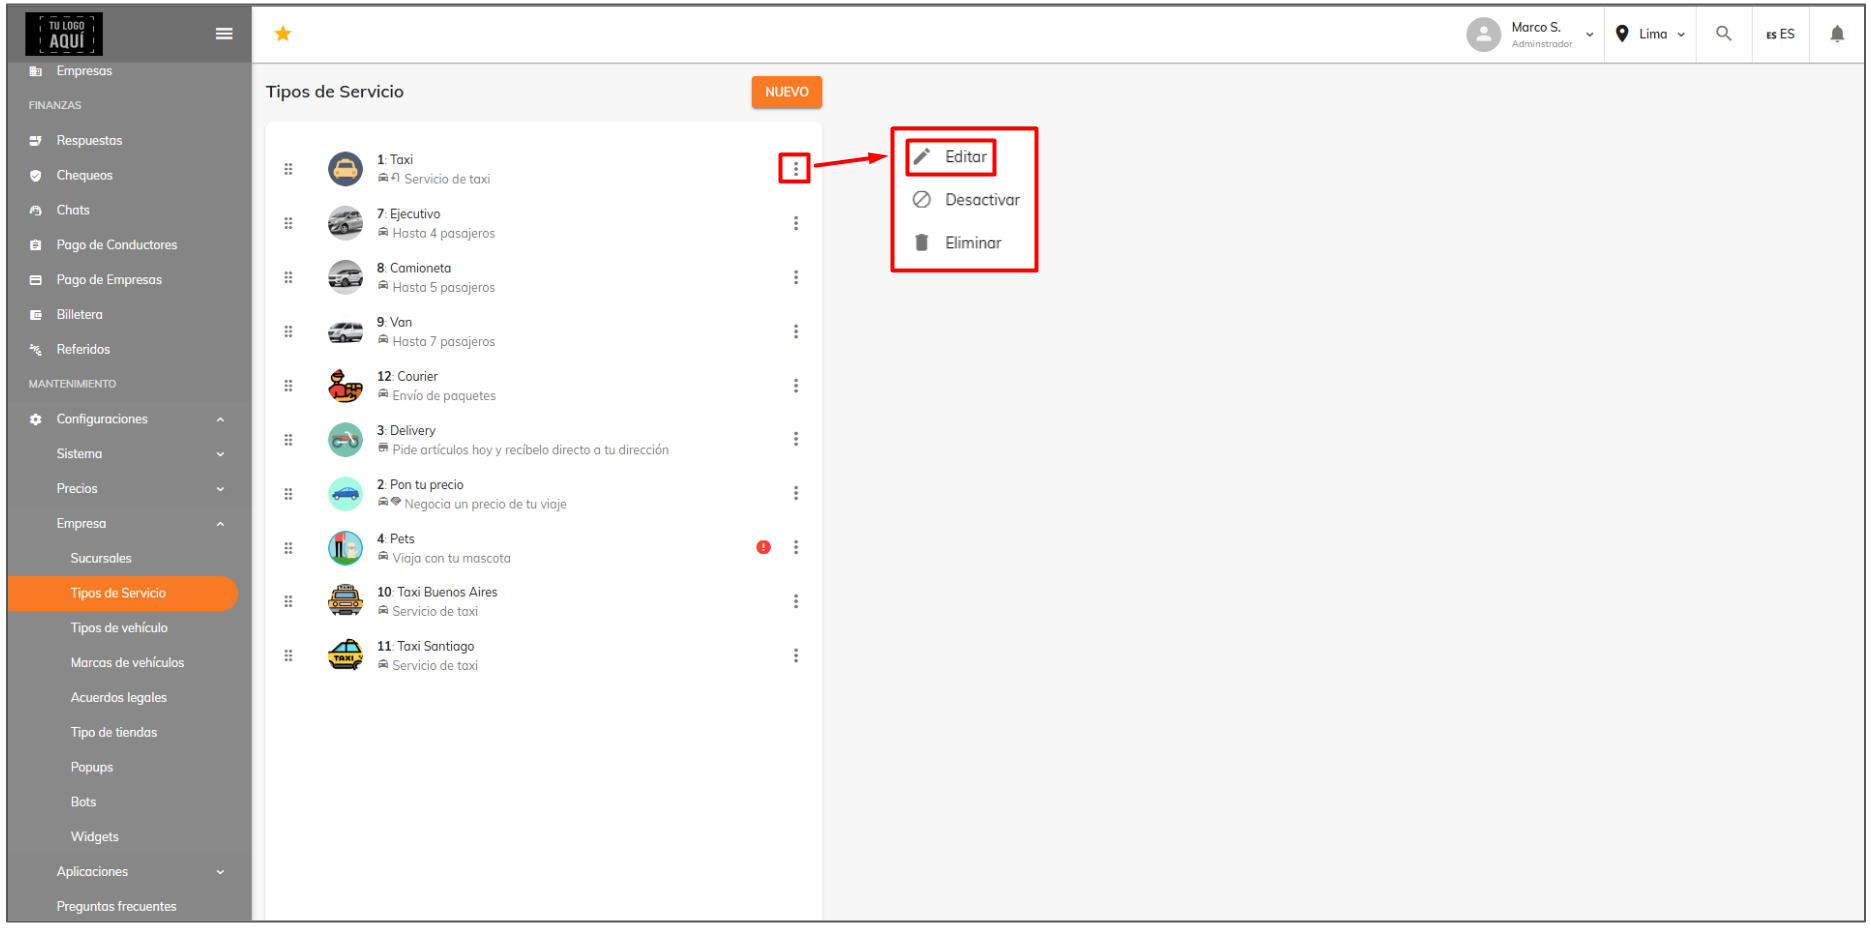
To assign a service type to each branch with its own rate table, go to Settings > Company > Service Types. Then select the service type you want and click "Edit".
At the bottom of the editor, you'll see the branches you can enable and assign rate tables to. Once you've made your selections, click "Save".
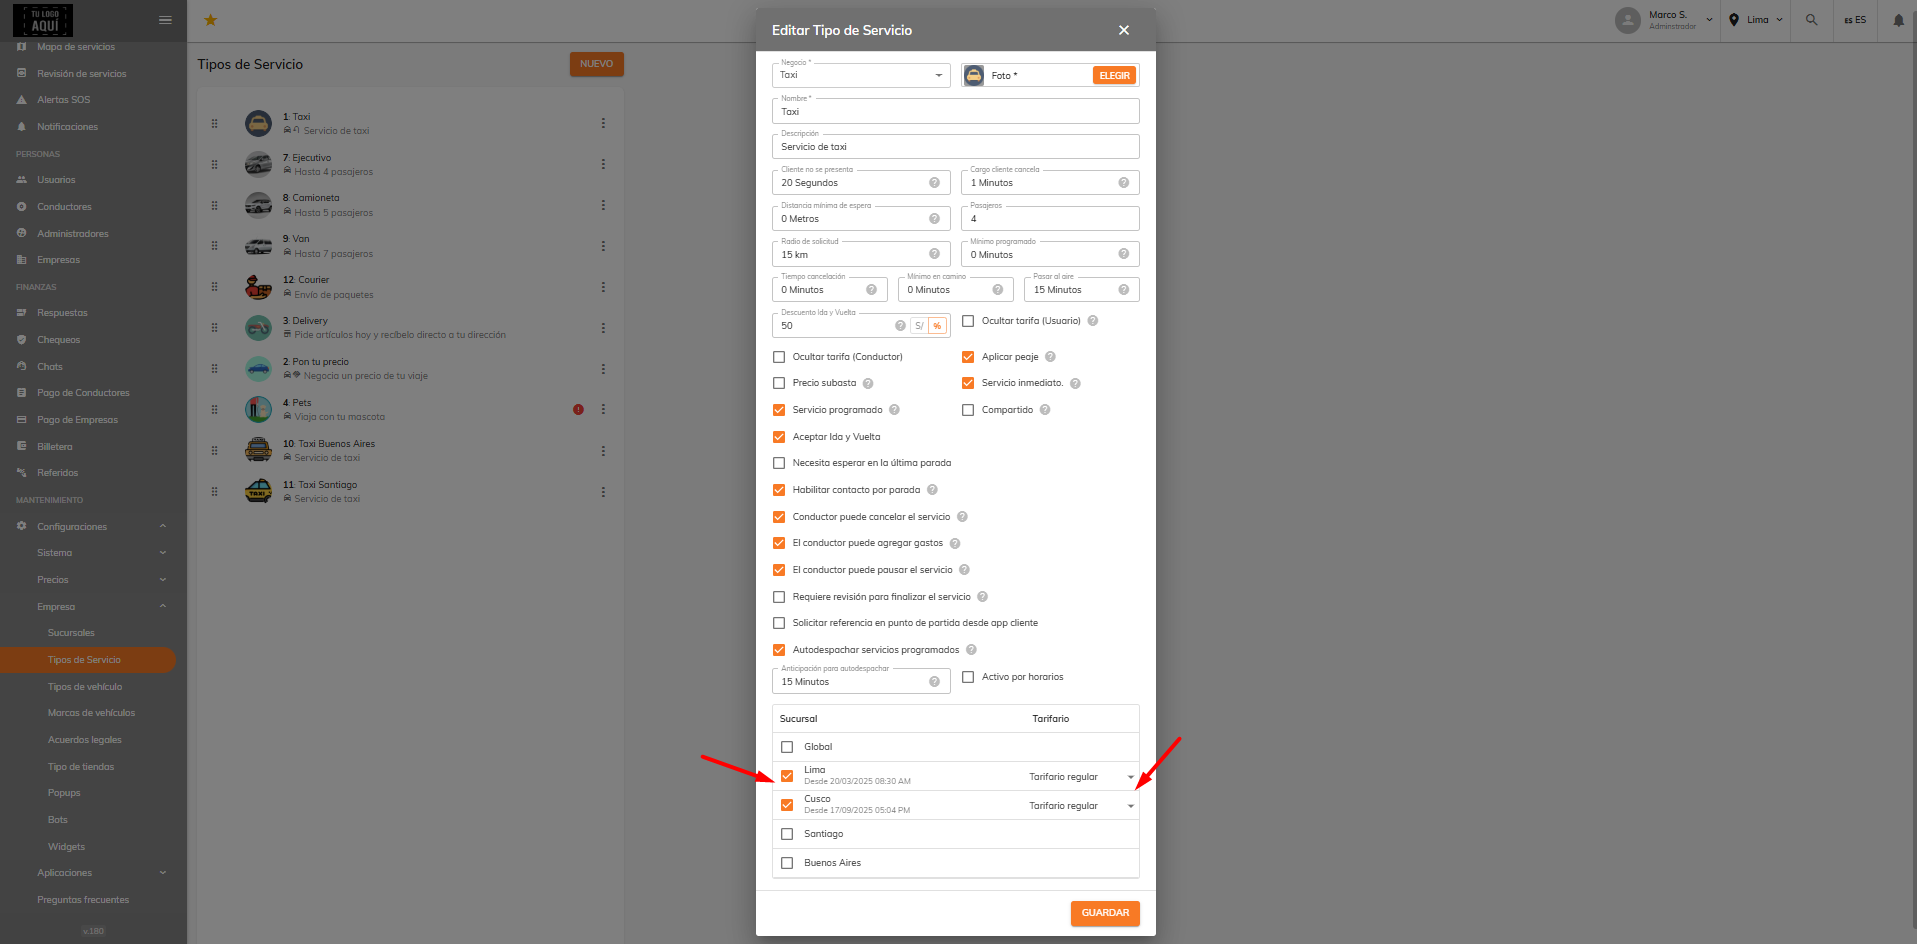
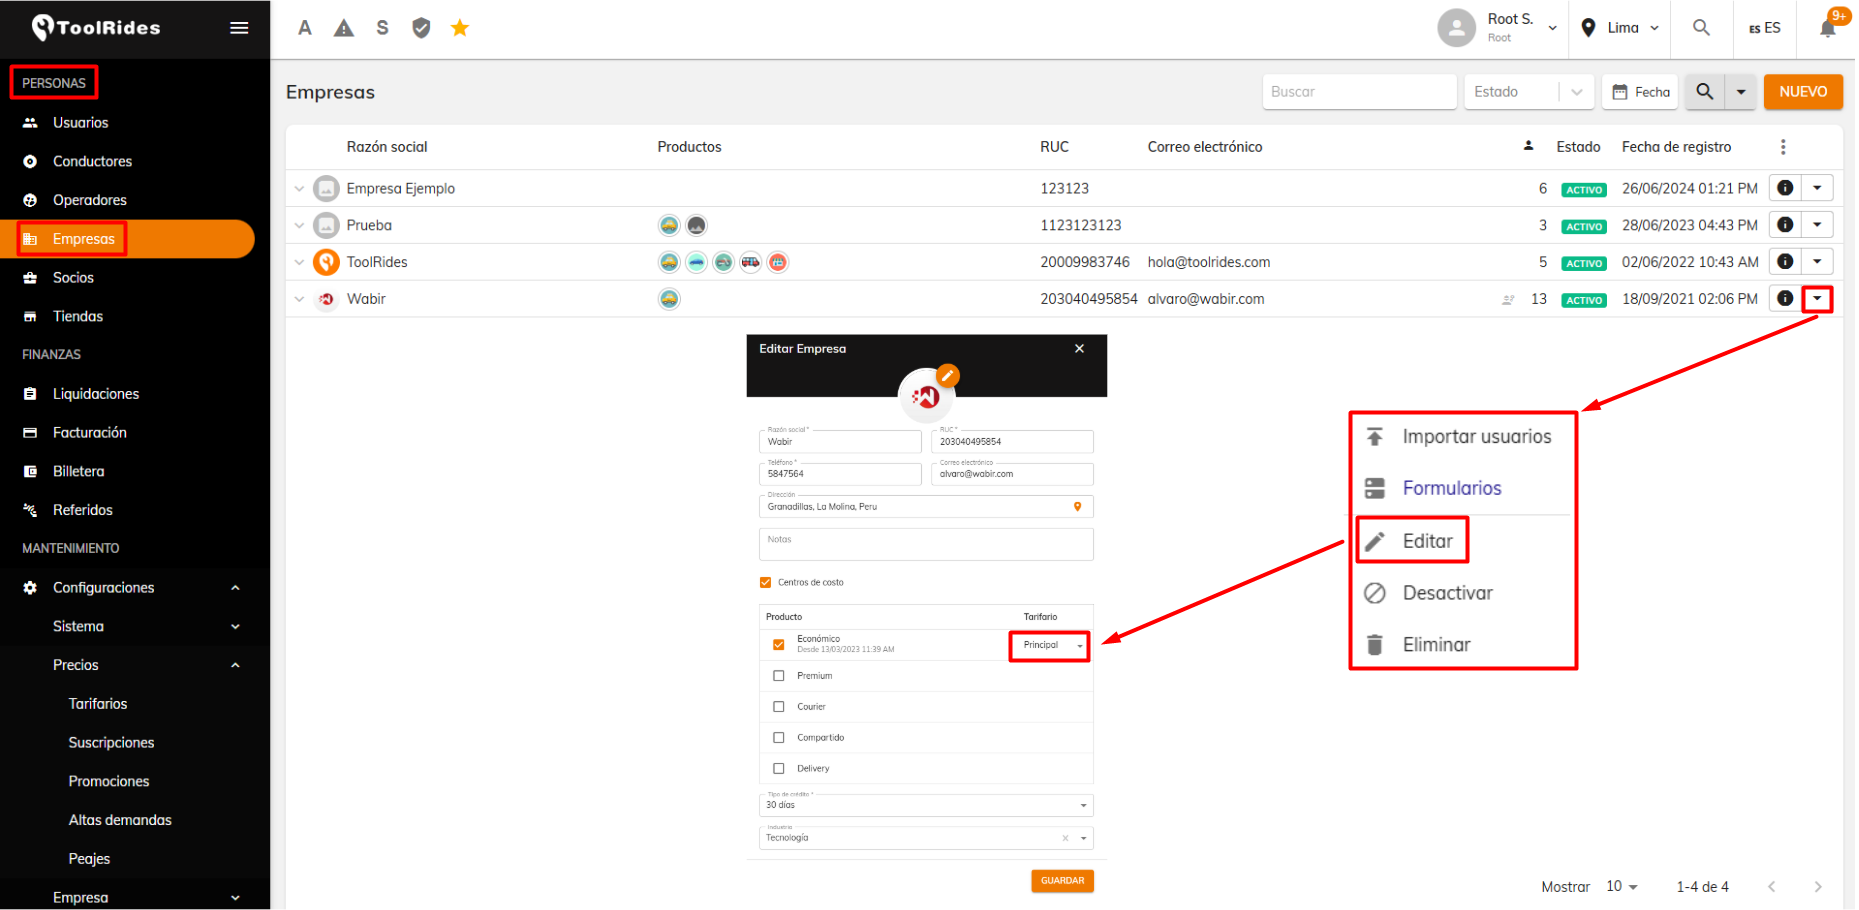
This is how you assign rate tables to service types, which means they apply to individual users or passengers. If you want to assign a rate table to a specific company, edit that company and assign it a rate table. This way, corporate passengers—those who belong to a company—will be charged that rate instead.
Was this article helpful?
Getting Started
- General Settings
- Customize your company information
- Create branches and assign rate tables by service type and company
- Setting up a distance-based fare (price per KM)
- Tolls (Tags): Setting Up Zones and Pricing
- Setting up zone-based pricing
- Setting up service types
- Trip grouping settings
- Configure your time settings in the panel