
 Use cases
 Messaging
 Taxi Companies
 Private Transport
 Transportation Entrepreneurs
 Last Mile
 SuperApp
 Software
 Taxi dispatch
 Corporate transportation
 Auction
 Products
 Booking Software
 Dispatch Platform
 Driver App
 Passenger App
 Web Widget
 Functions
 Schedule & Booking
 Driver Management
 Custom
 Corporate Portal
 Security & Support
 Resources
 Learn
Learn



Integrating Mercado Pago in the web panel for card payments
Go to https://www.mercadopago.com/ and click "Log in."
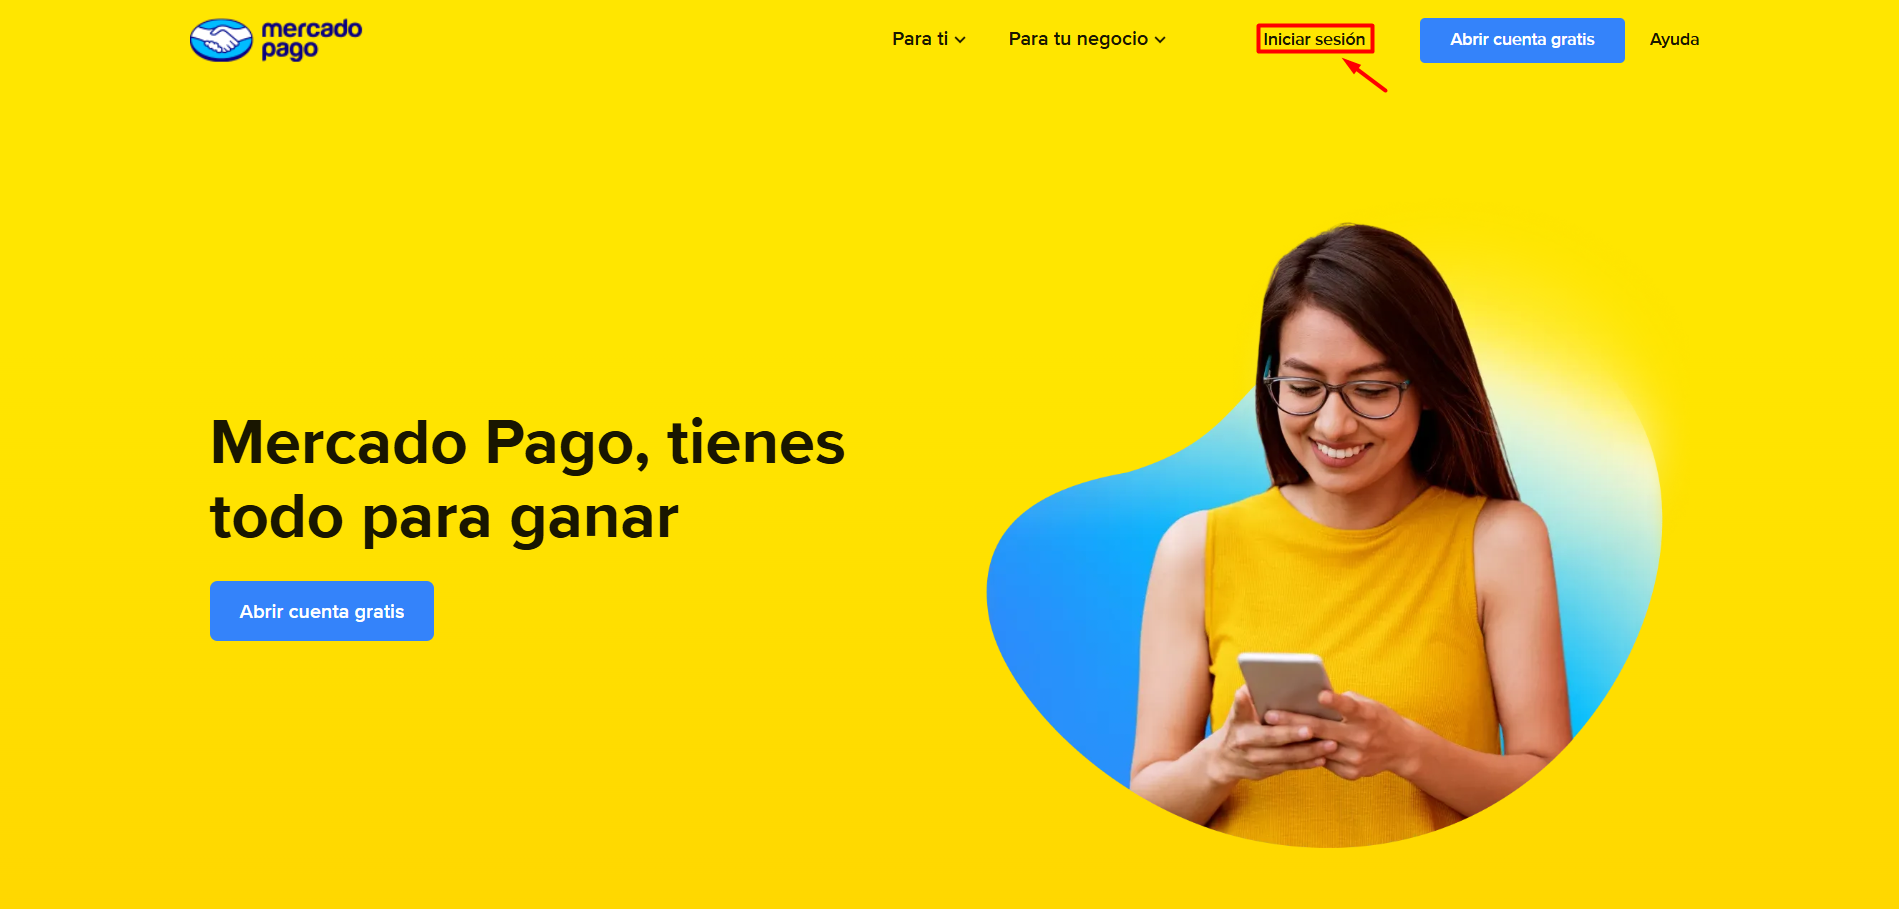
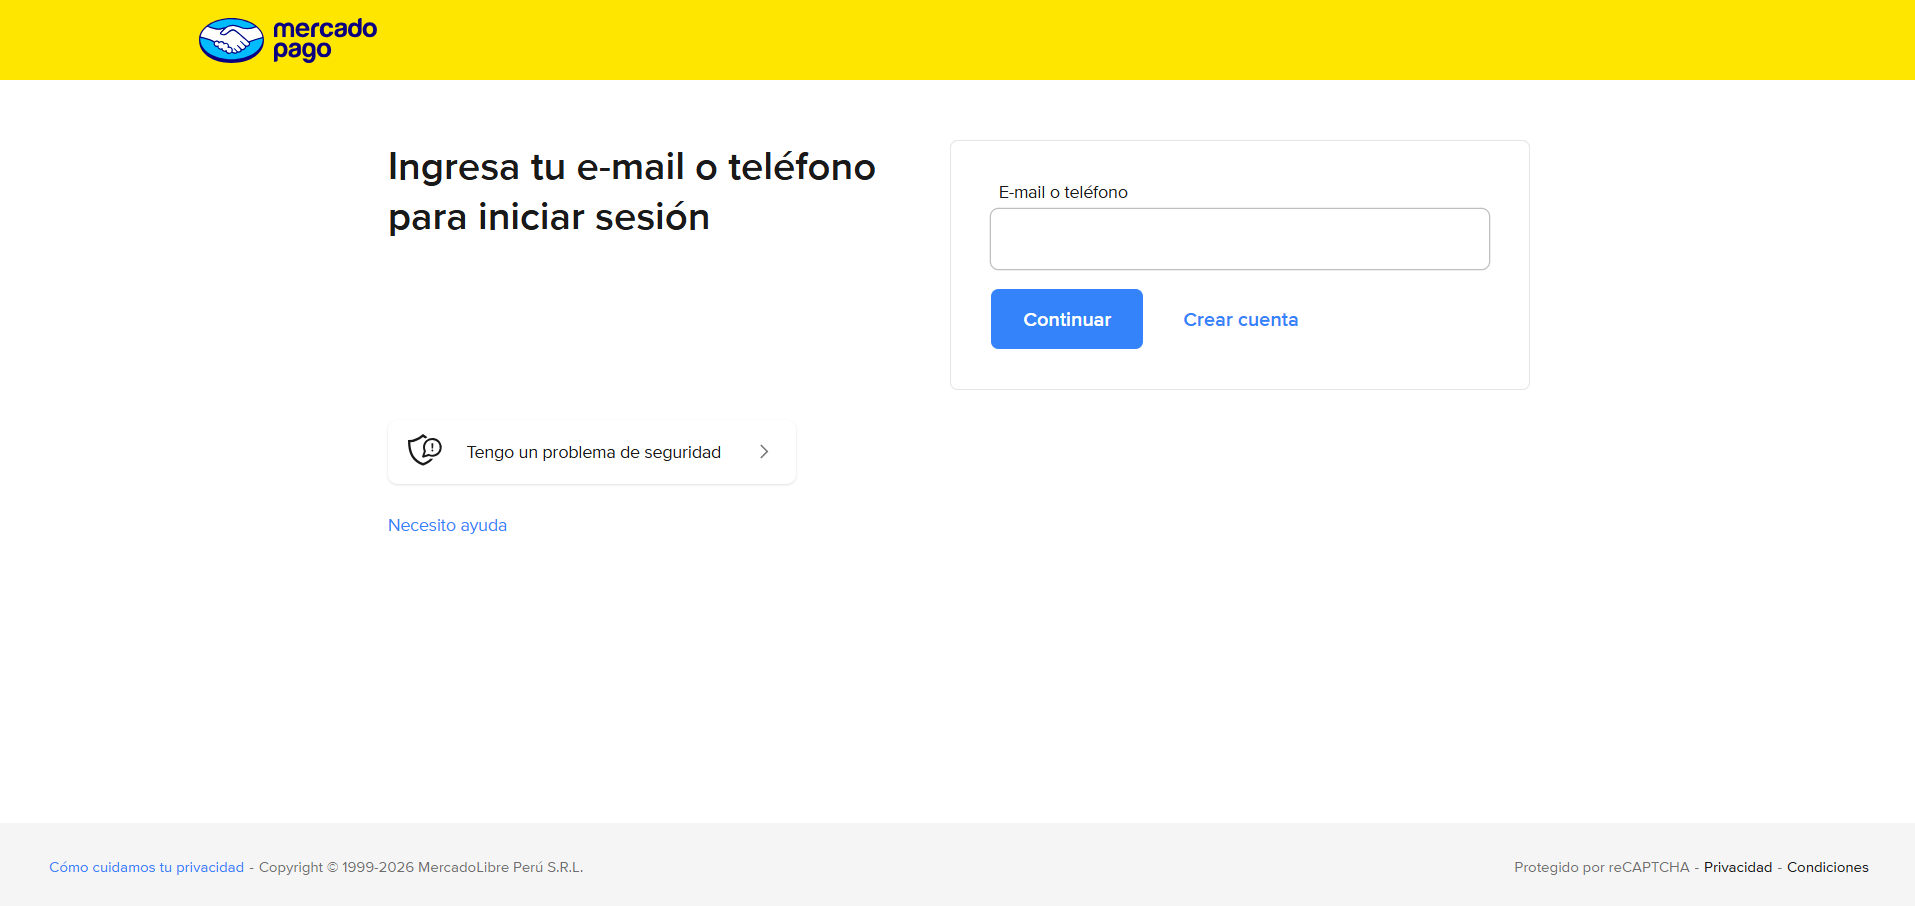
Log in with your username and password.
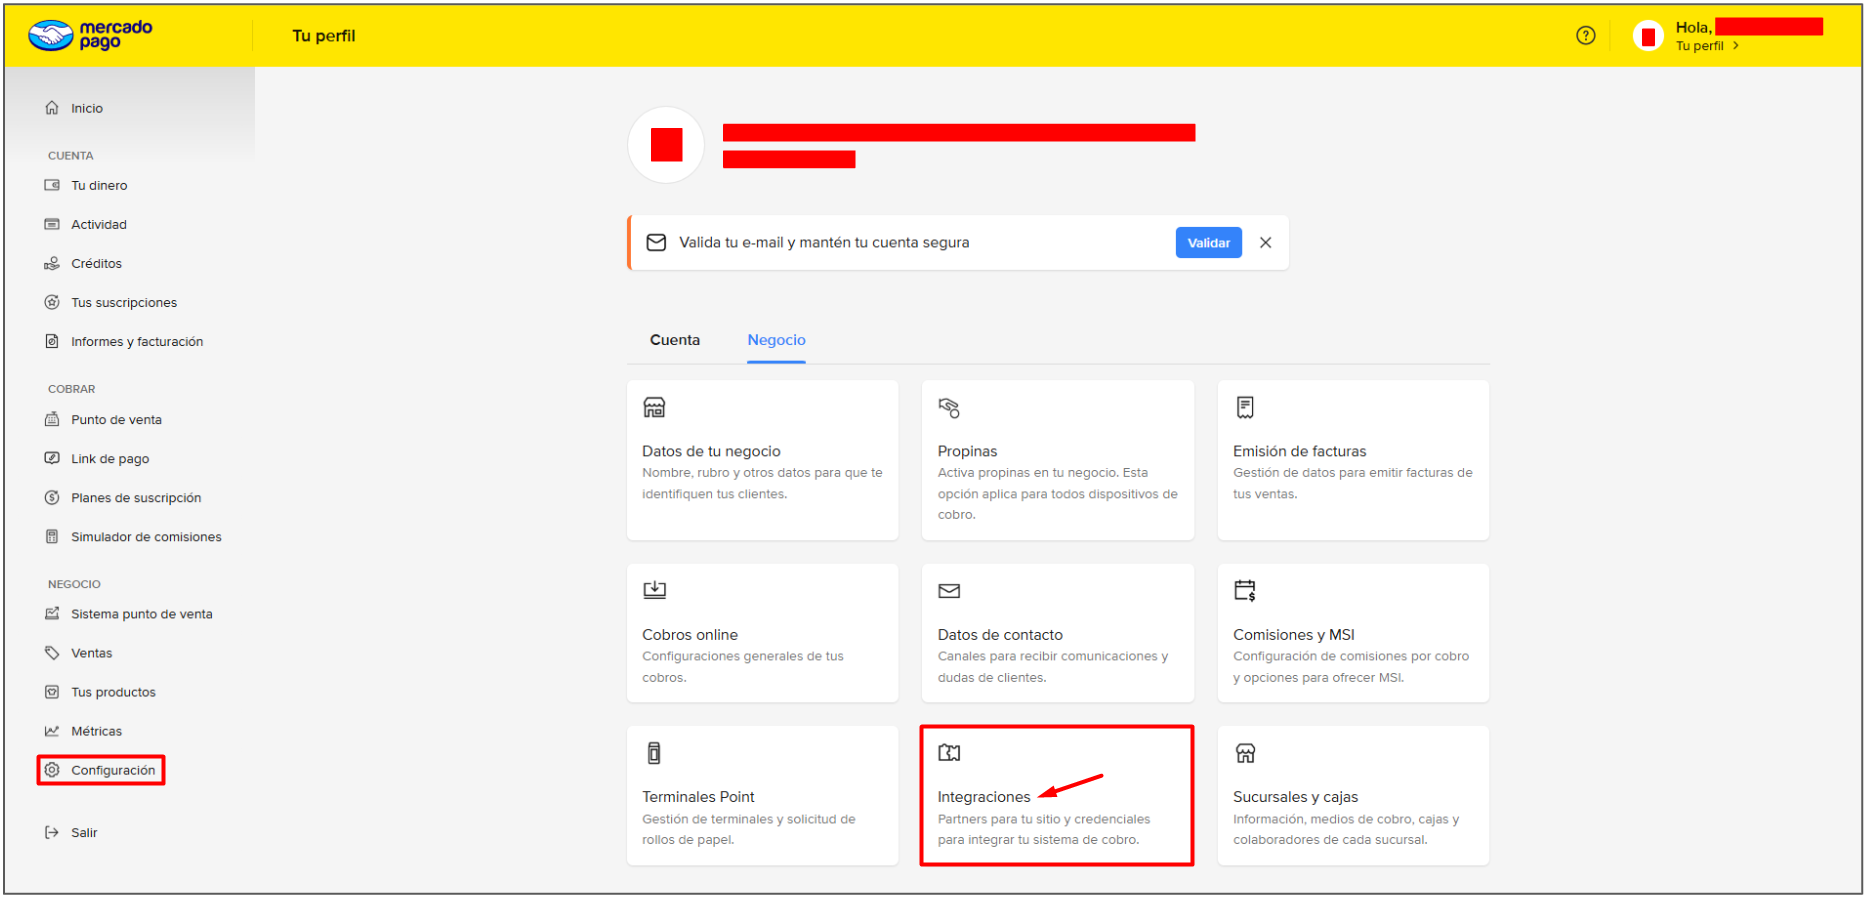
Go to Settings > Integrations.
Select "Your integrations."
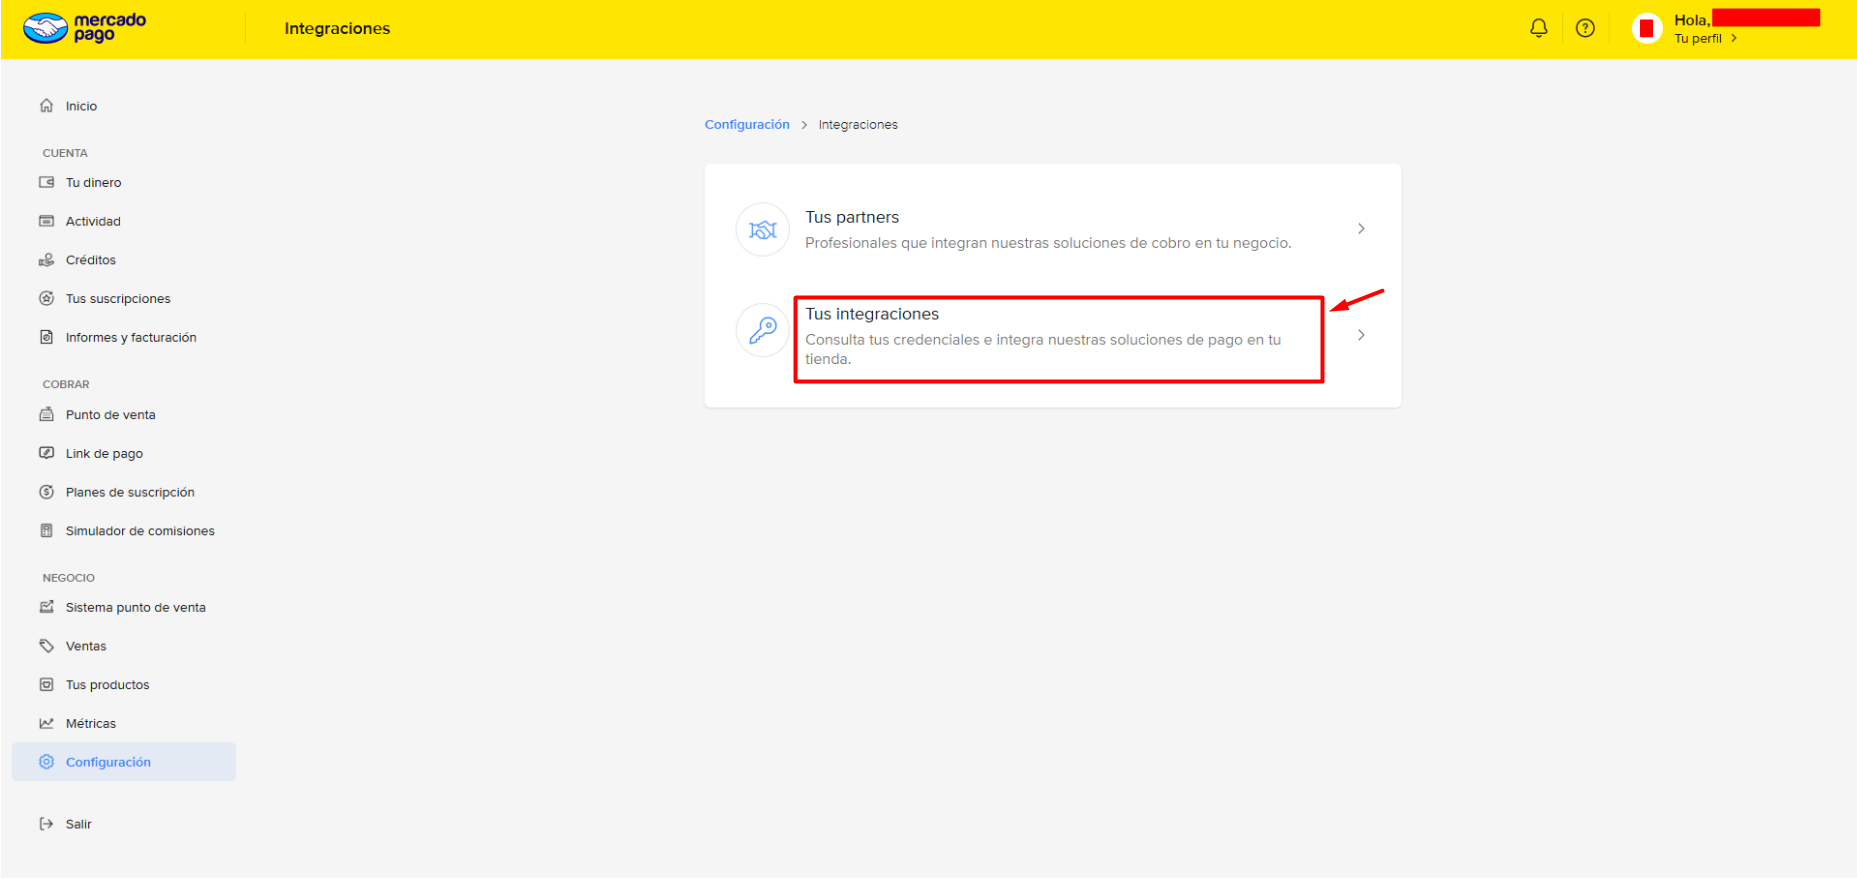
Create an application using the button.
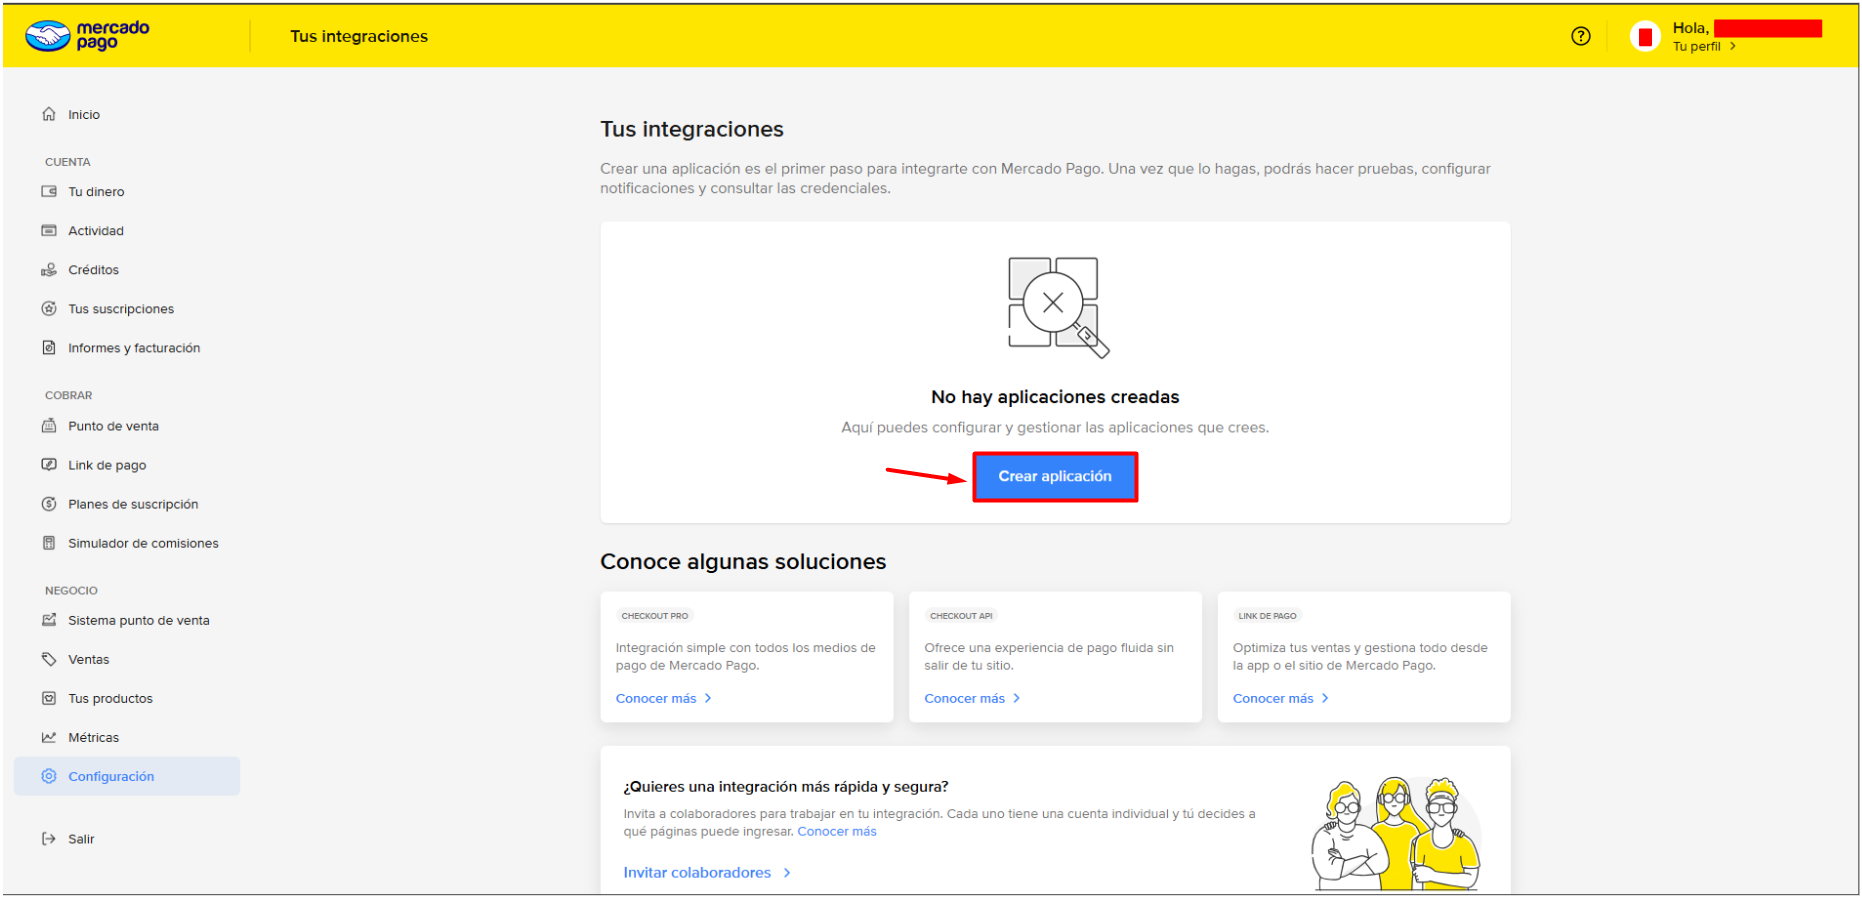
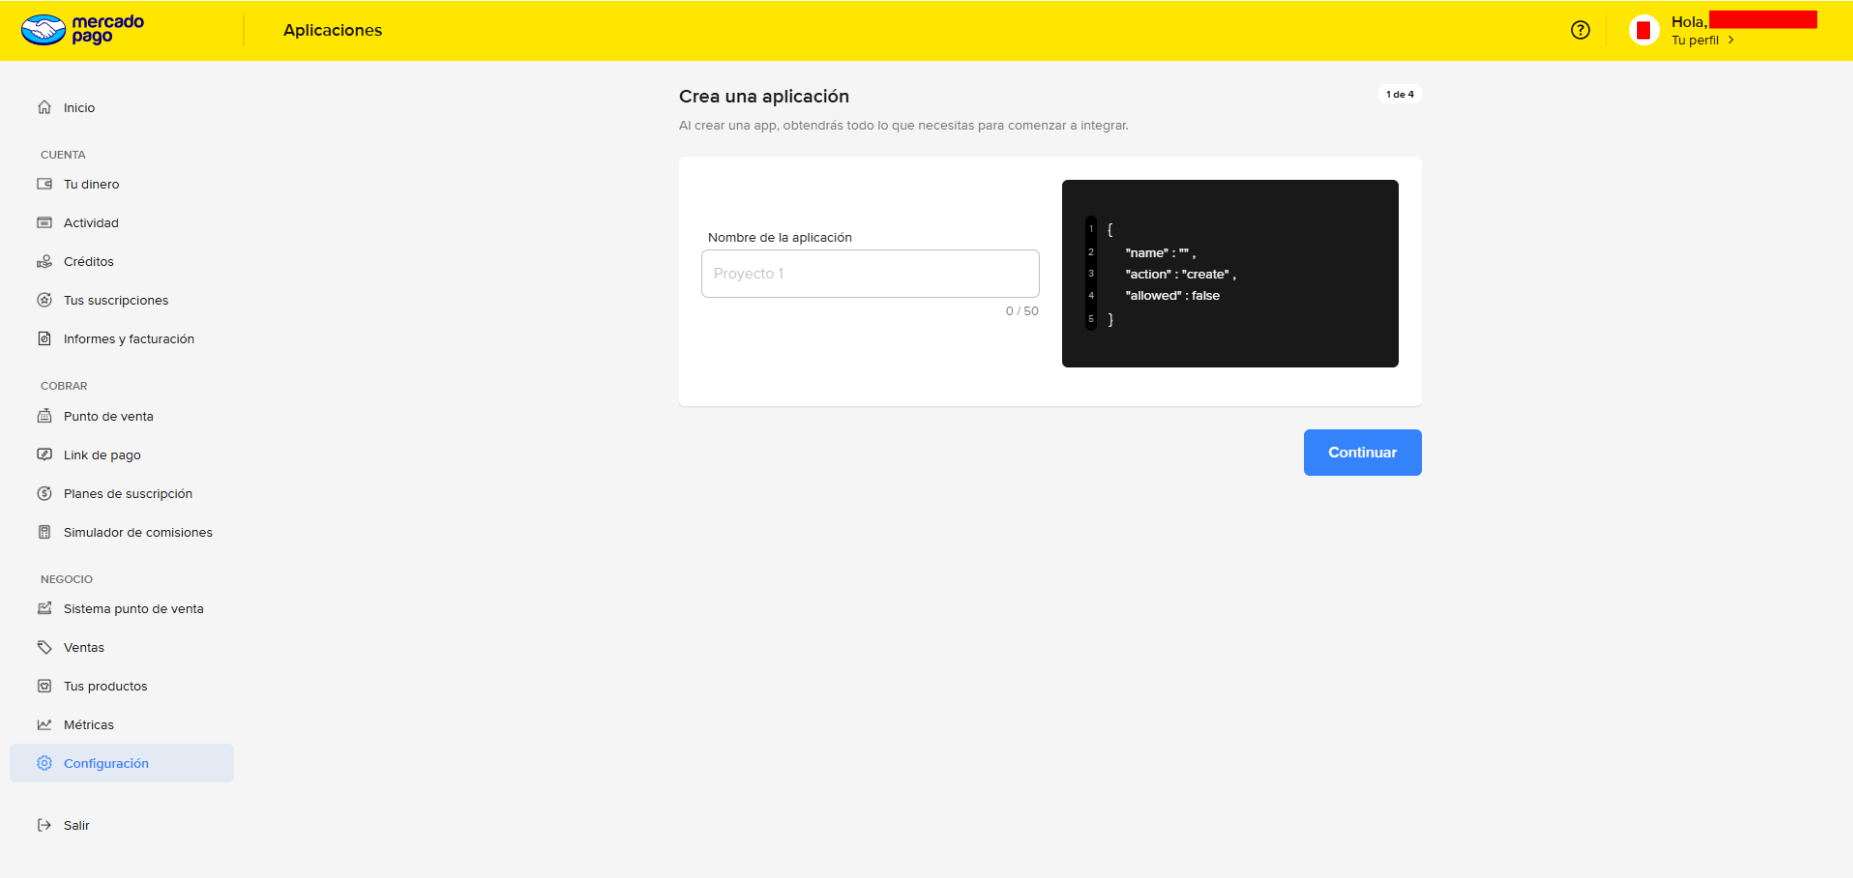
Name the application.
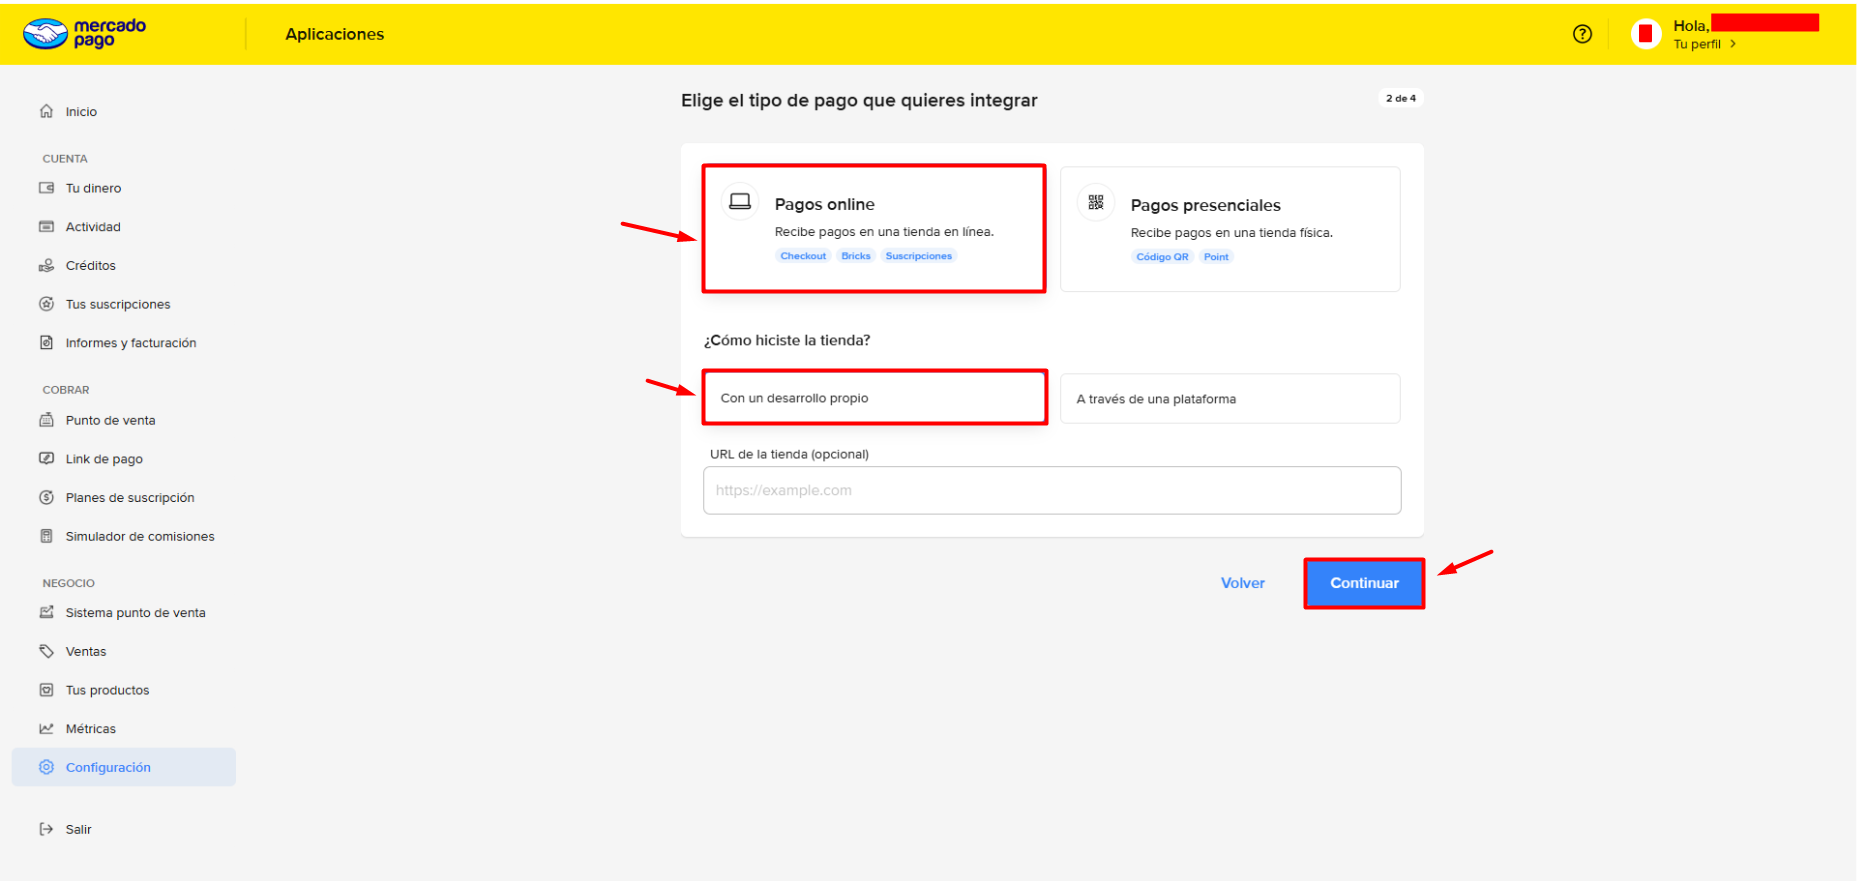
Choose the options "Online payments" and "With a custom integration."
Select the "Checkout API" option.
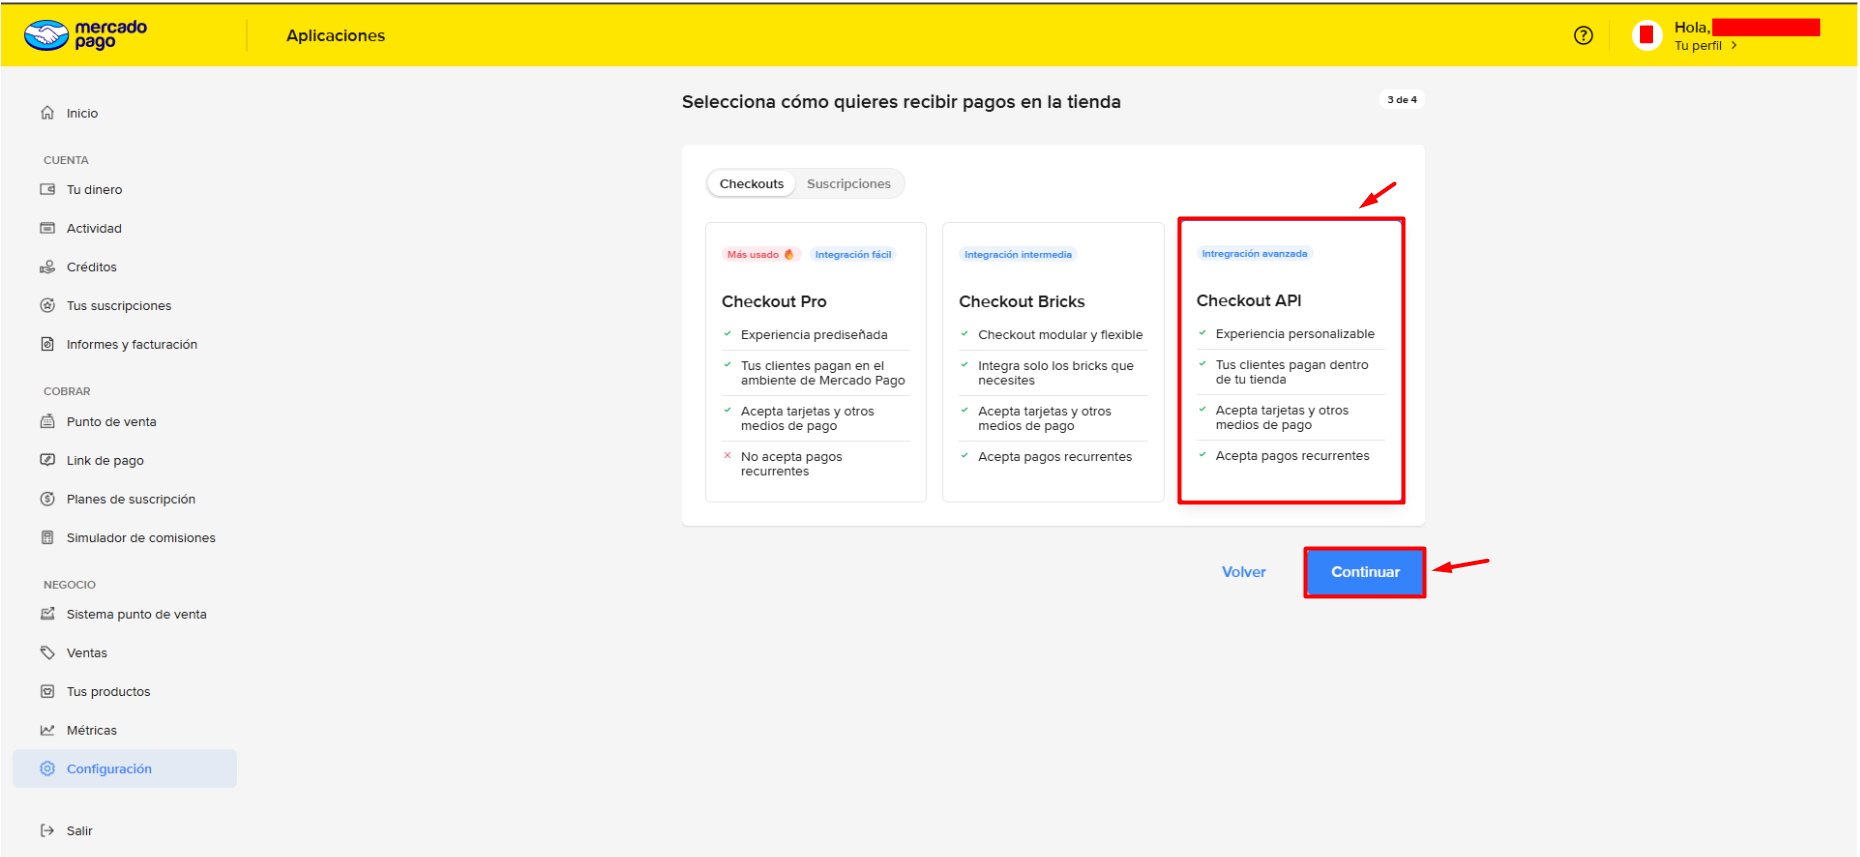
Select the "Payments API" option.
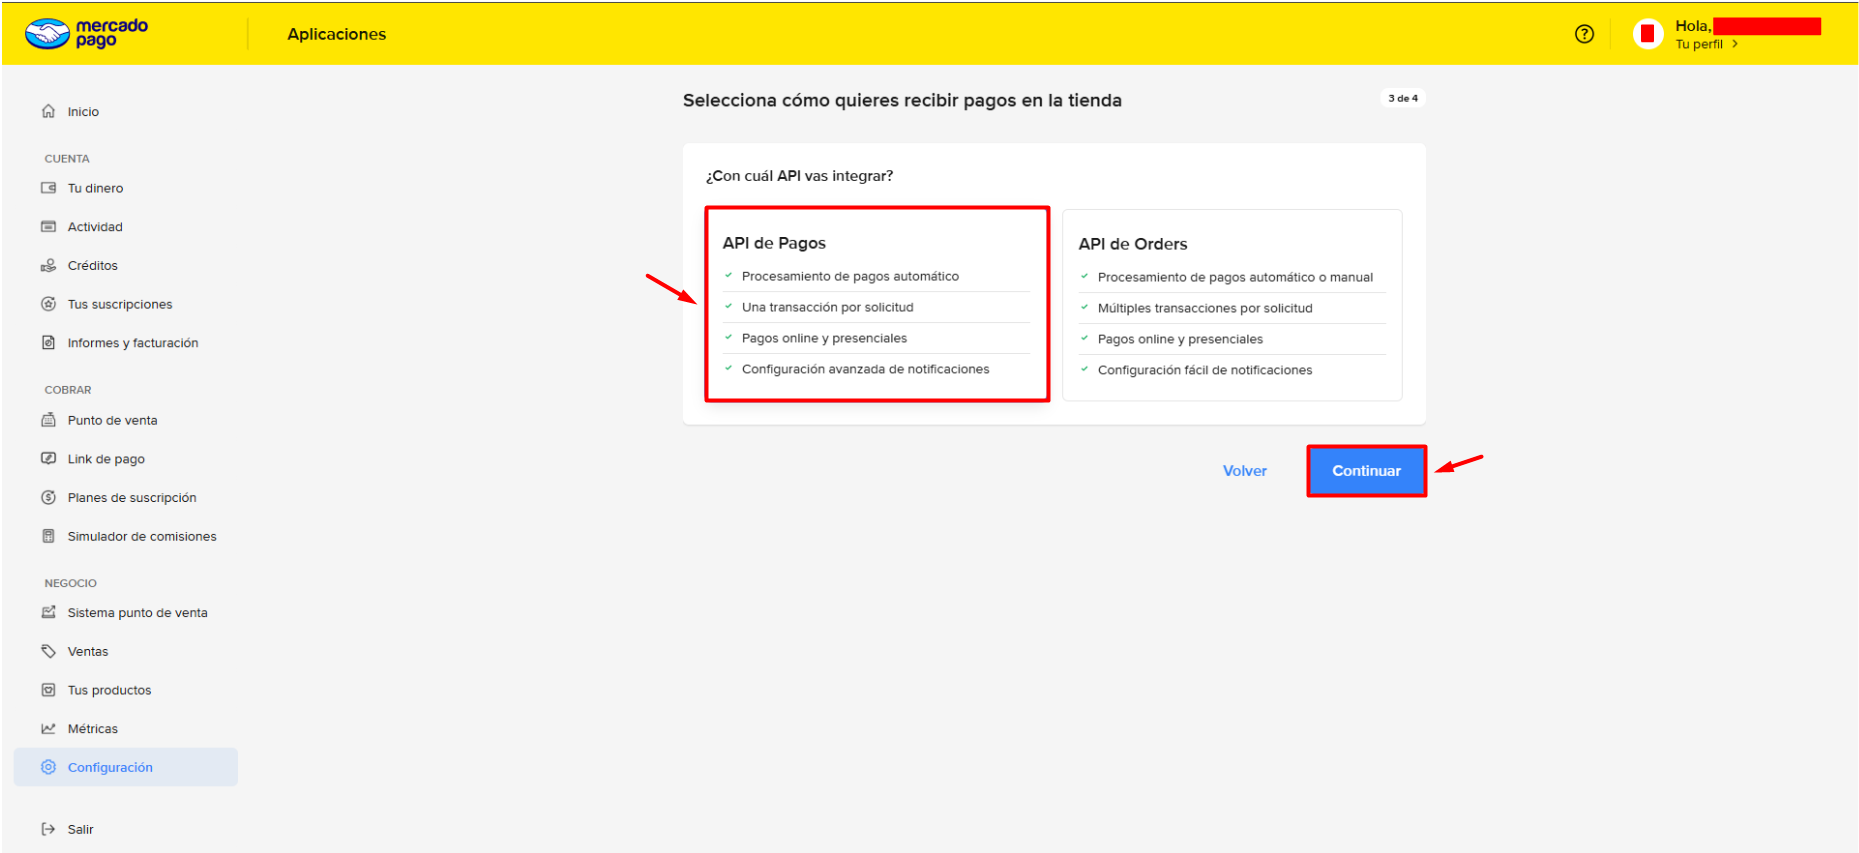
Accept the terms and conditions and click the "Continue" button.
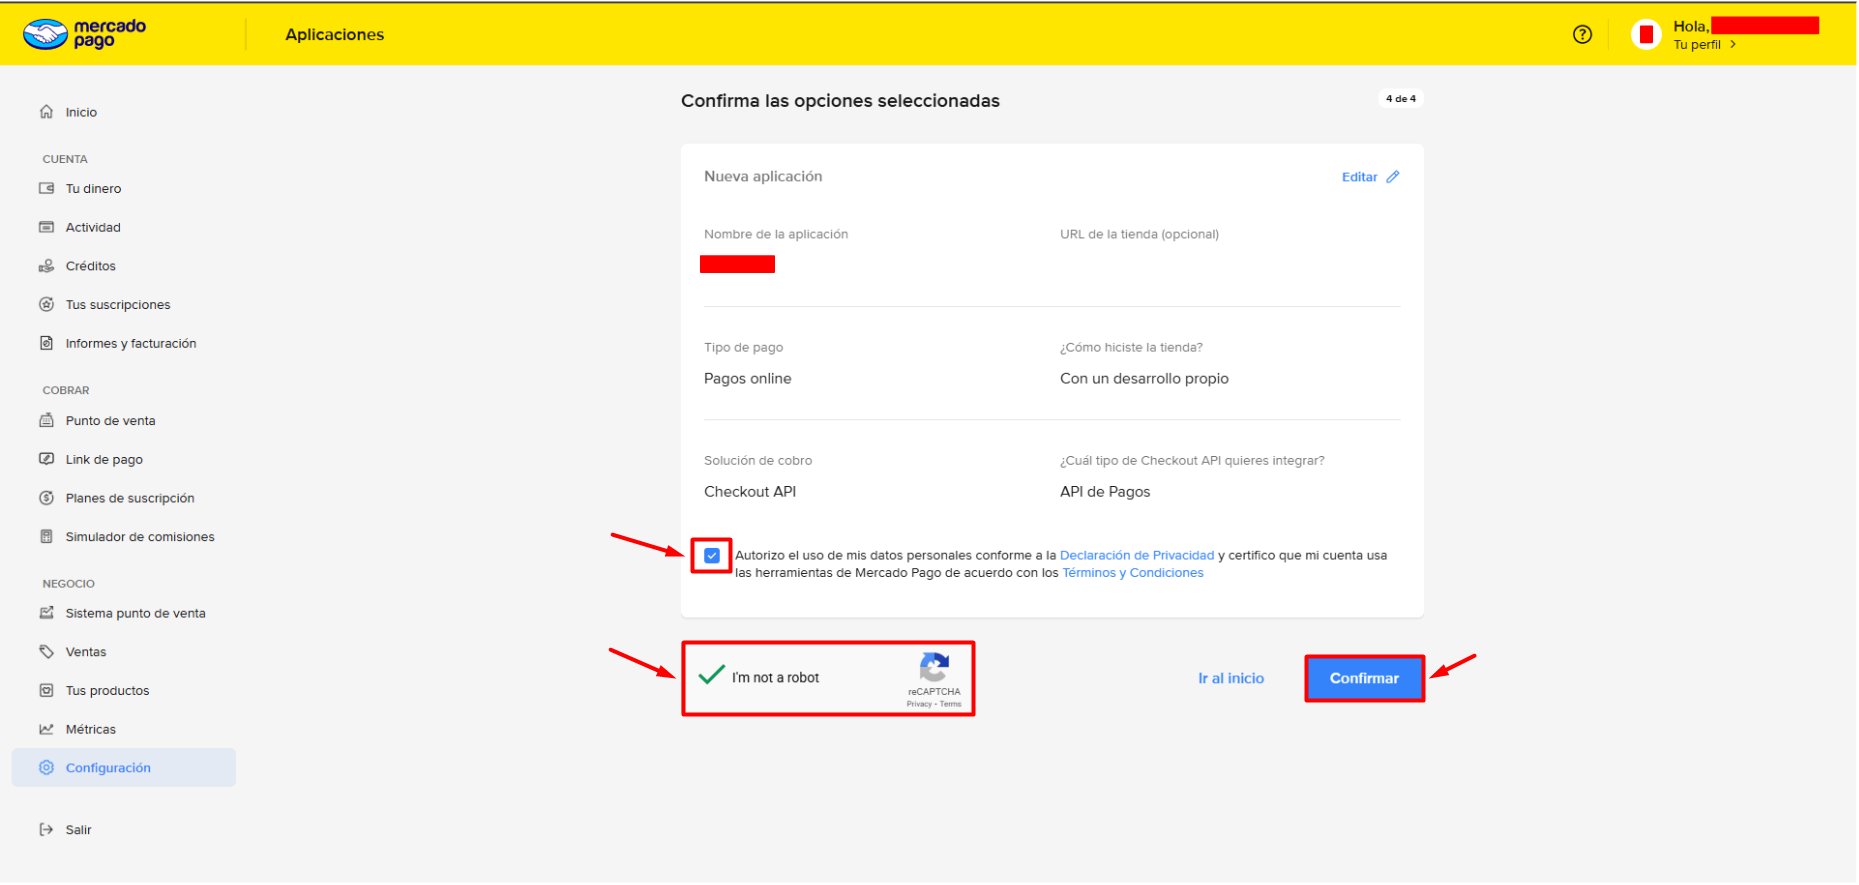
Click the "Activate credentials" option.
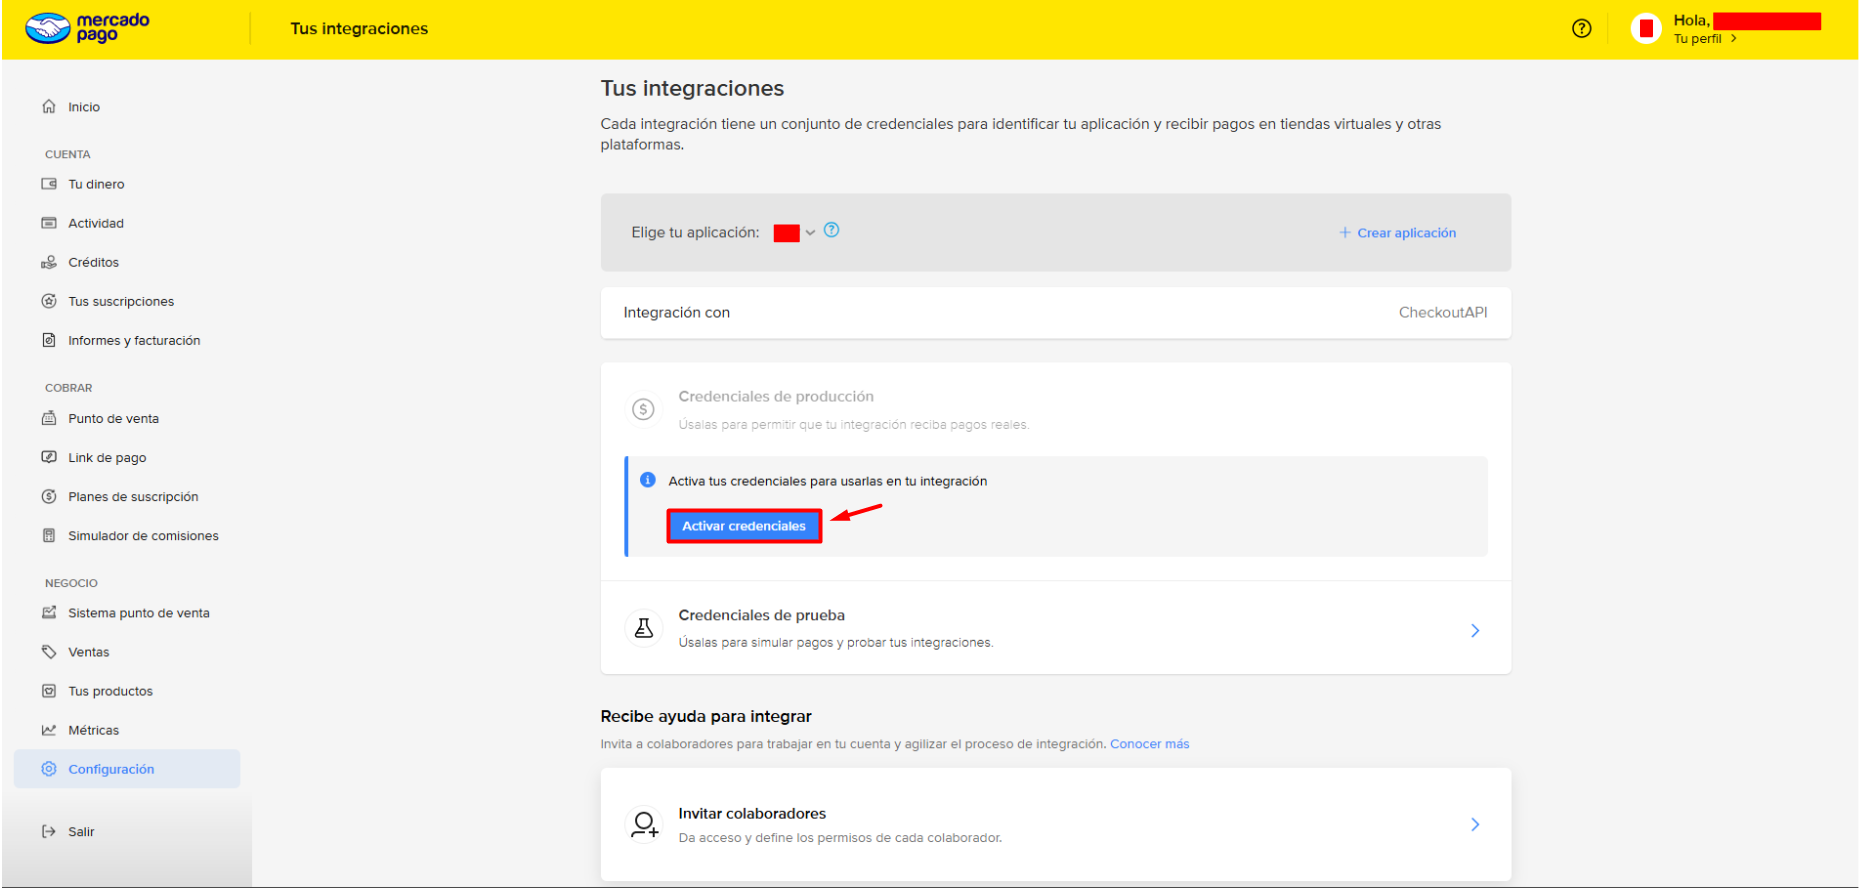
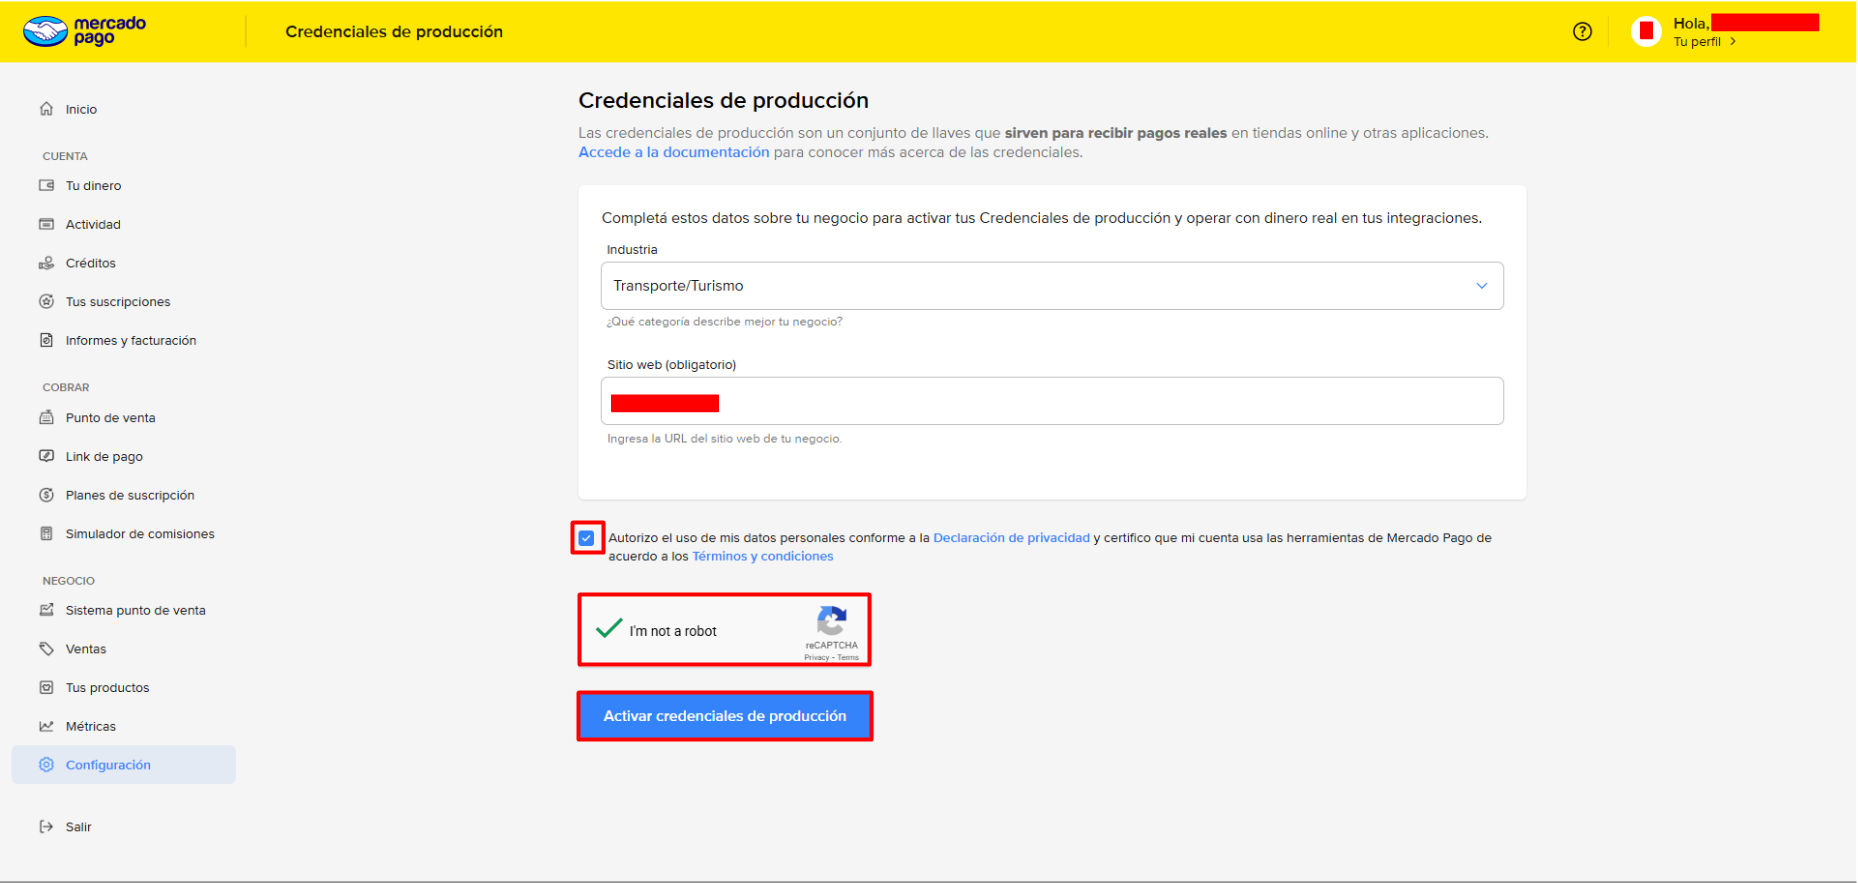
Under industry, choose "Transportation/Tourism," add your company's website, accept the terms and conditions, and click the "Activate production credentials" button.
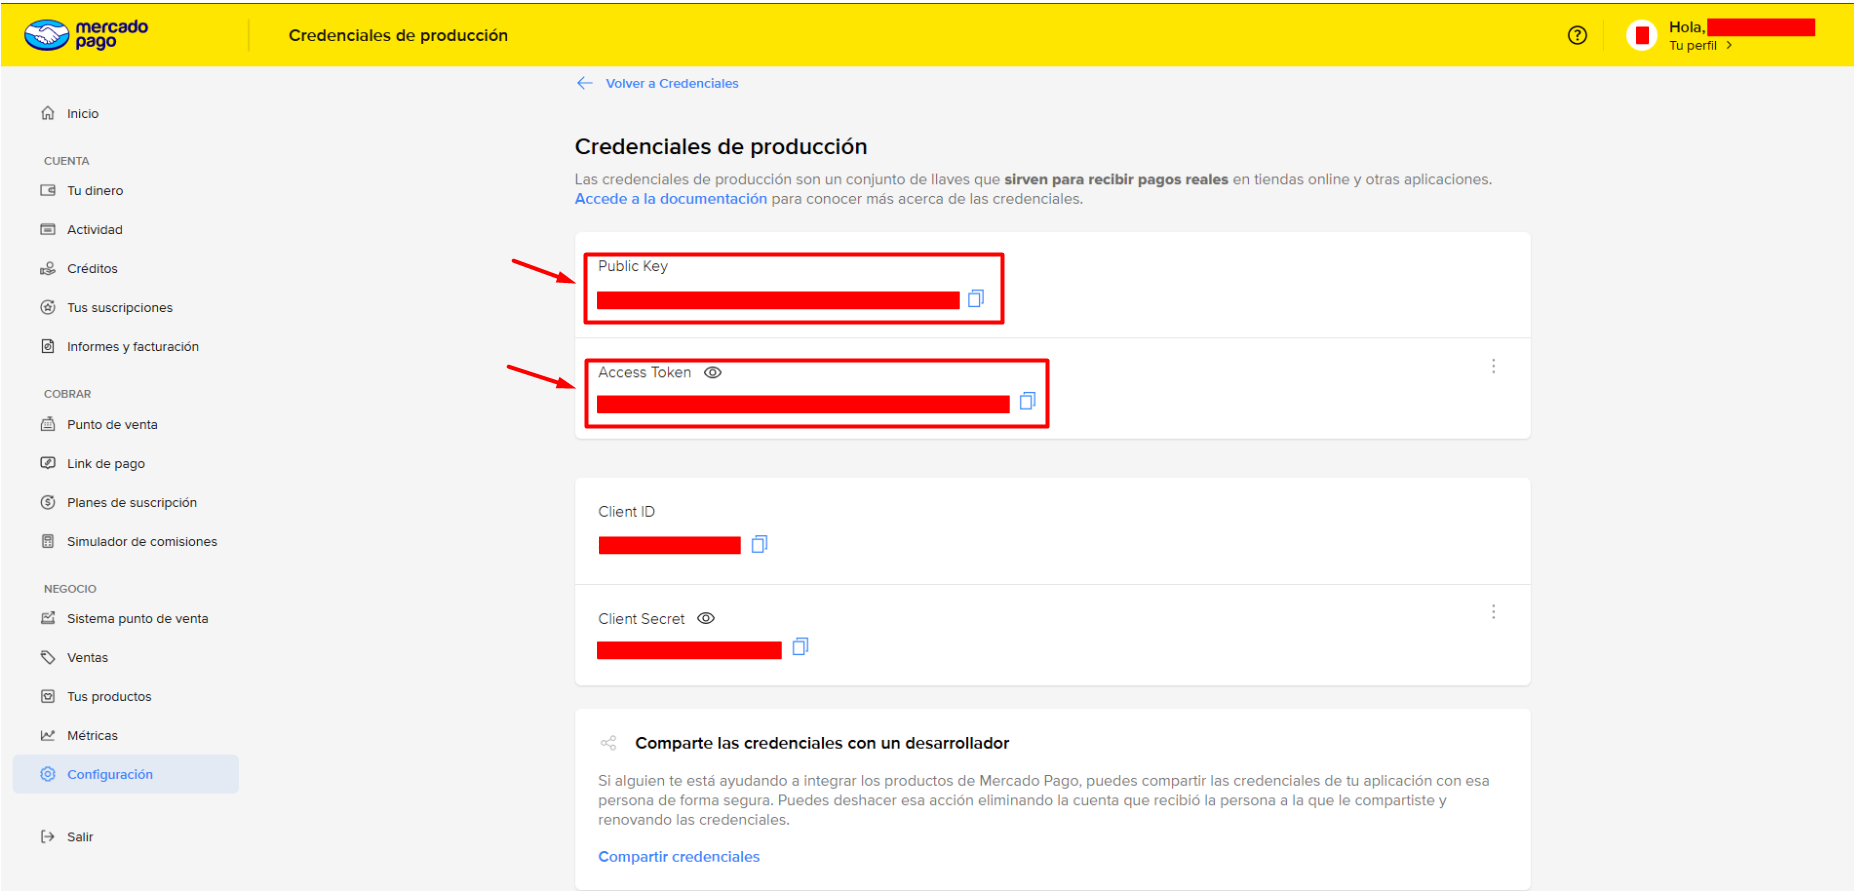
Copy the public key and access token.
In Maintenance > Settings > System > Payment gateways in the web panel, paste both values where they belong.
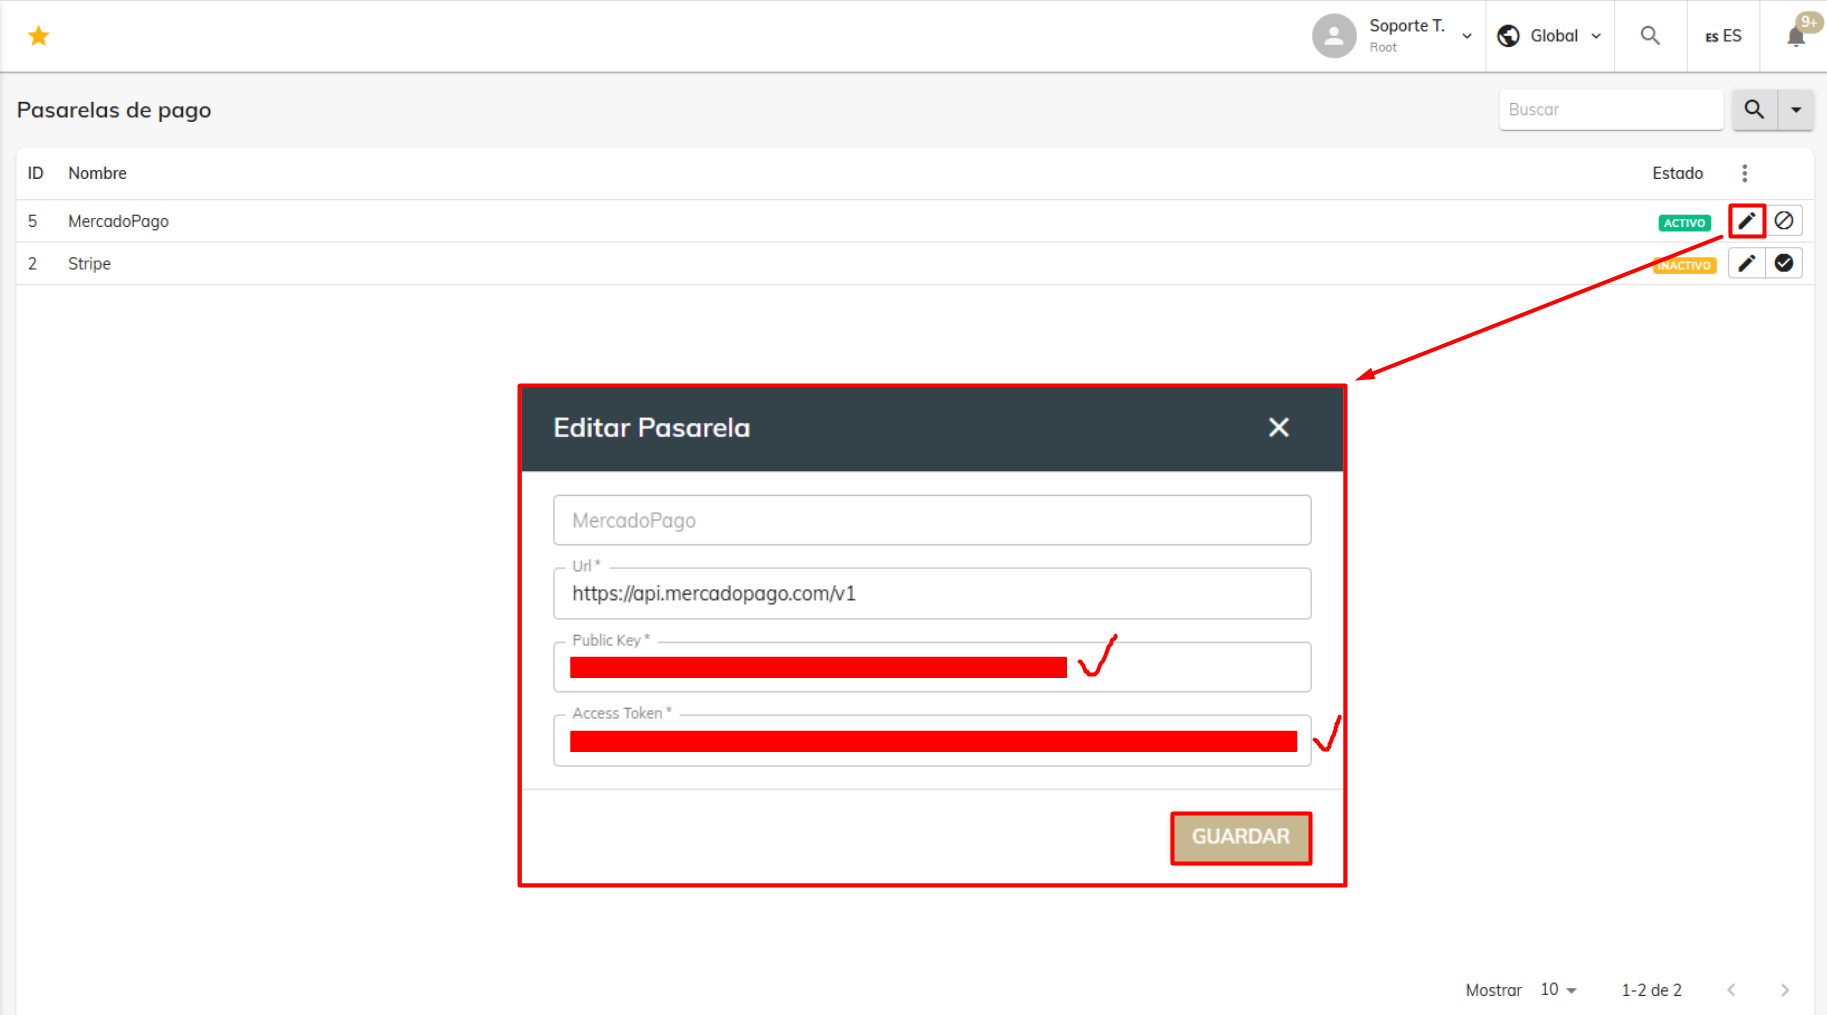
To access this section of the web panel, you must have it enabled in Maintenance > Settings > System > User profile.
You'll also need to go to Maintenance > Settings > System > Payment methods in the web panel to enable the Mercado Pago card payment method.
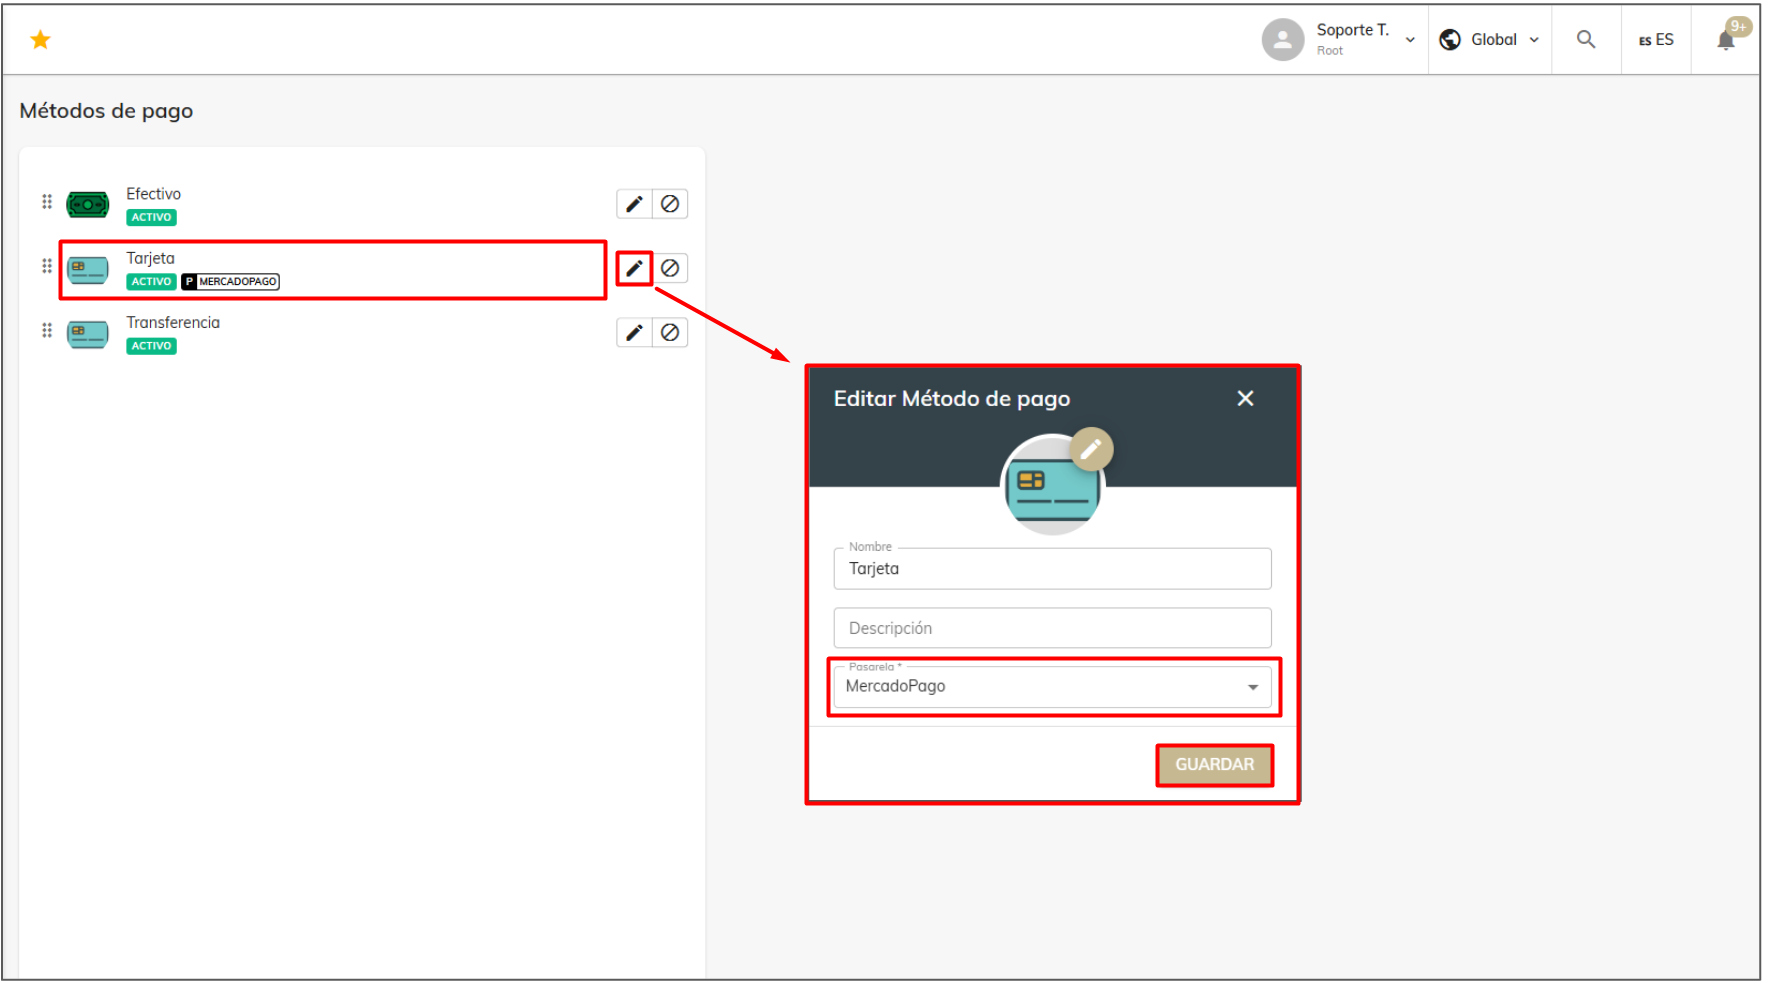
Now you can run test trips using the card payment method to confirm the process works correctly.
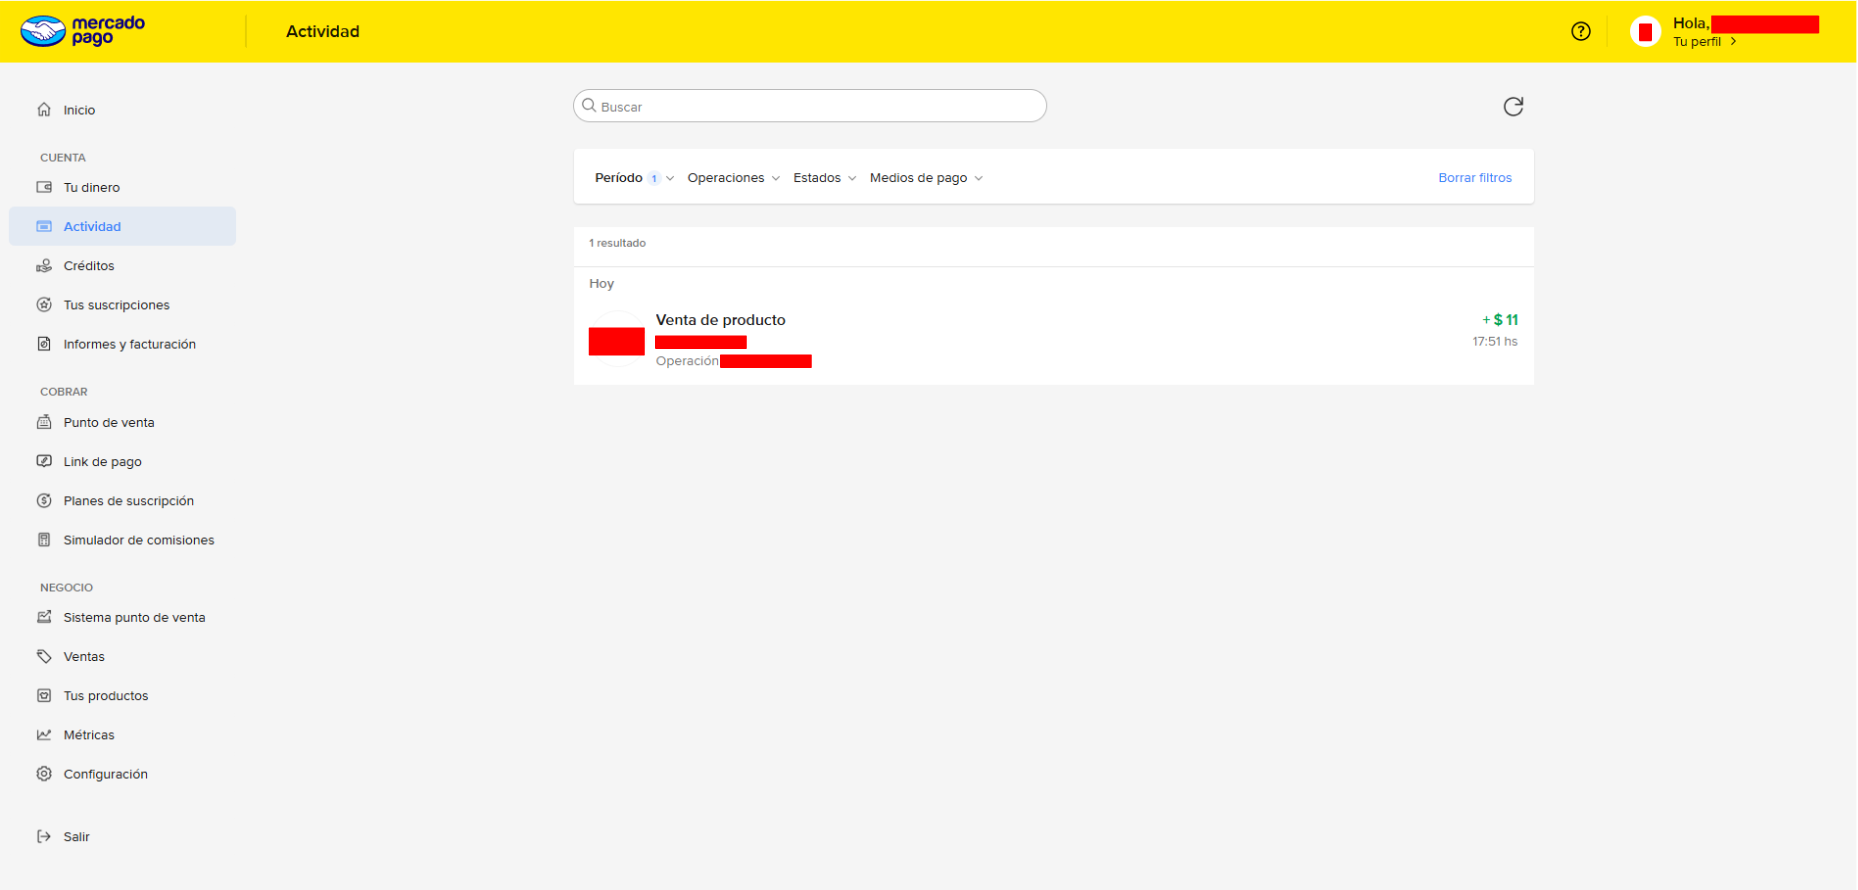
If you go to your Mercado Pago account, you should see the details of the card transactions:
Was this article helpful?
Payment Gateways
- Integrate Stripe into the web panel for card payments
- Opening and Verifying a WebPay Account
- Integrated Payment Gateways for Credit / Debit Cards
- Integrating Culqi in the Web Panel for Card Payments
- Integrating Mercado Pago in the web panel for card payments